Small Changes = HUGE Transformation
This post is sponsored by the Home Depot Prosepective where I am partnering with The Home Depot for the year using an assortment of Husky Tools and organization to build out the Husky Dream Shop. This post includes affiliate links for the products I use. The project design, methods, and opinions are my own. Thanks for reading!
Extendable Square - https://homedepot.sjv.io/knLnv 1
2 in 1 Screwdriver - https://homedepot.sjv.io/xxAx3
Husky Workbench - https://homedepot.sjv.io/E5jkQ
Husky Tool Cabinet - https://homedepot.sjv.io/6BK0b
After the initial excitement of moving into our Dream Home, the reality of what lies ahead has hit Katie and I square in the face. This. House. Needs. WORK! While we love the spacious layout, and the unique and vintage vibe of the house it has been a money pit so far. From the $10k duct work required to seal the eroded duct joints, to the beautiful SubZero refrigerator immediately breaking and requiring a $1700 service call this new house has kicked our butts! Some of this was to be expected moving into a house that is 38 years old, but some of the hidden costs have been painful. All of this is to saw I was excited to jump into my first renovation project in the new house, but fully expected it to be a nightmare. Was I right or was I pleasantly surprised?
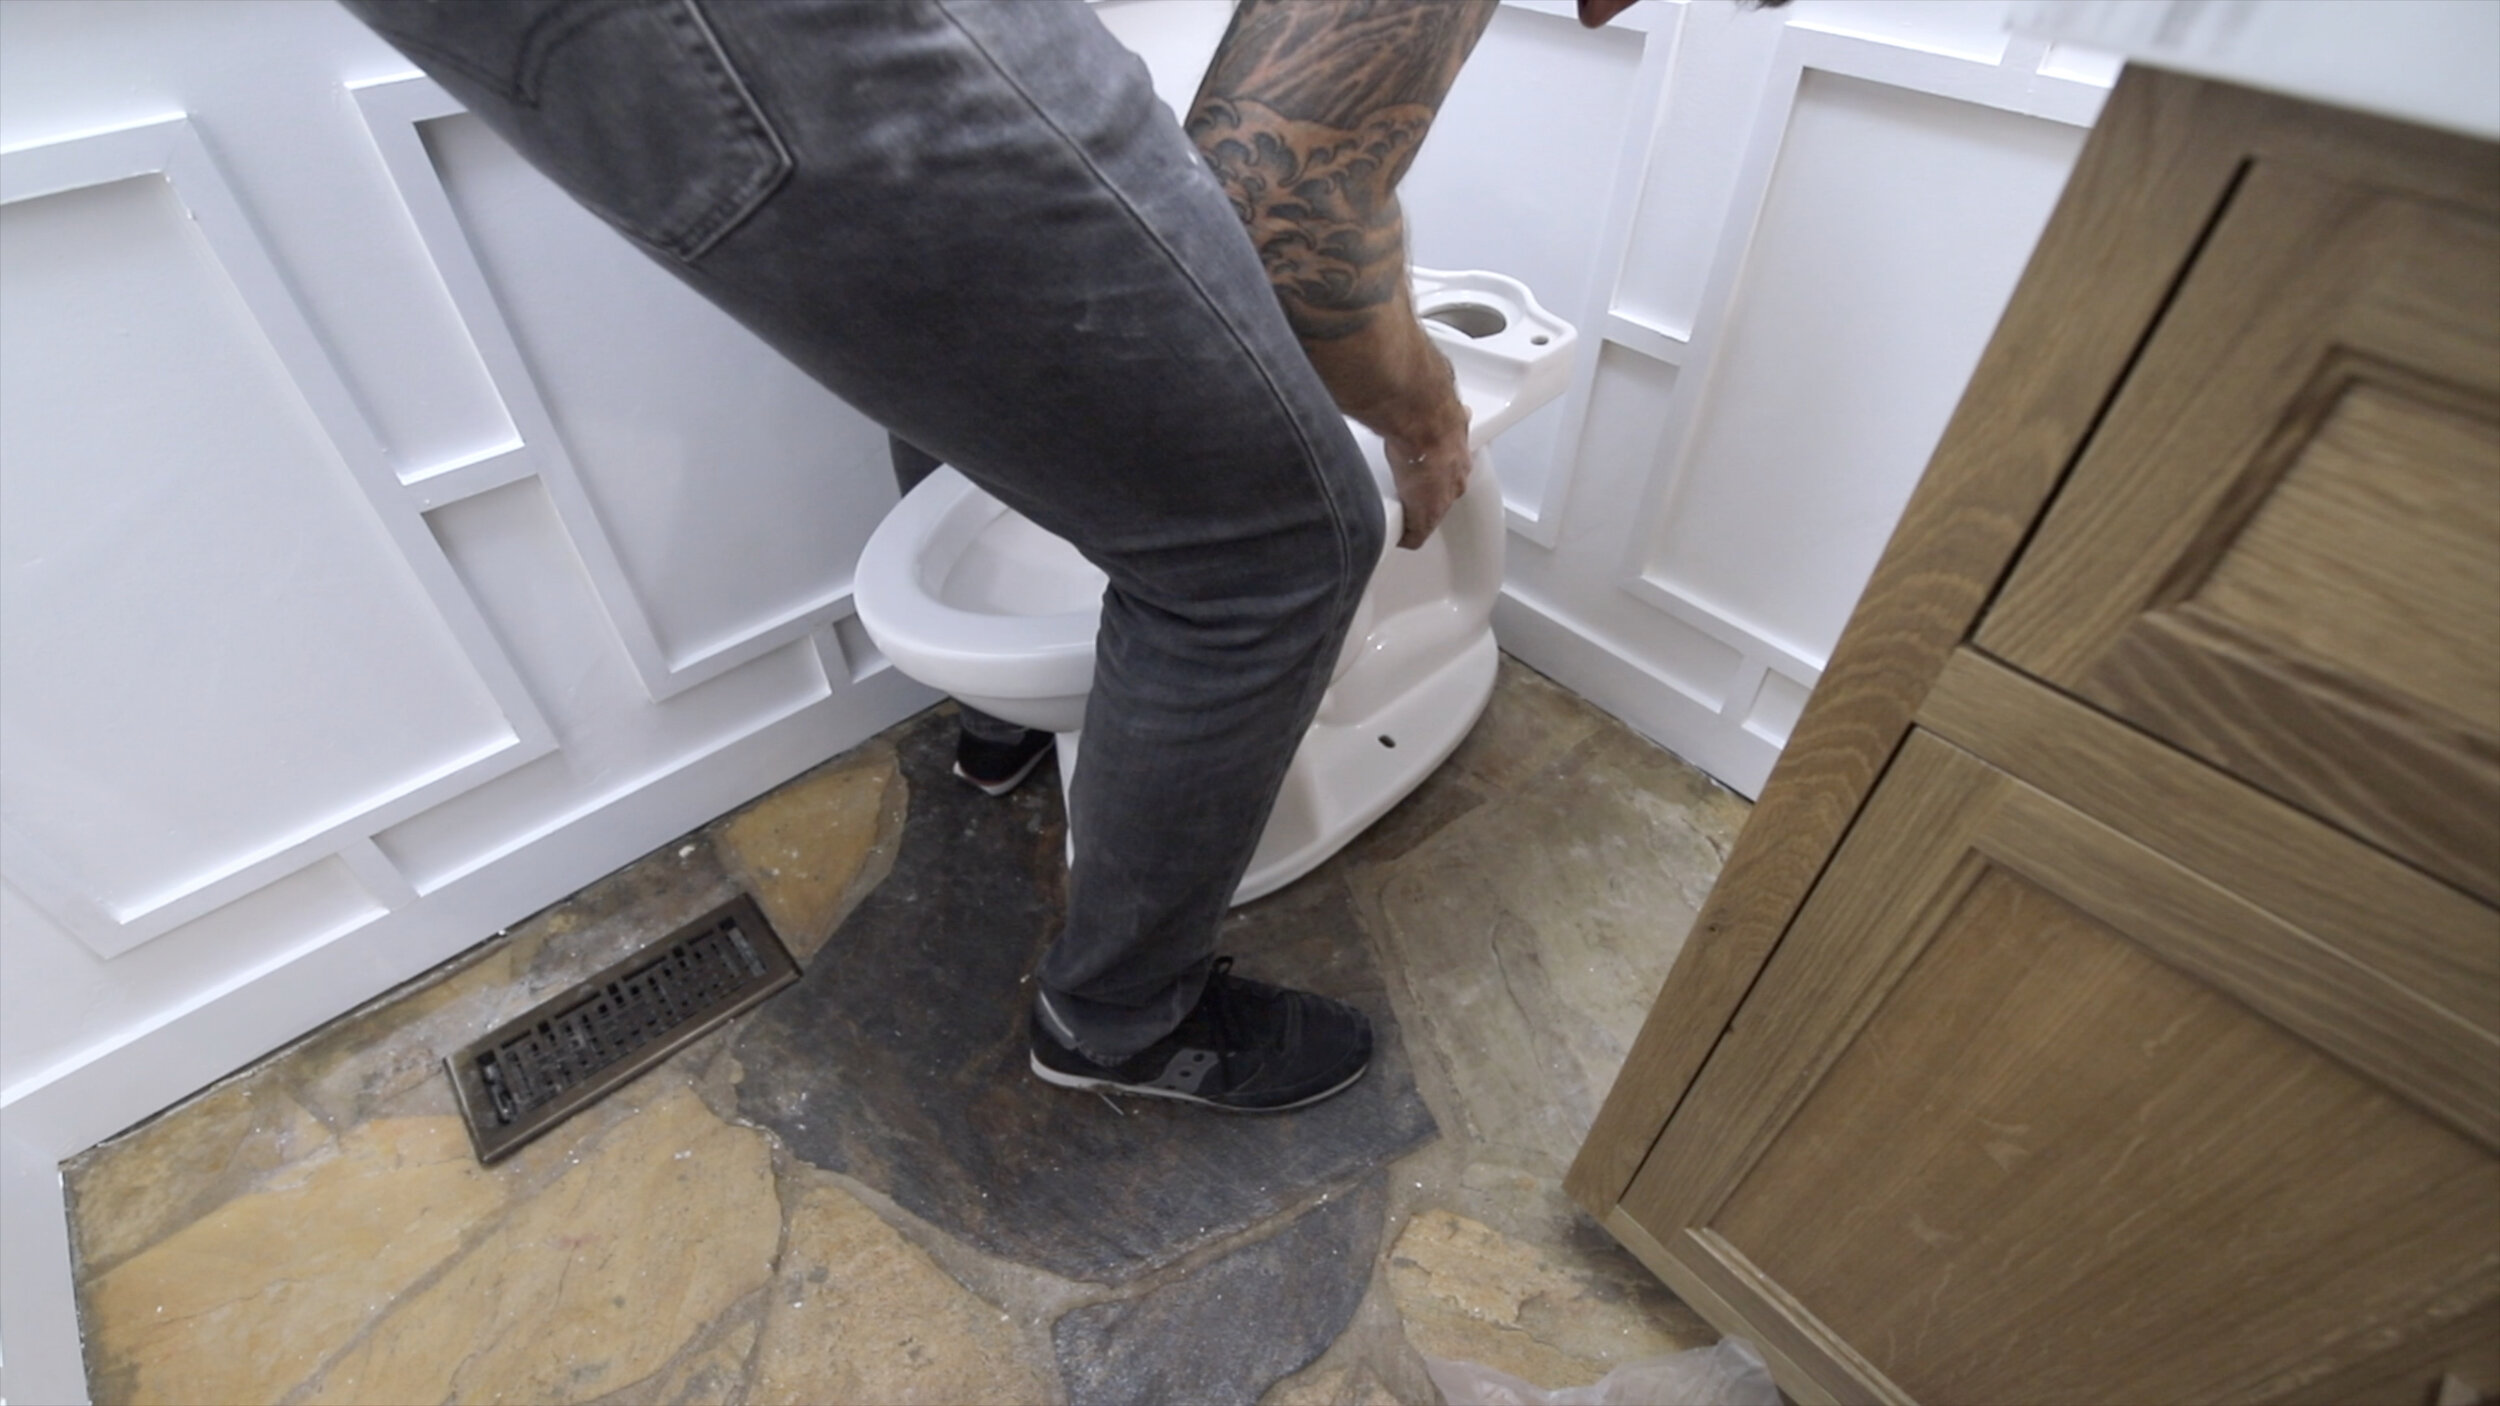
The first project to tackle was our guest half bathroom. This lies right outside the kitchen in the hallway that takes you back to the laundry room, and into the living room and loft area going the opposite direction. The stone floors (which I absolutely LOVE) extend from the kitchen into that hallway, and through into the guest bathroom. Beyond that this bathroom was a hideous monstrosity. A tiny black toilet sat packed into the corner next to patricle board vanity that was built in place when the home was built. The countertop and sink was black as well, and the whole drab theme was ultimately tied together by the chocolate brown walls with an exceptionally heavy troweled on textured. The light fixture looked like 4 wilted, dead tulips, and the mirror looked to be an afterthought in its cheap plastic frame. Step 1 was easy…gut the entire thing!
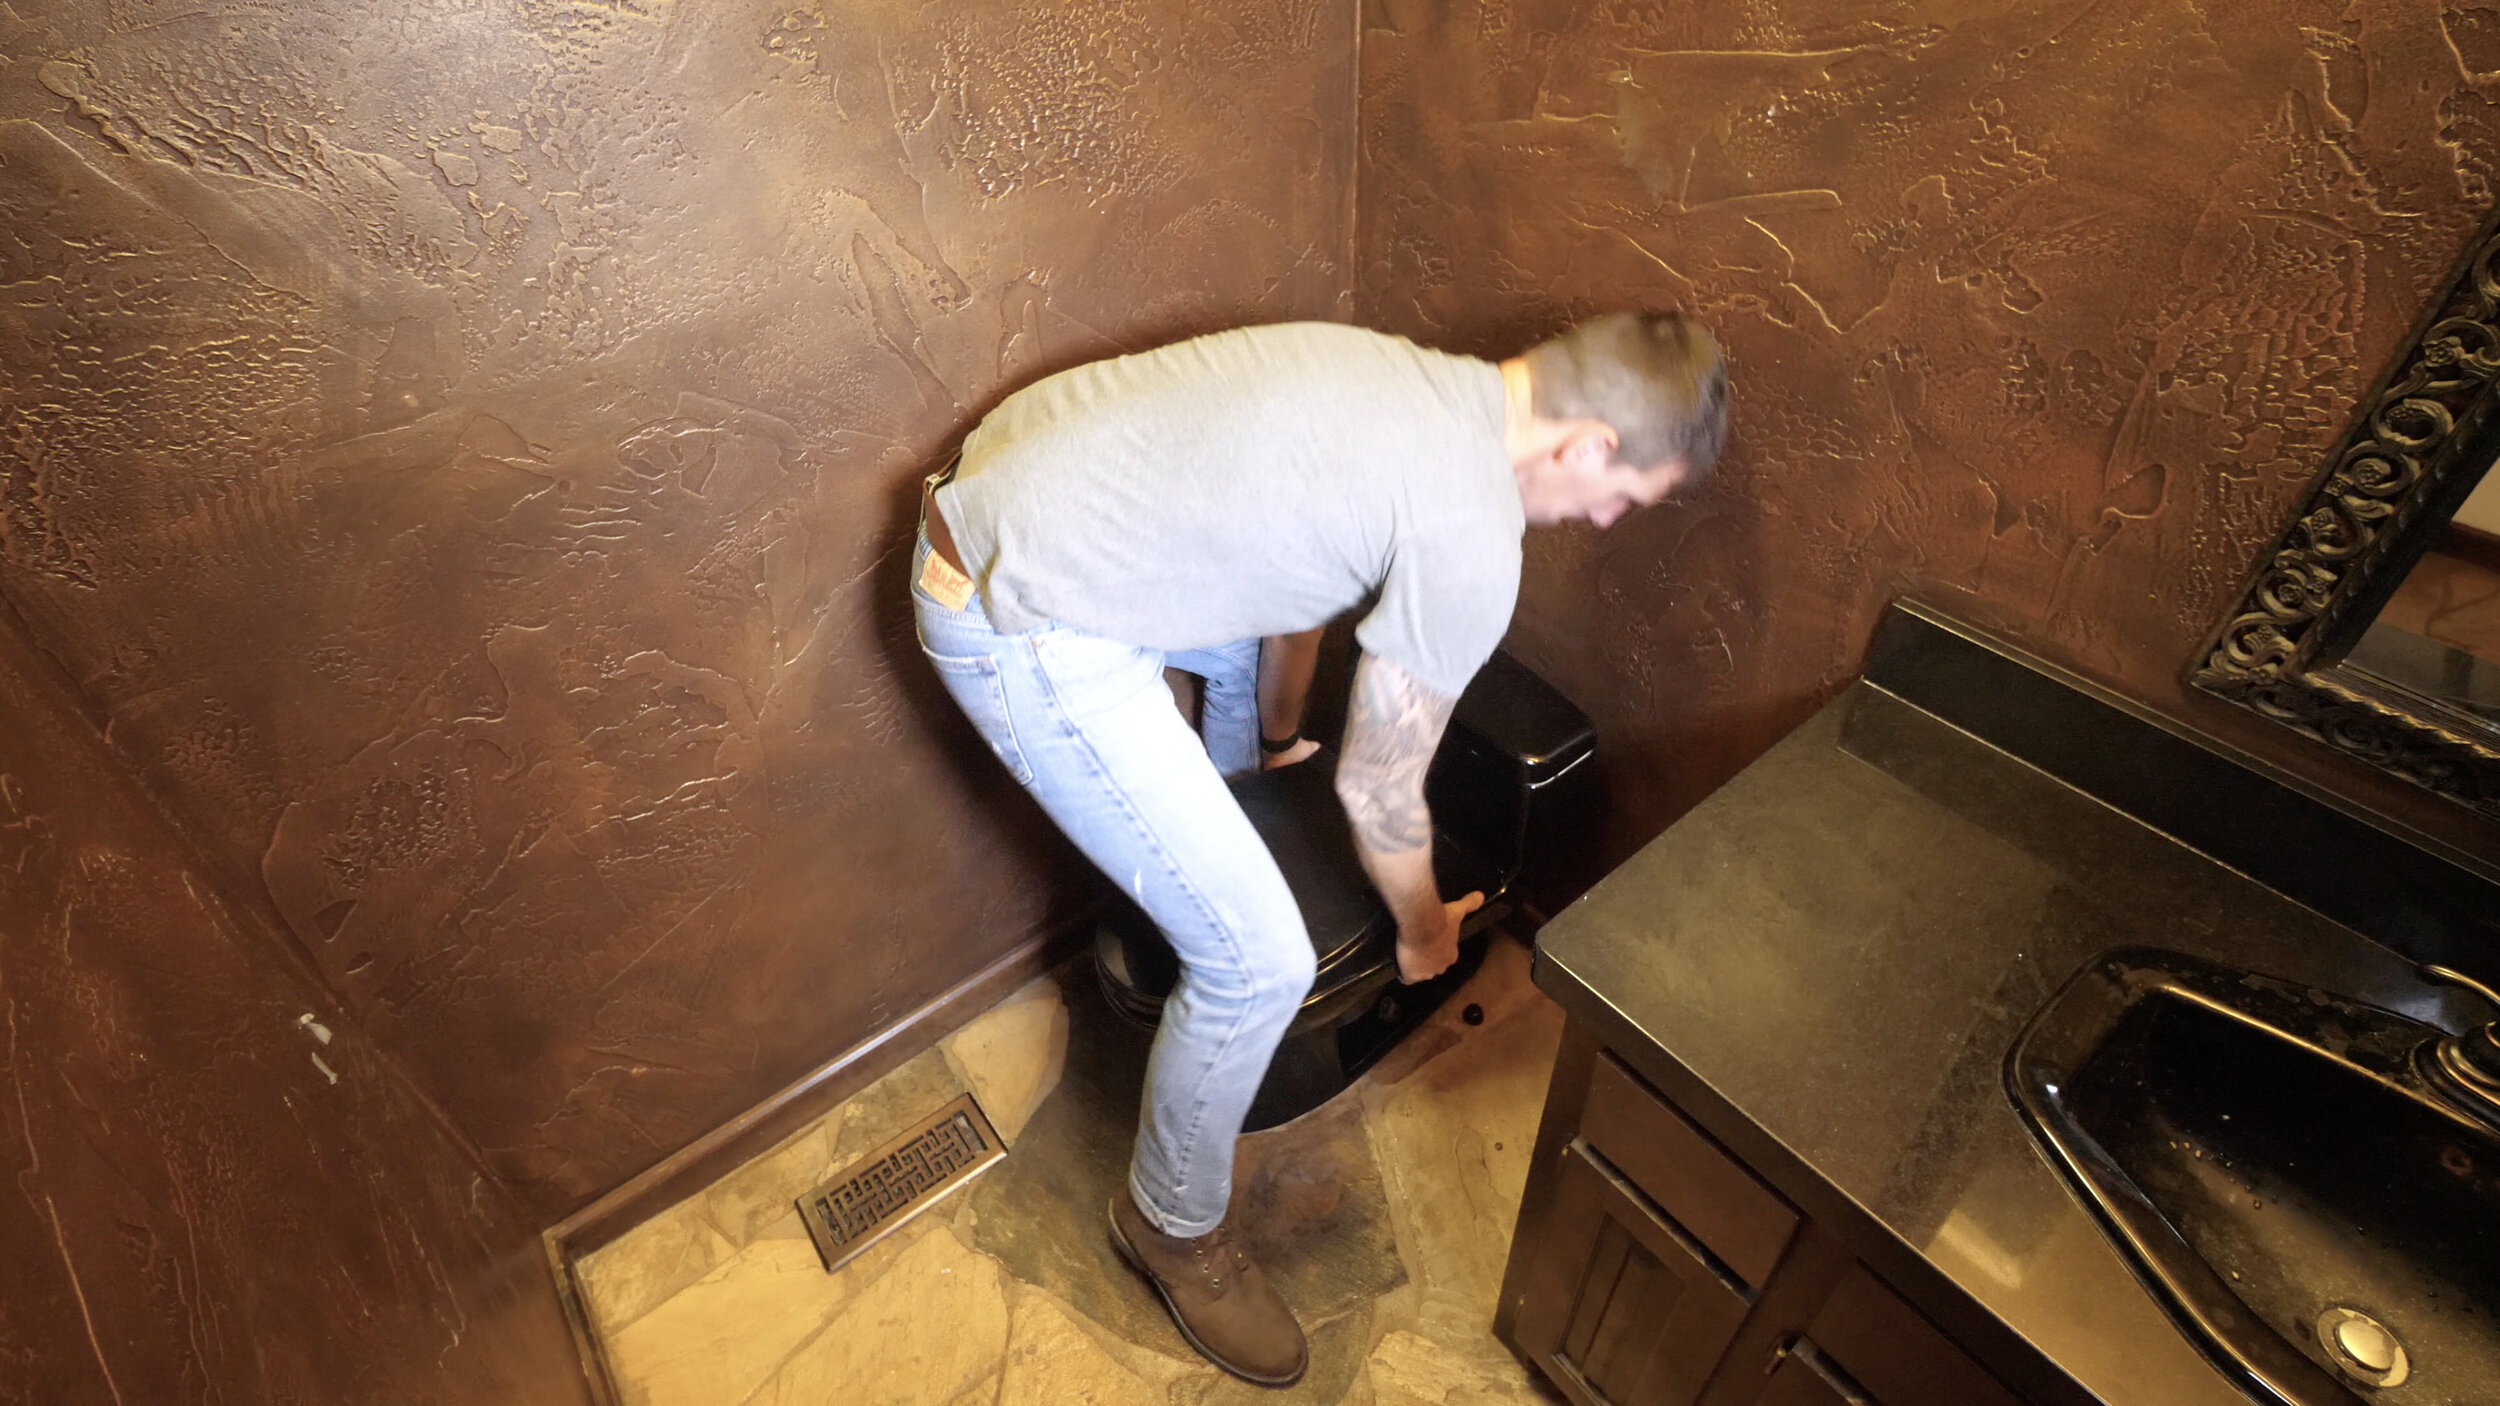
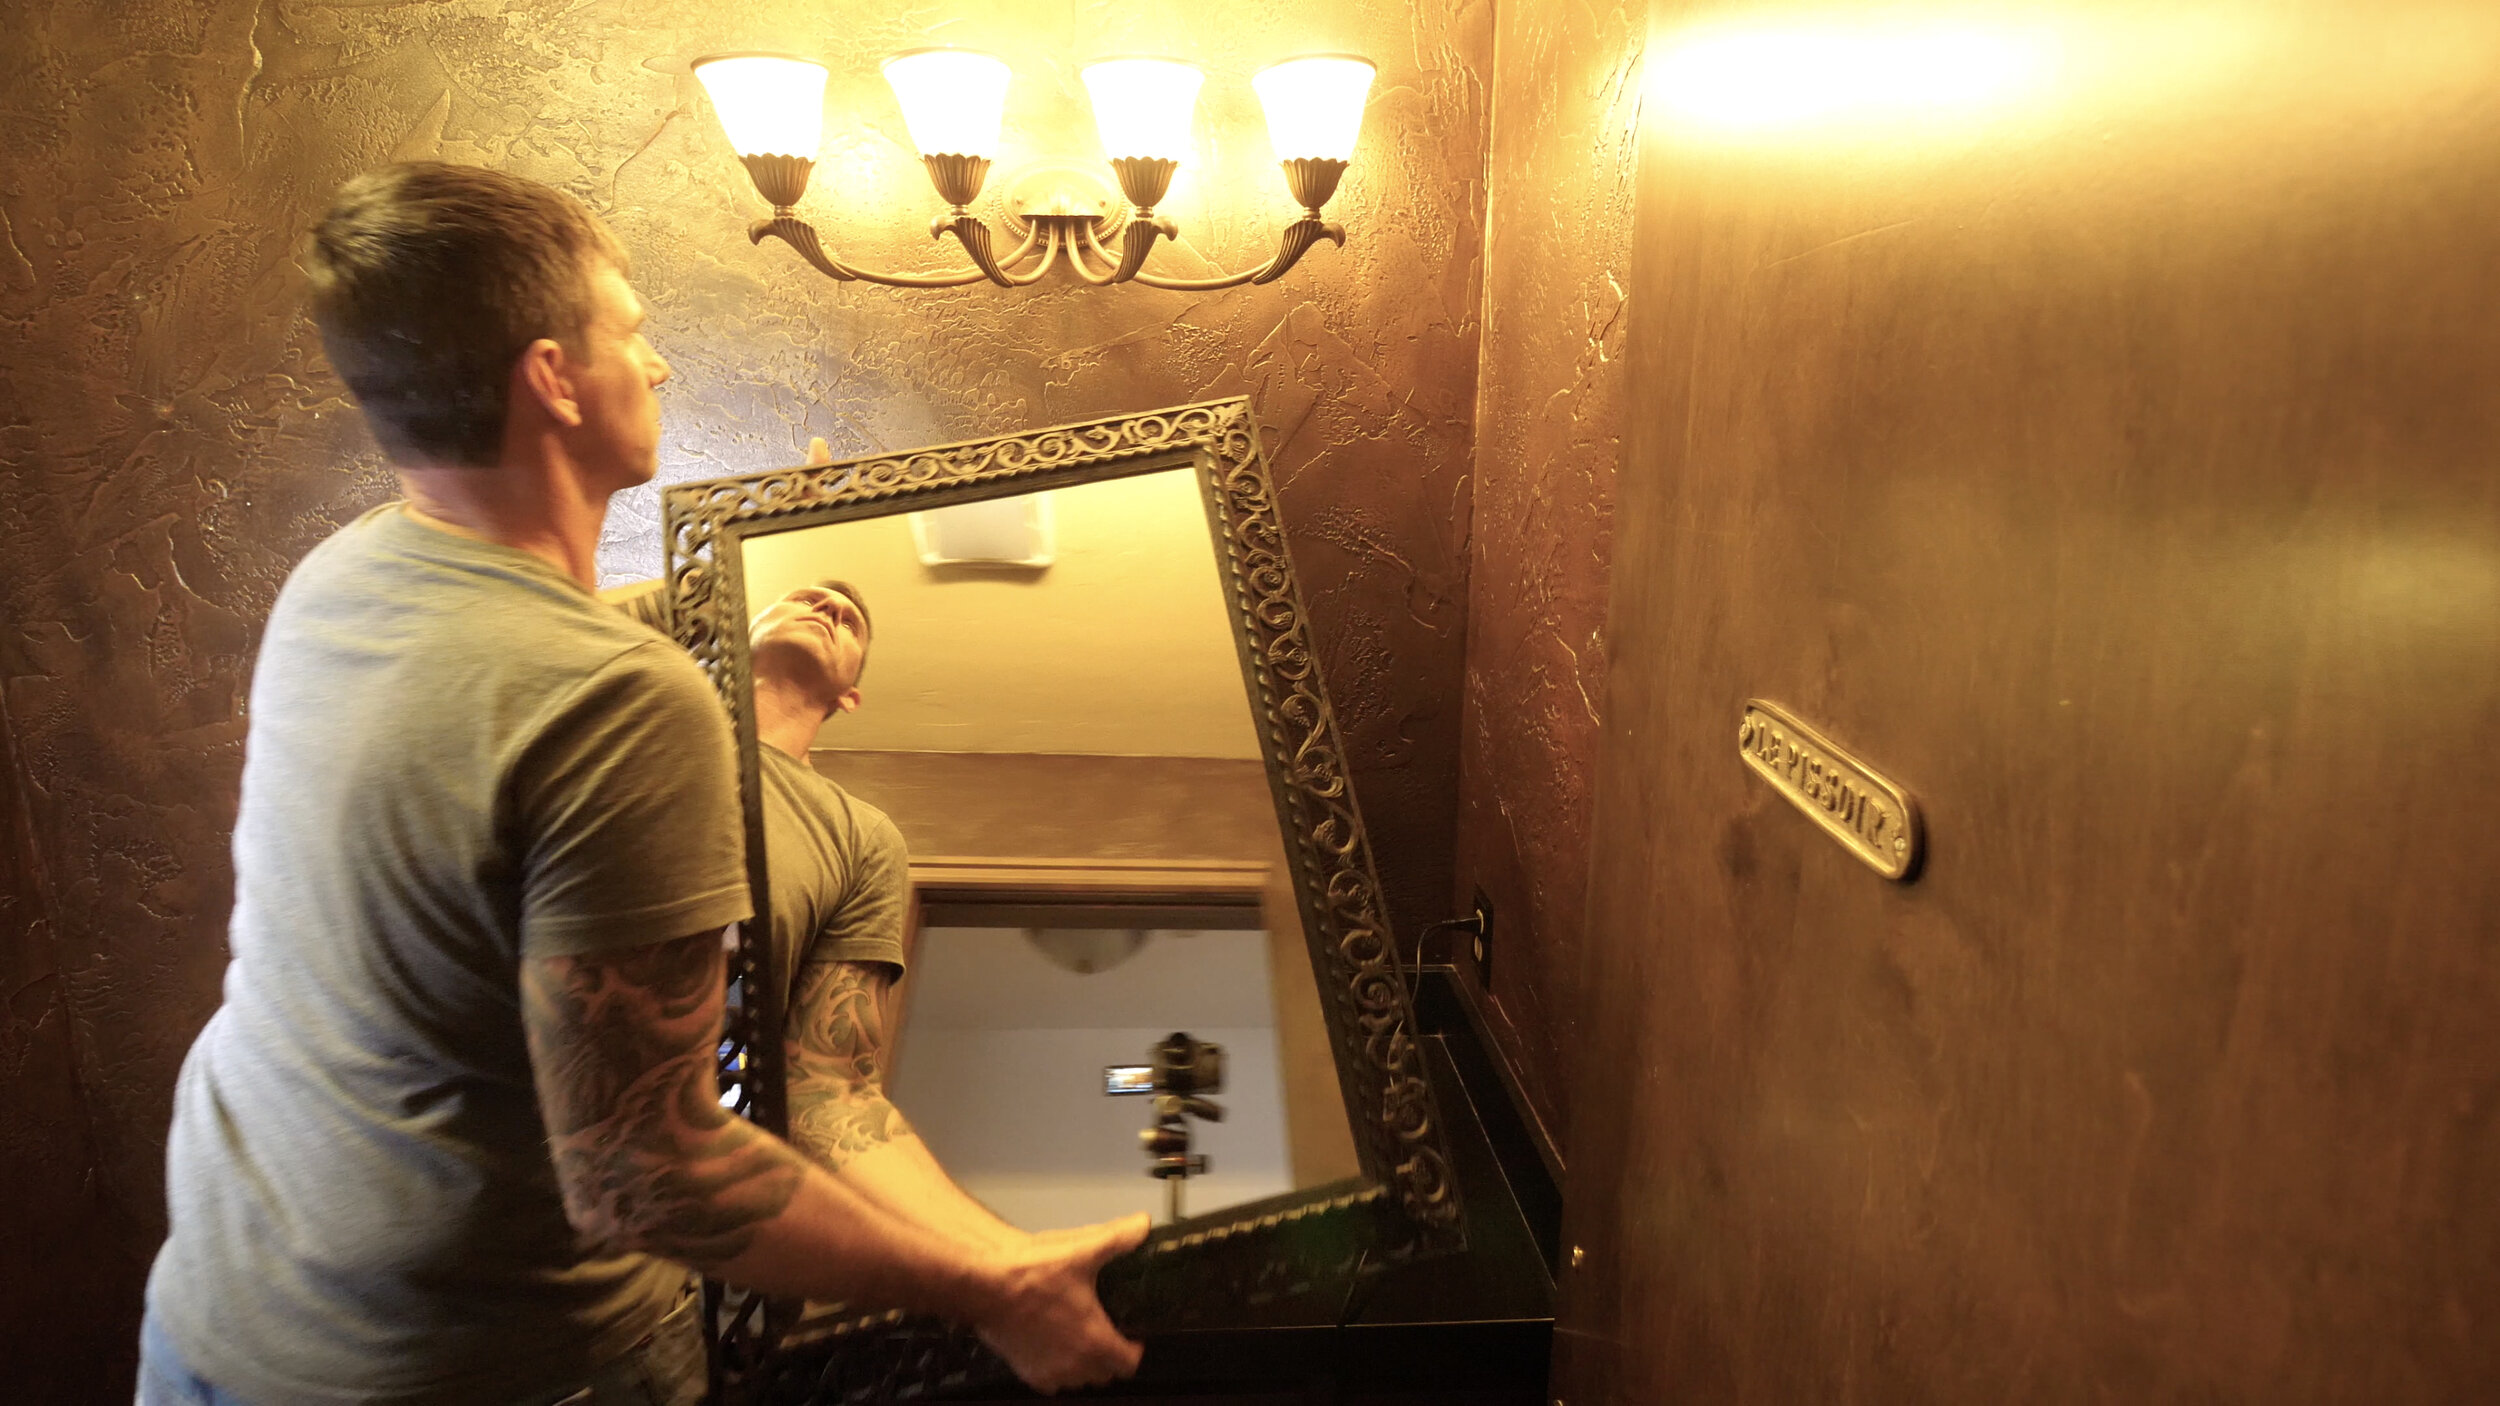
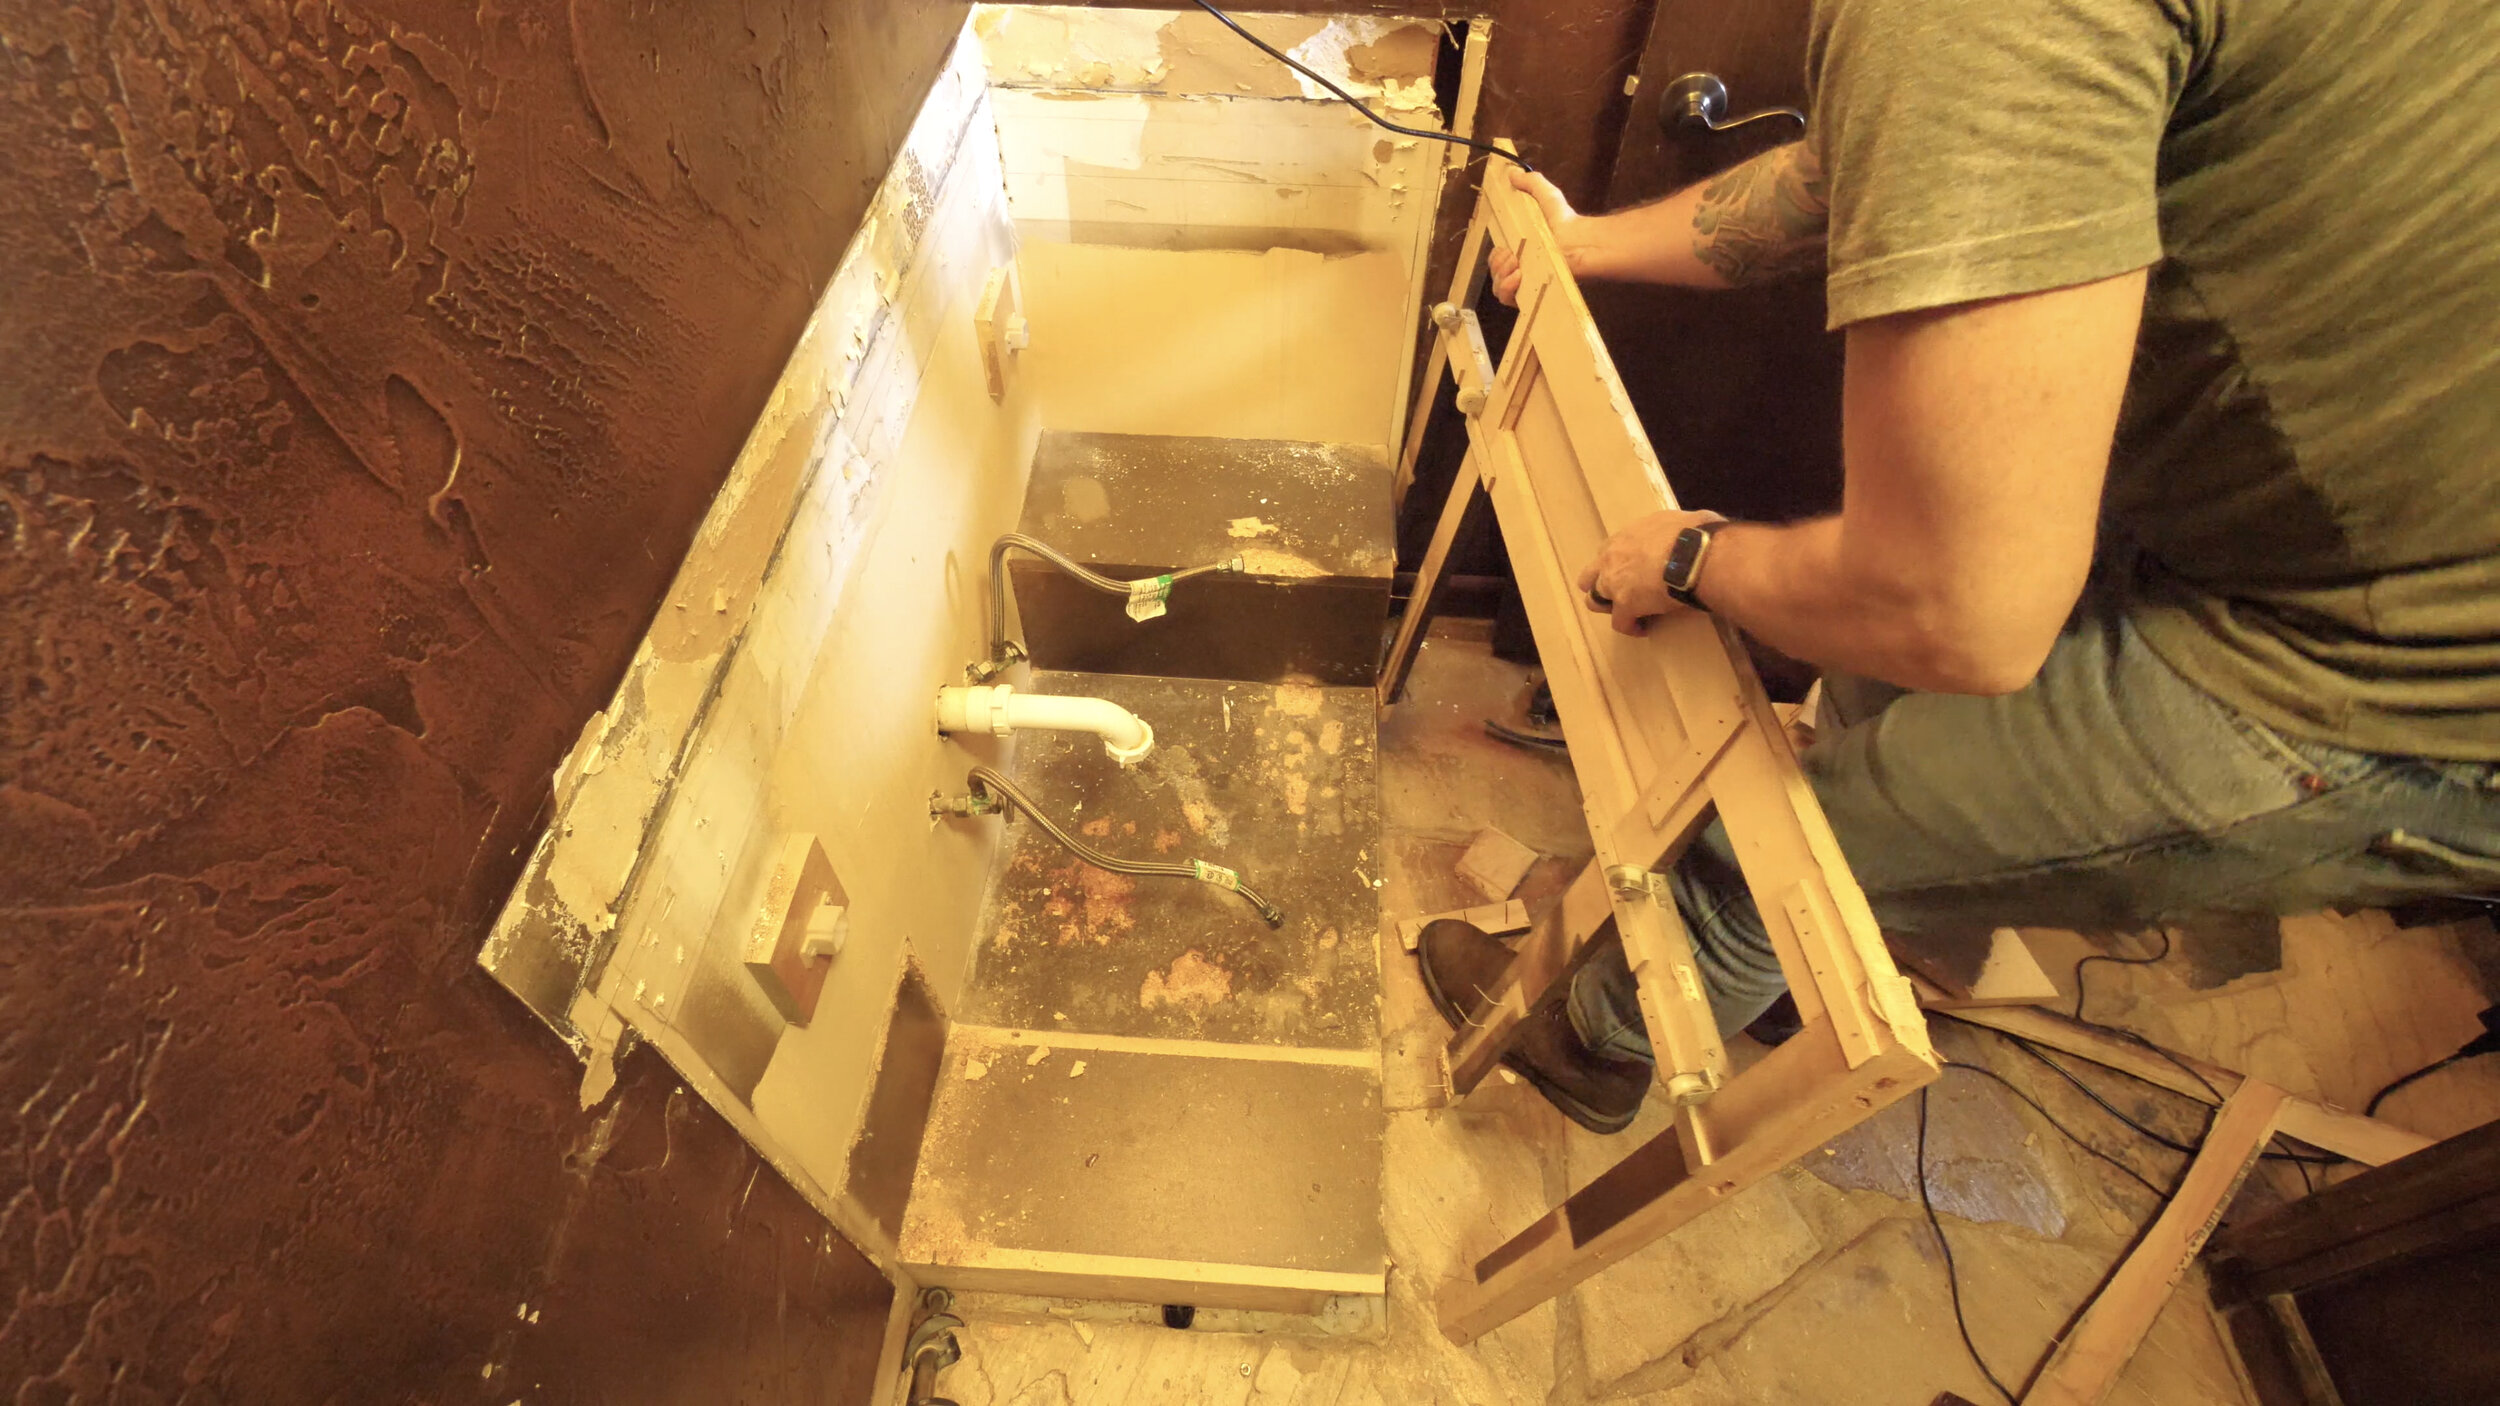
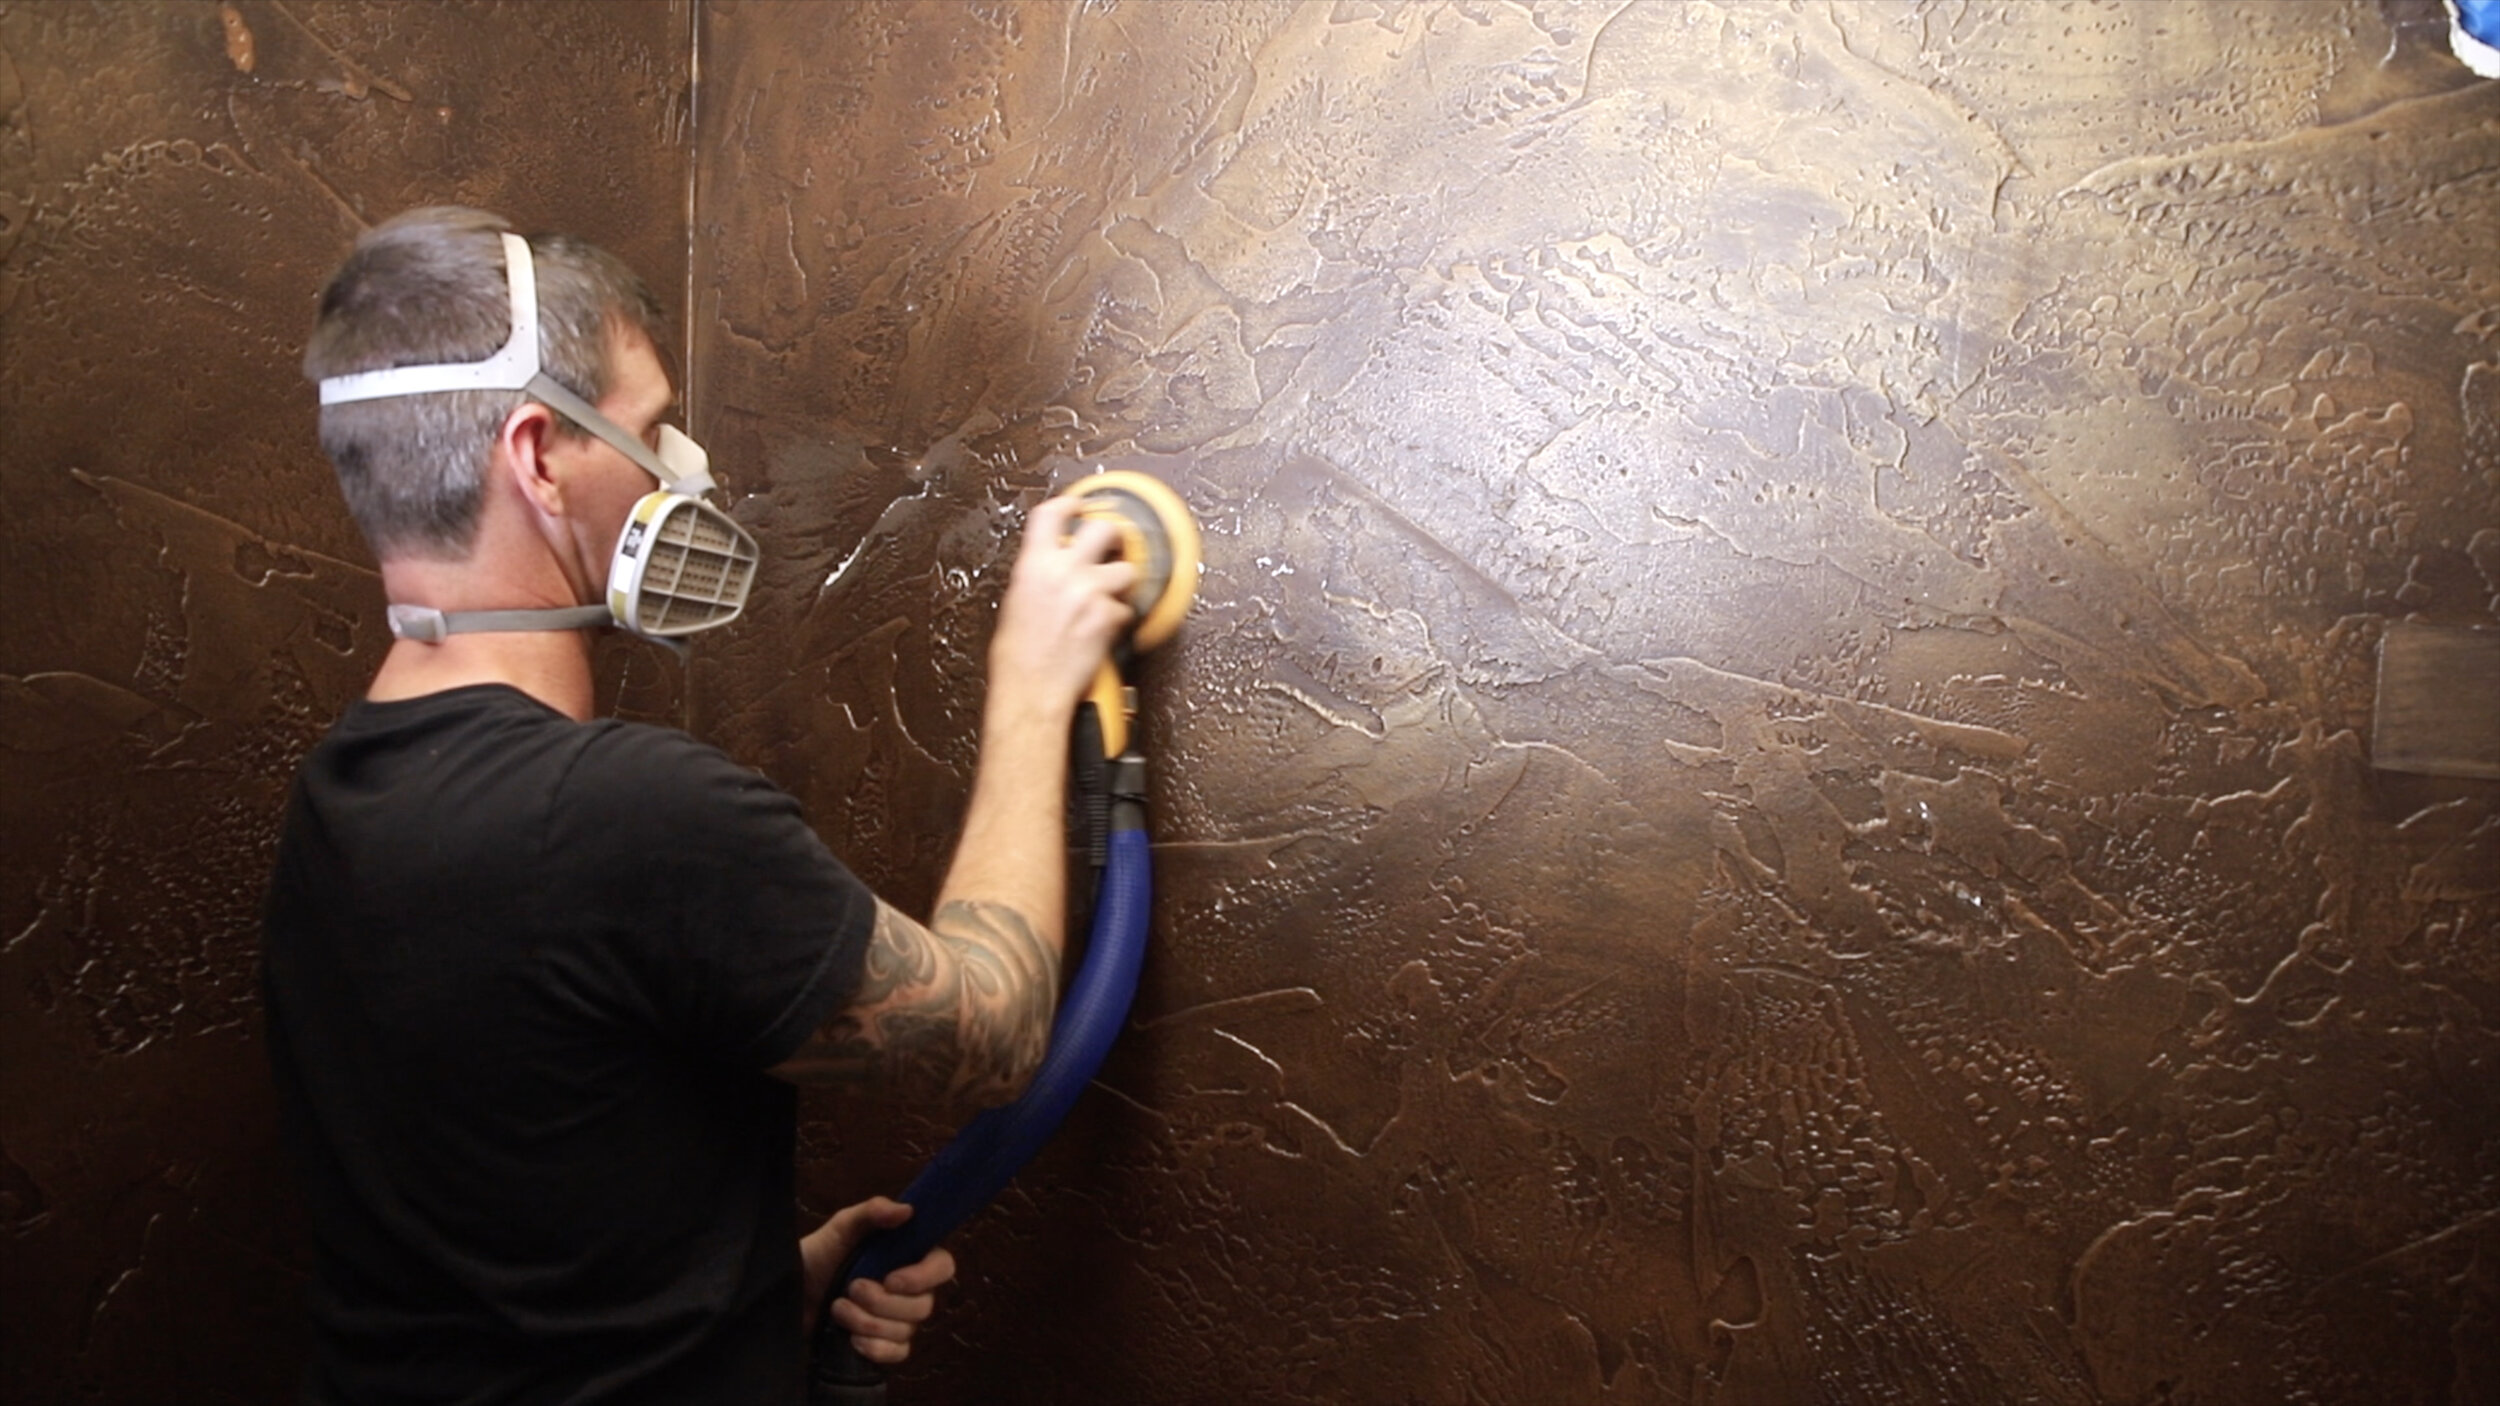
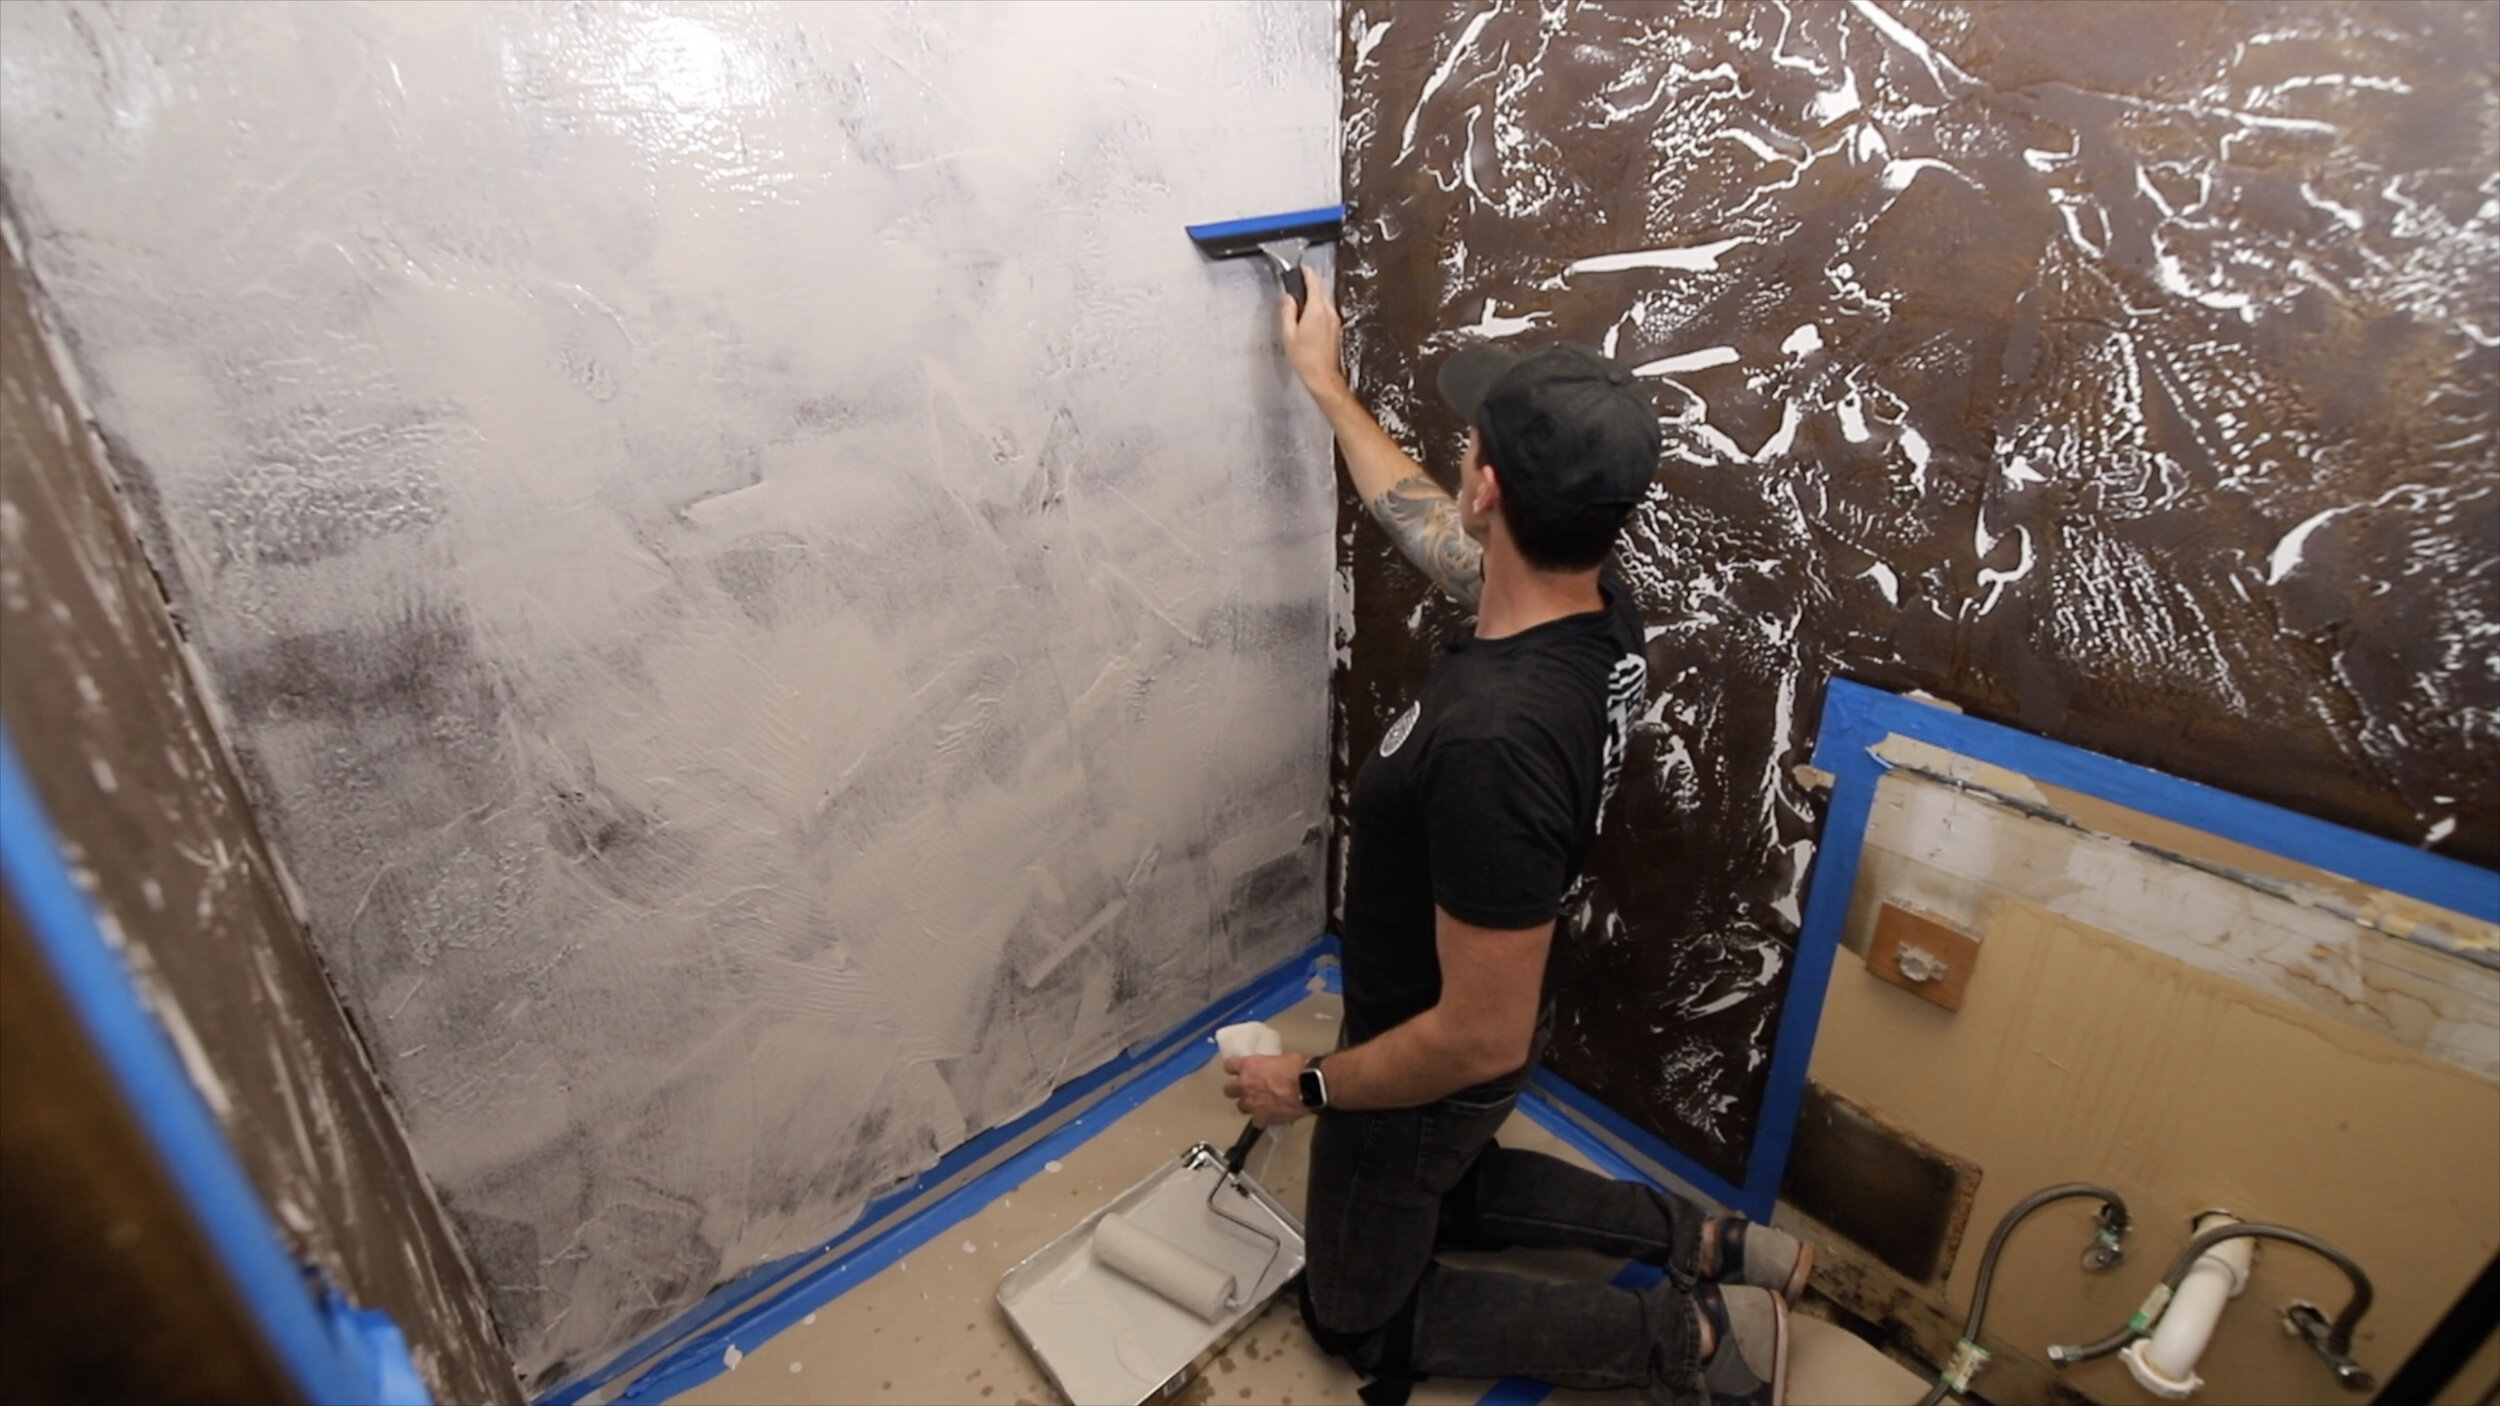
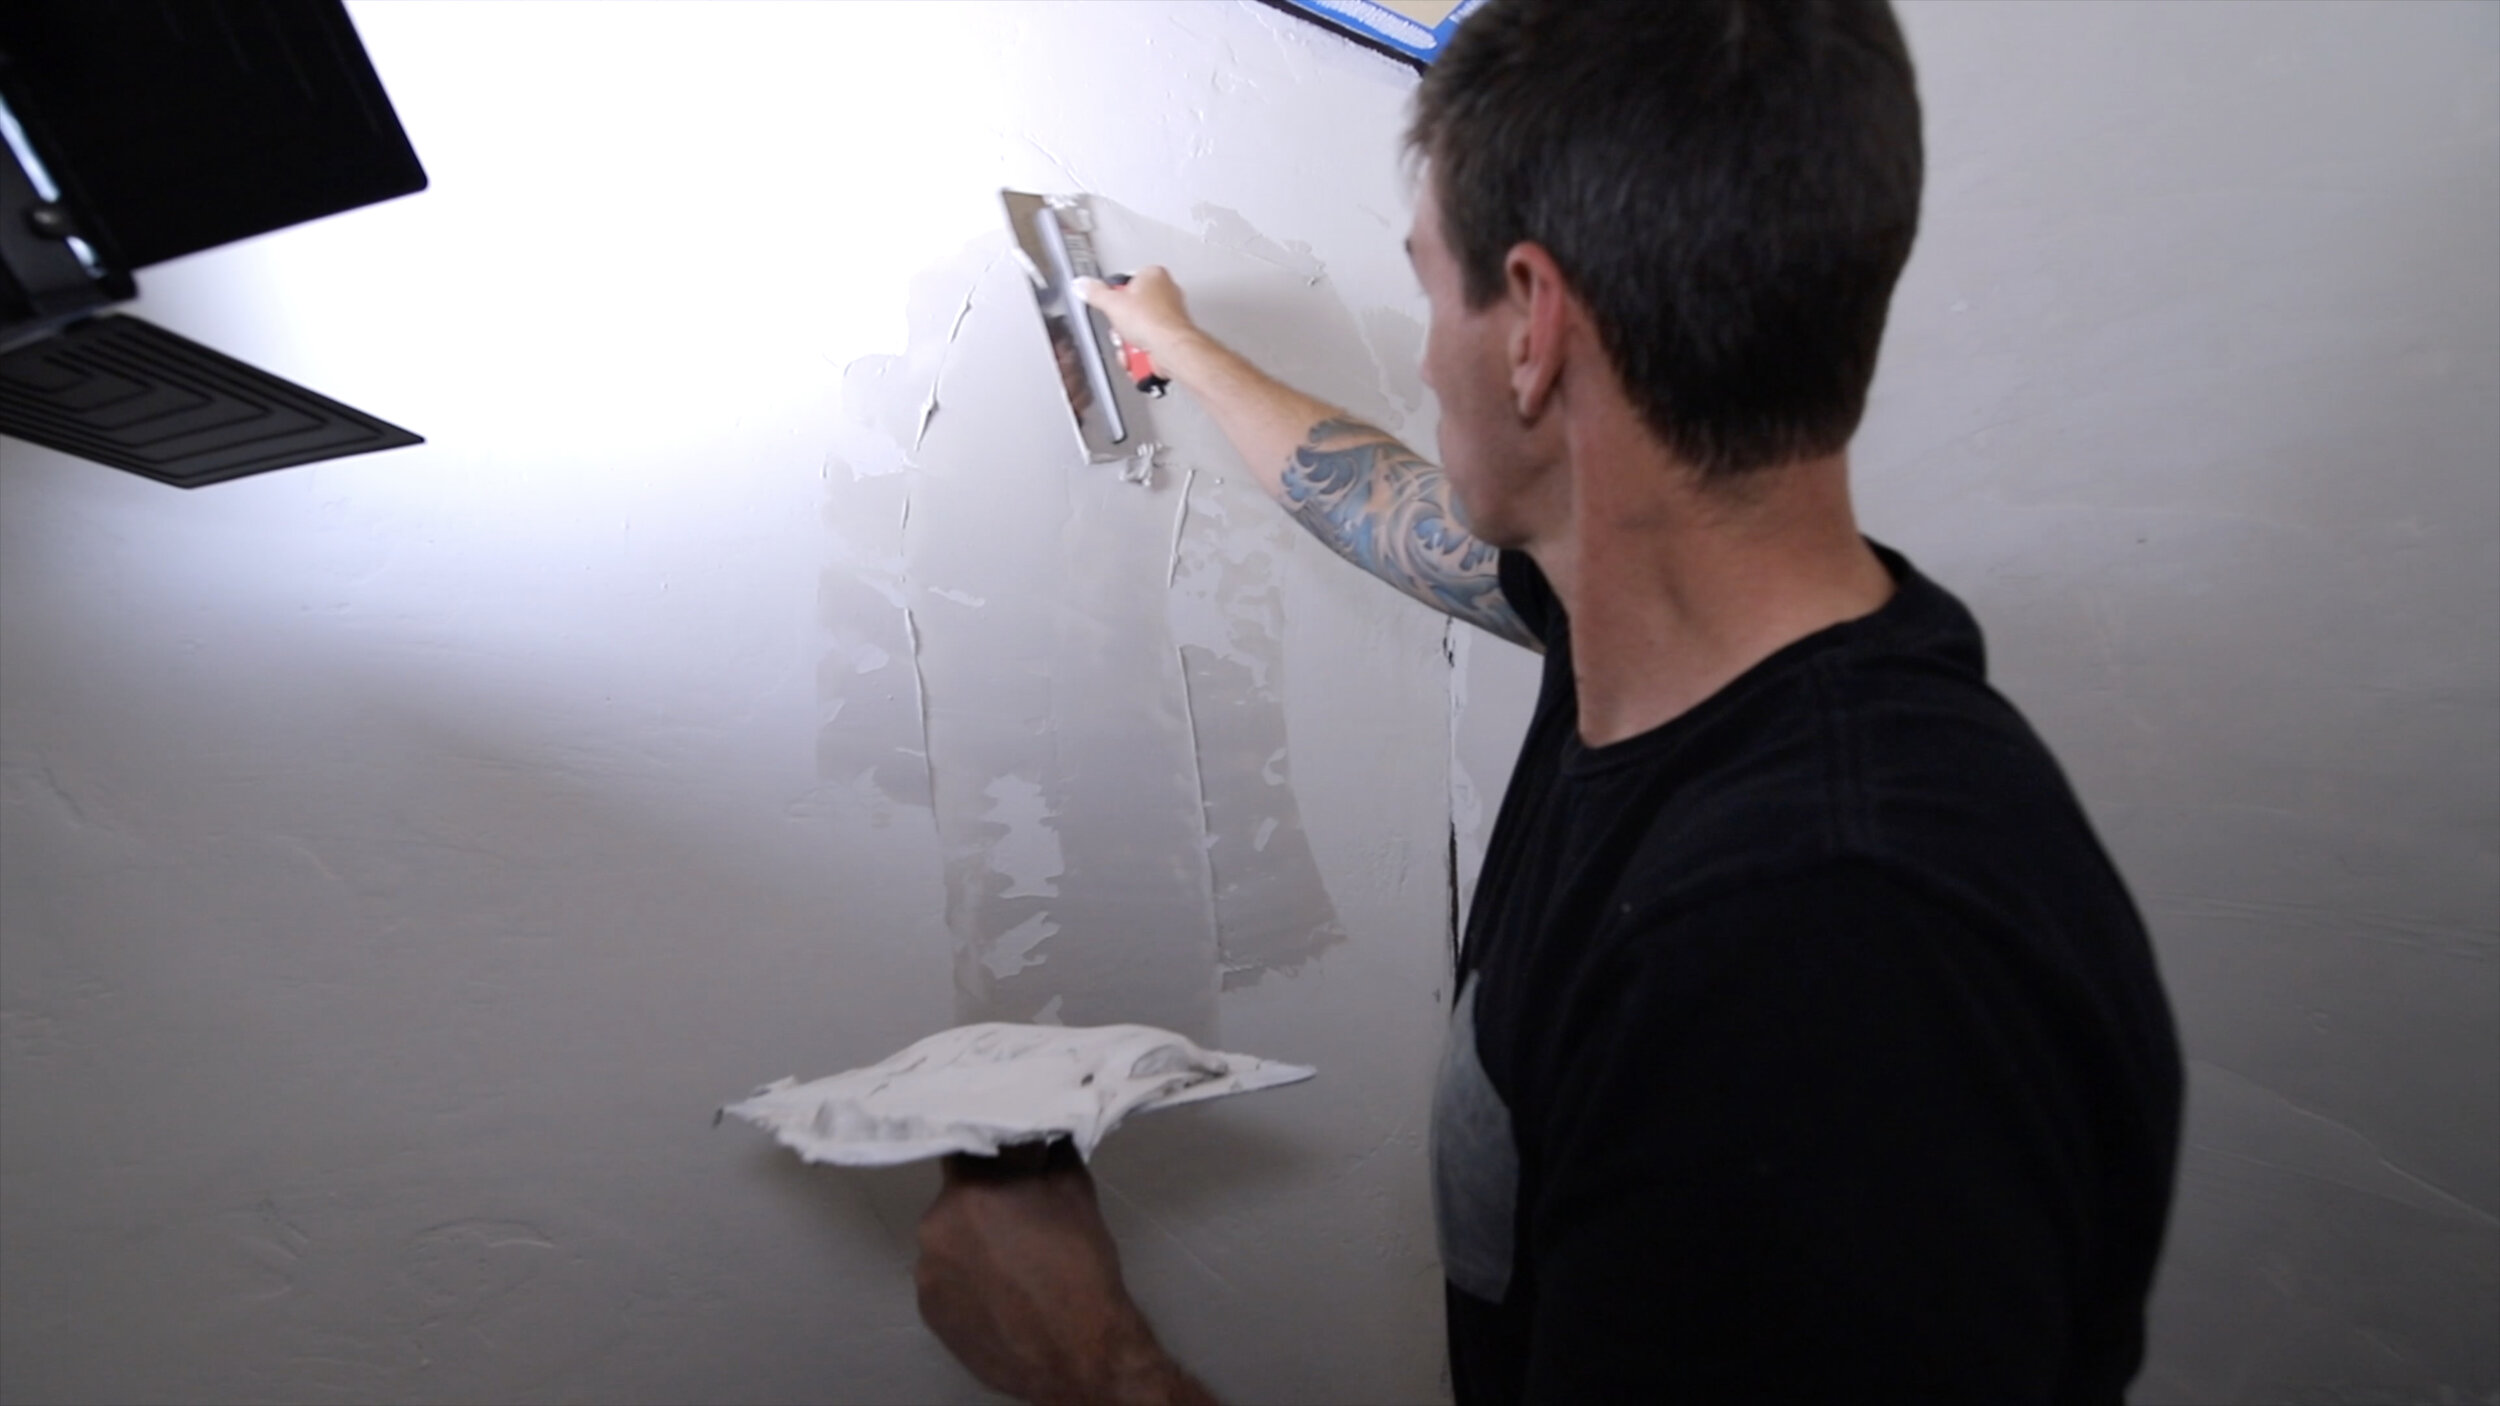
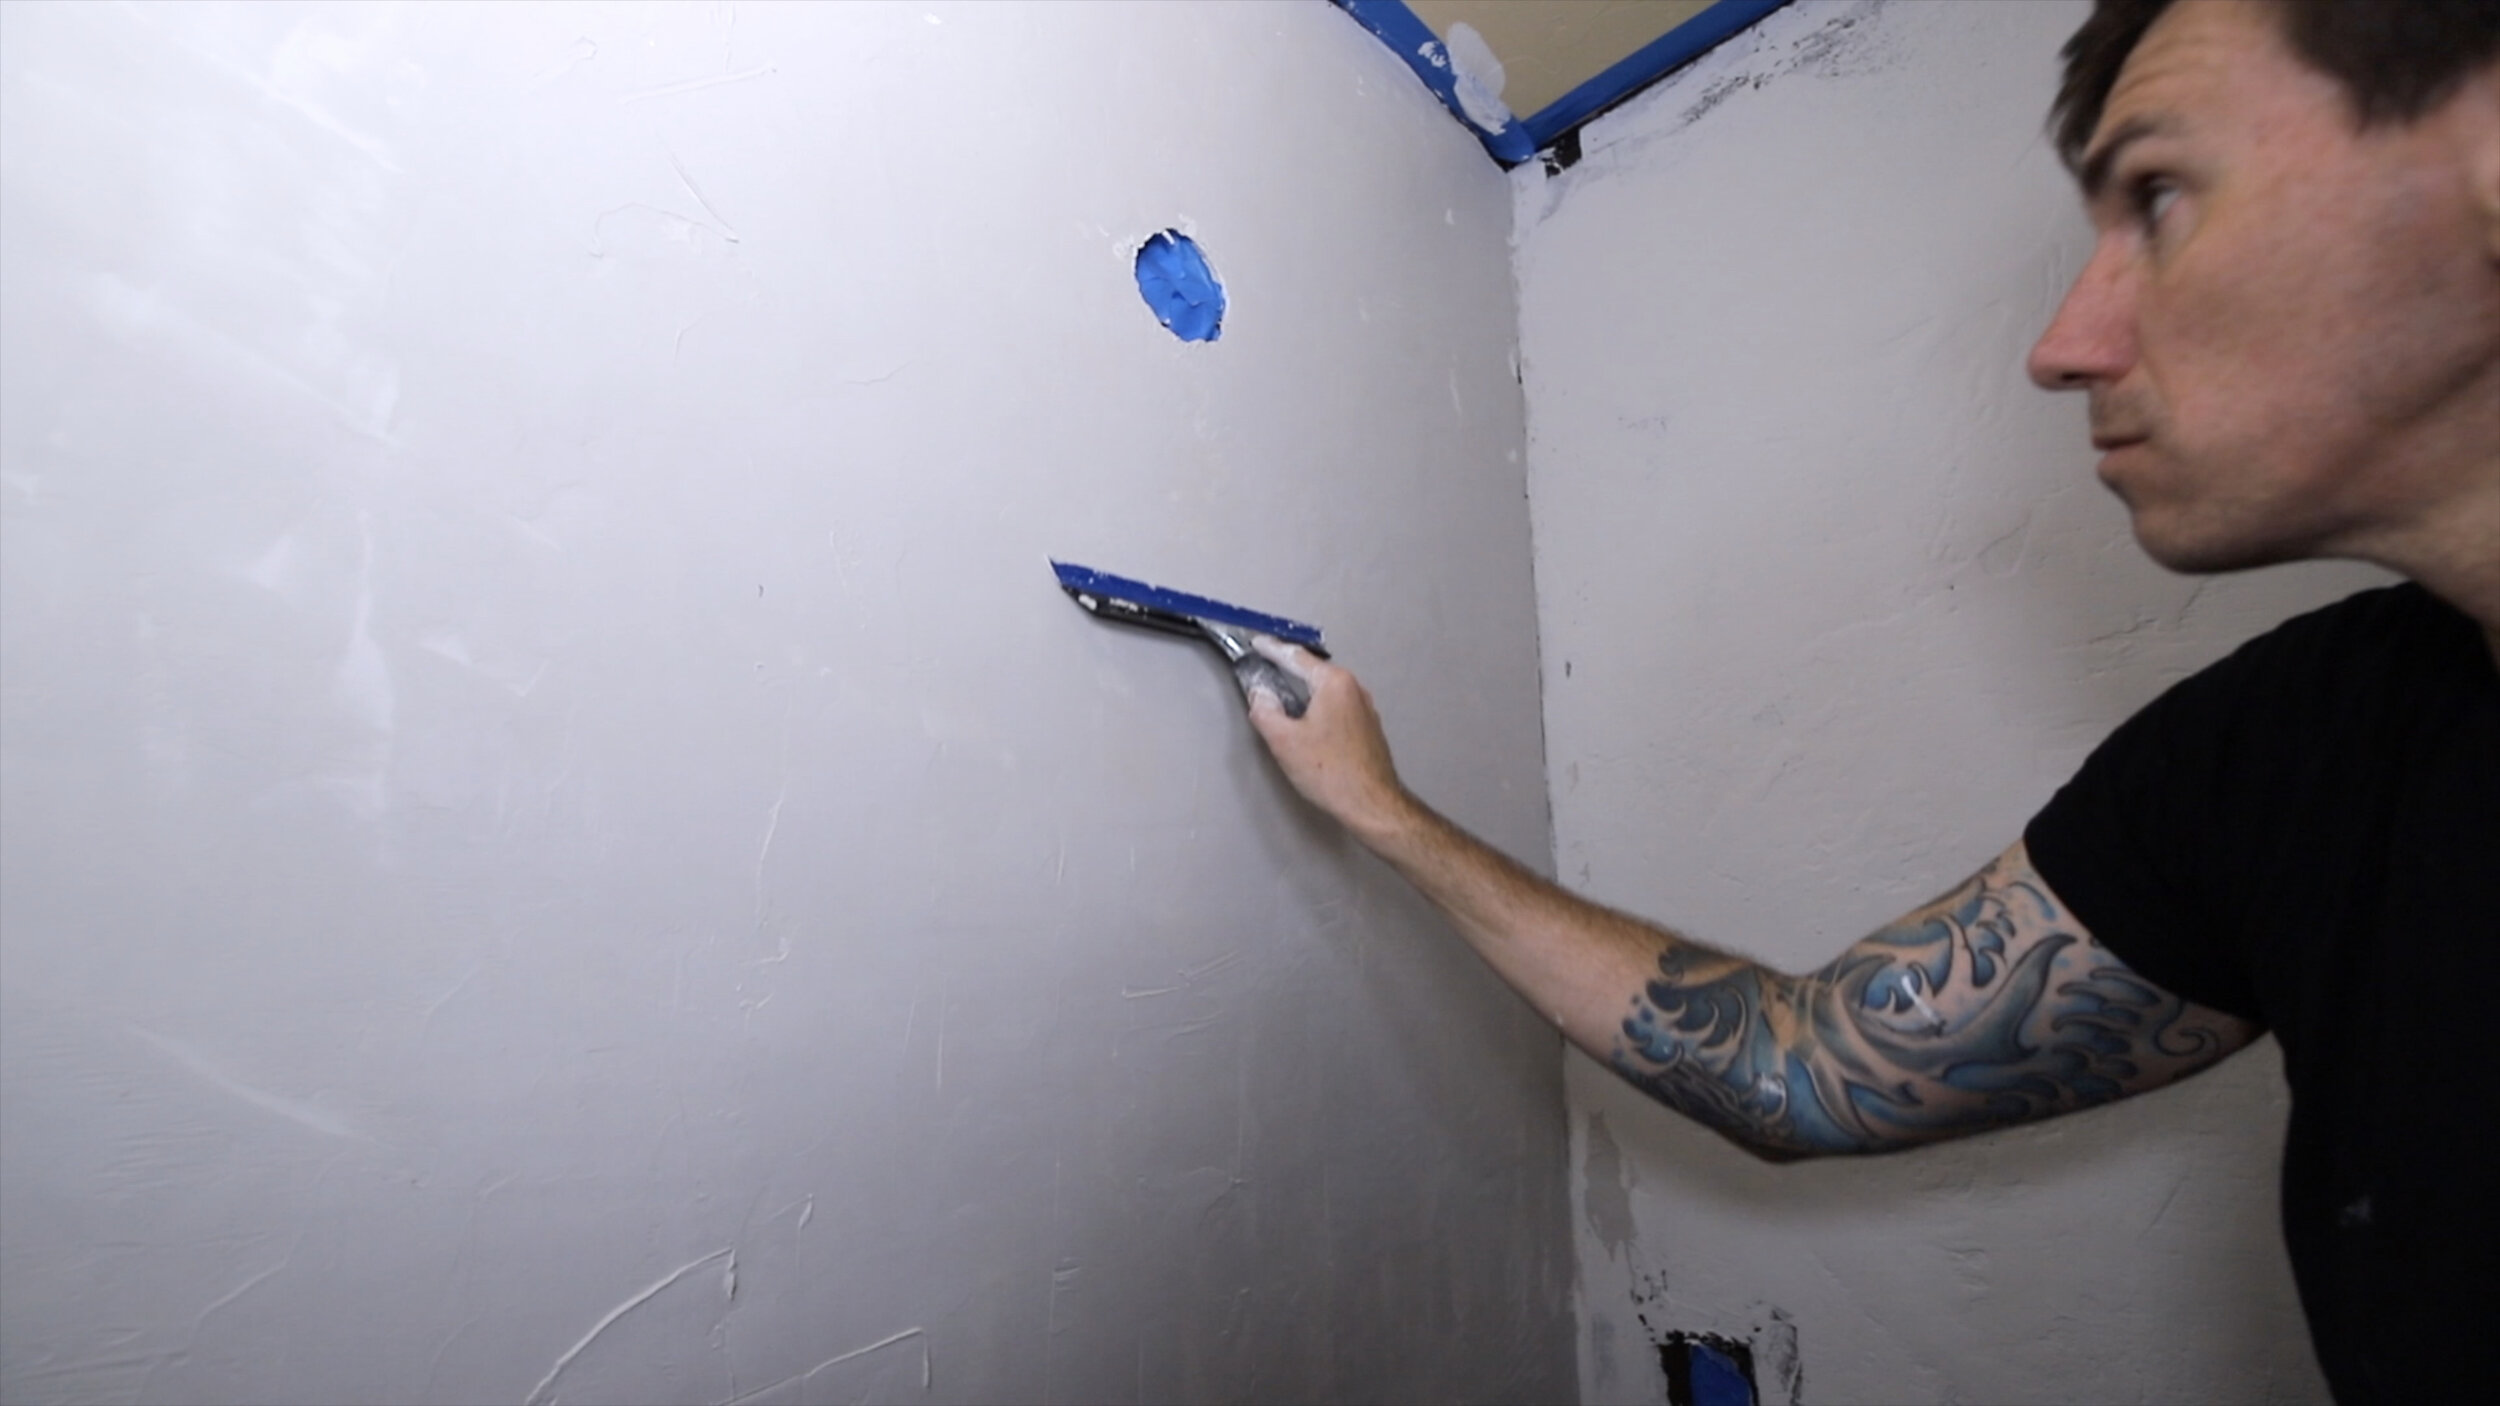
I removed the countertop, the vanity, the toilet, light fixture, and was left with an empty, albeit textured chocolate walled slate. Step 2: Remove the Wall Texture! First I tried thinning down a premixed joint compound and rolling it onto the walls with a 1/2 inch nap roller before coming back with a drywall squeegee to smooth each coat in an opposite direction from the last. 3 coats in and I realized this technique only works for walls with a light texture. I picked up a drywall hawk and trowel and did what I should’ve done to begin with. I only thinned the joint compound slightly, and began troweling the mixture onto the walls in opposing directions to get it down into all the voids. I worked in 4 foot by 4 foot sections, and again used the squeegee to smooth after troweling. Once this was done I sanded the walls smooth with my orbital sander hooked up to dust collection and I had the smooth walls I was looking for. Two coats of a satin white paint and the bathroom looked bright and beautiful.
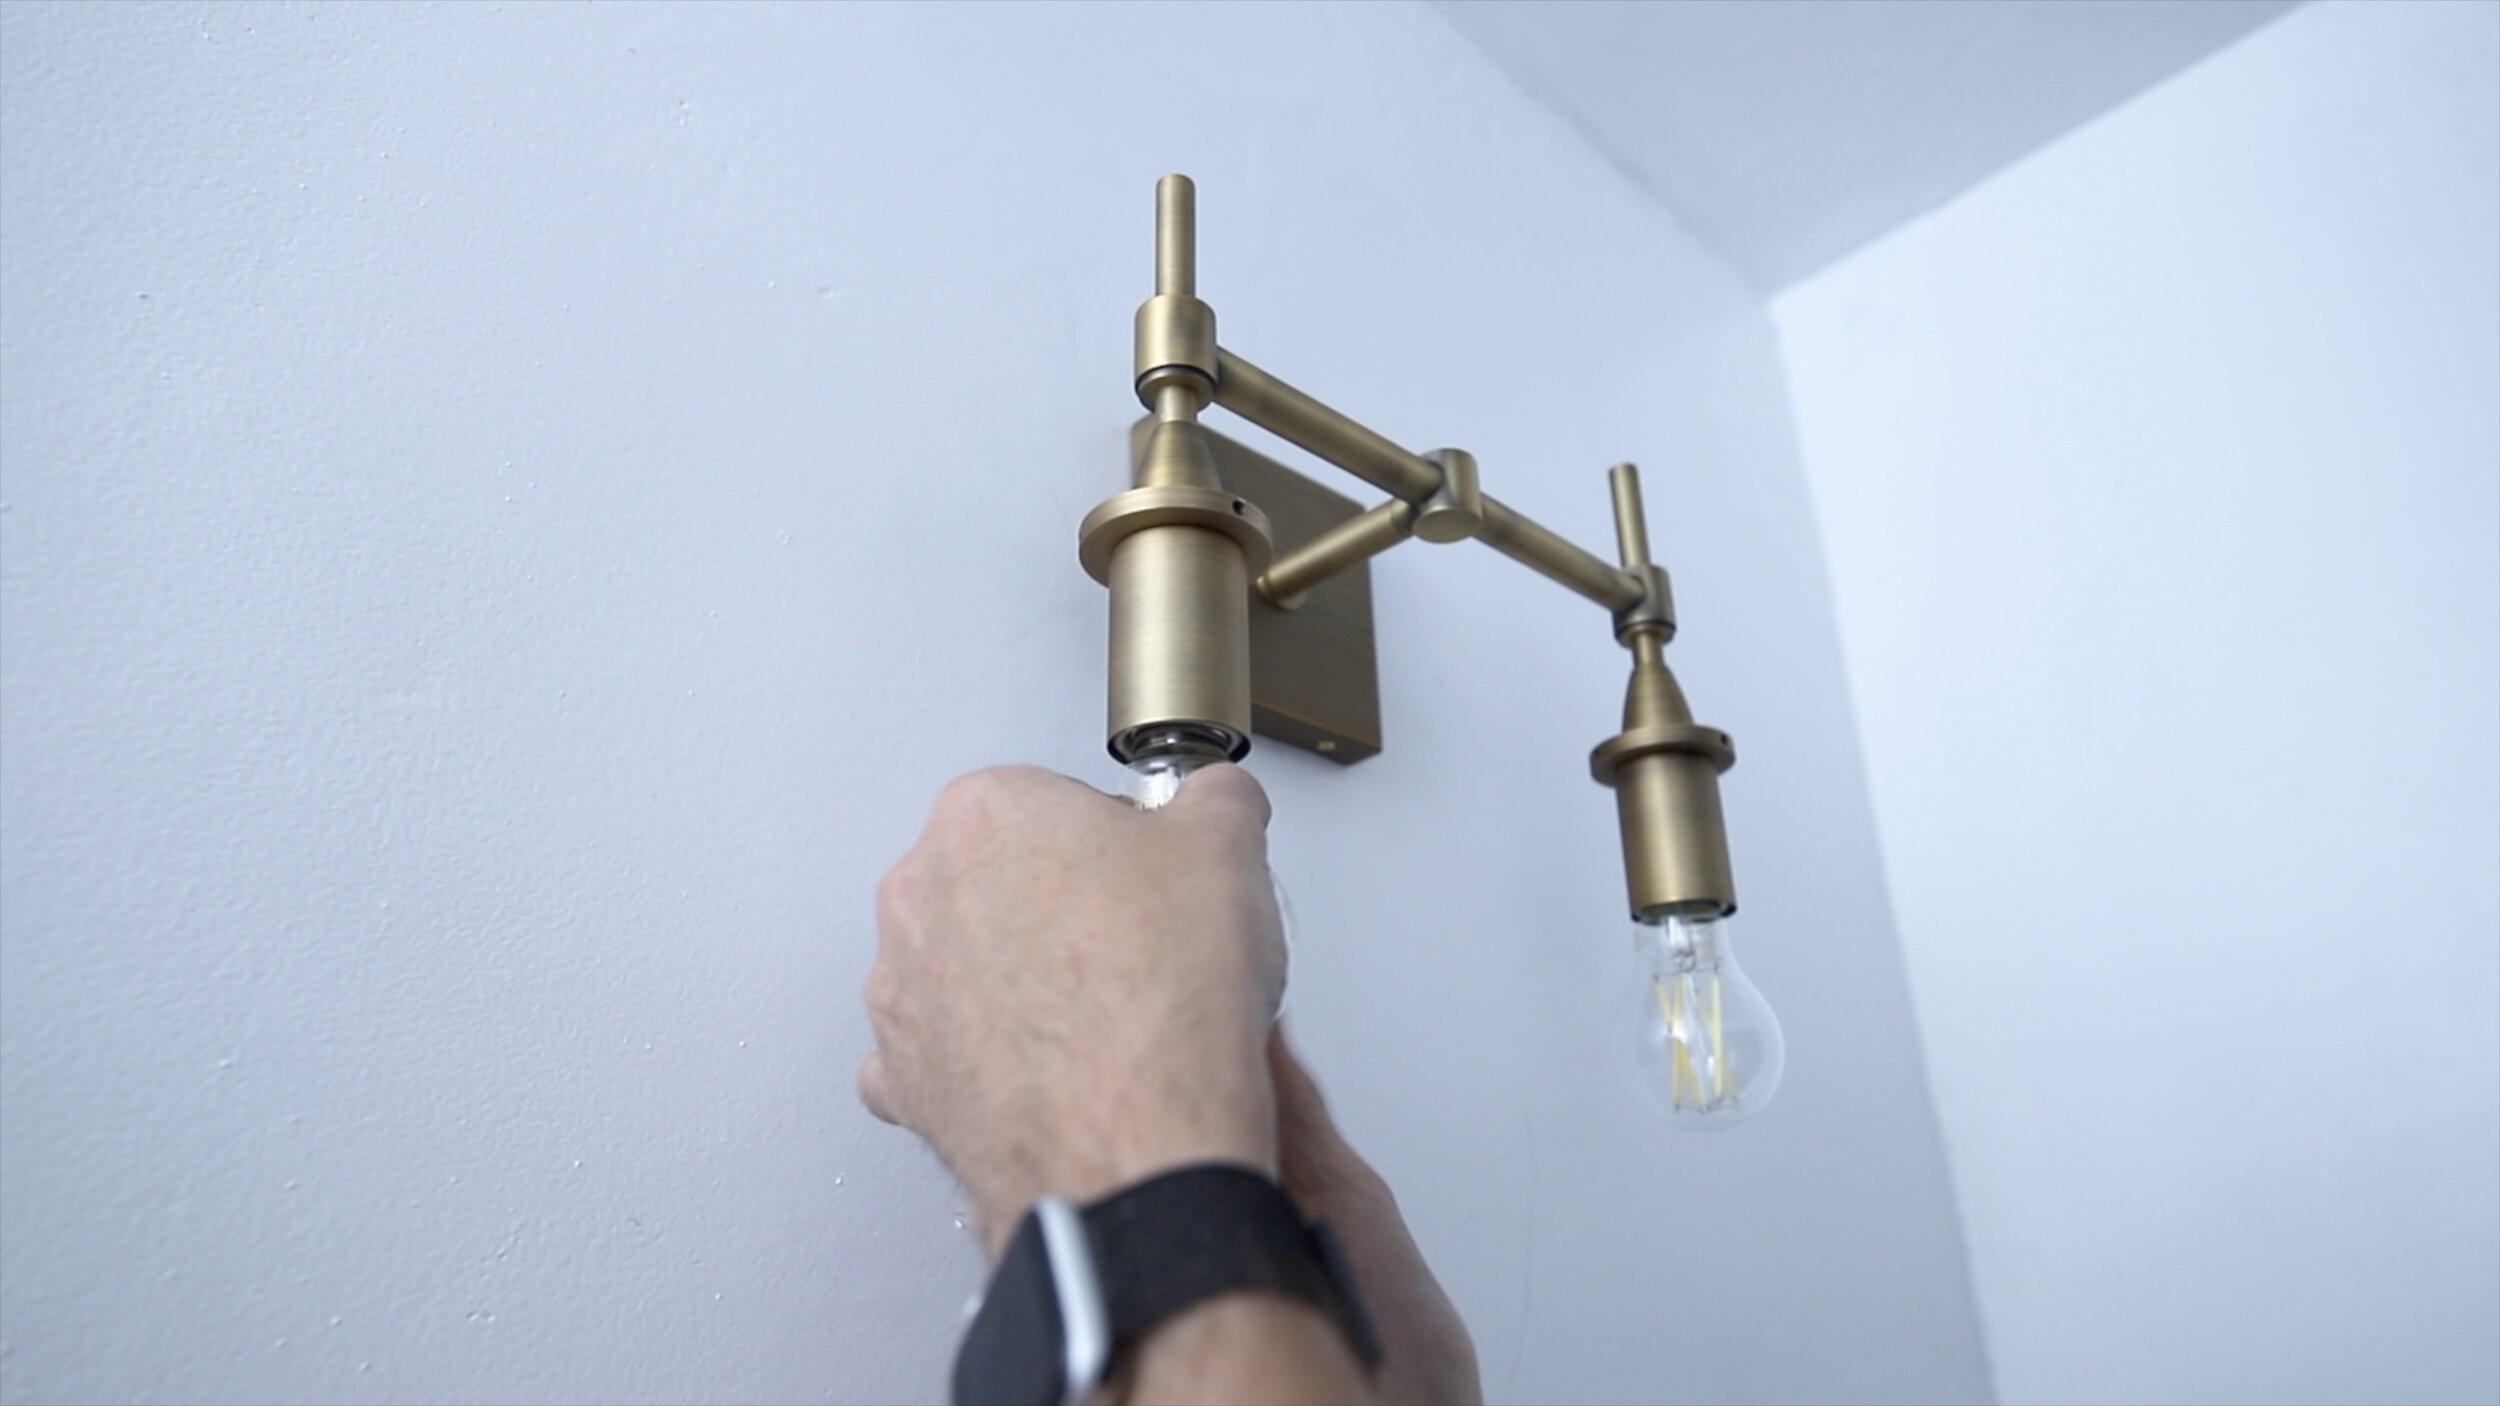
Step 3 was to upgrade the light fixtures. I have the lights I used linked in the YouTube video, but the main thing to know is using the proper light temperature. I prefer a bright white daylight color temperature which is measured in kelvin. Look for lights that say they’re in the 5000k to 5500k range to transform any space that has those soft yellowy-orangey lights.
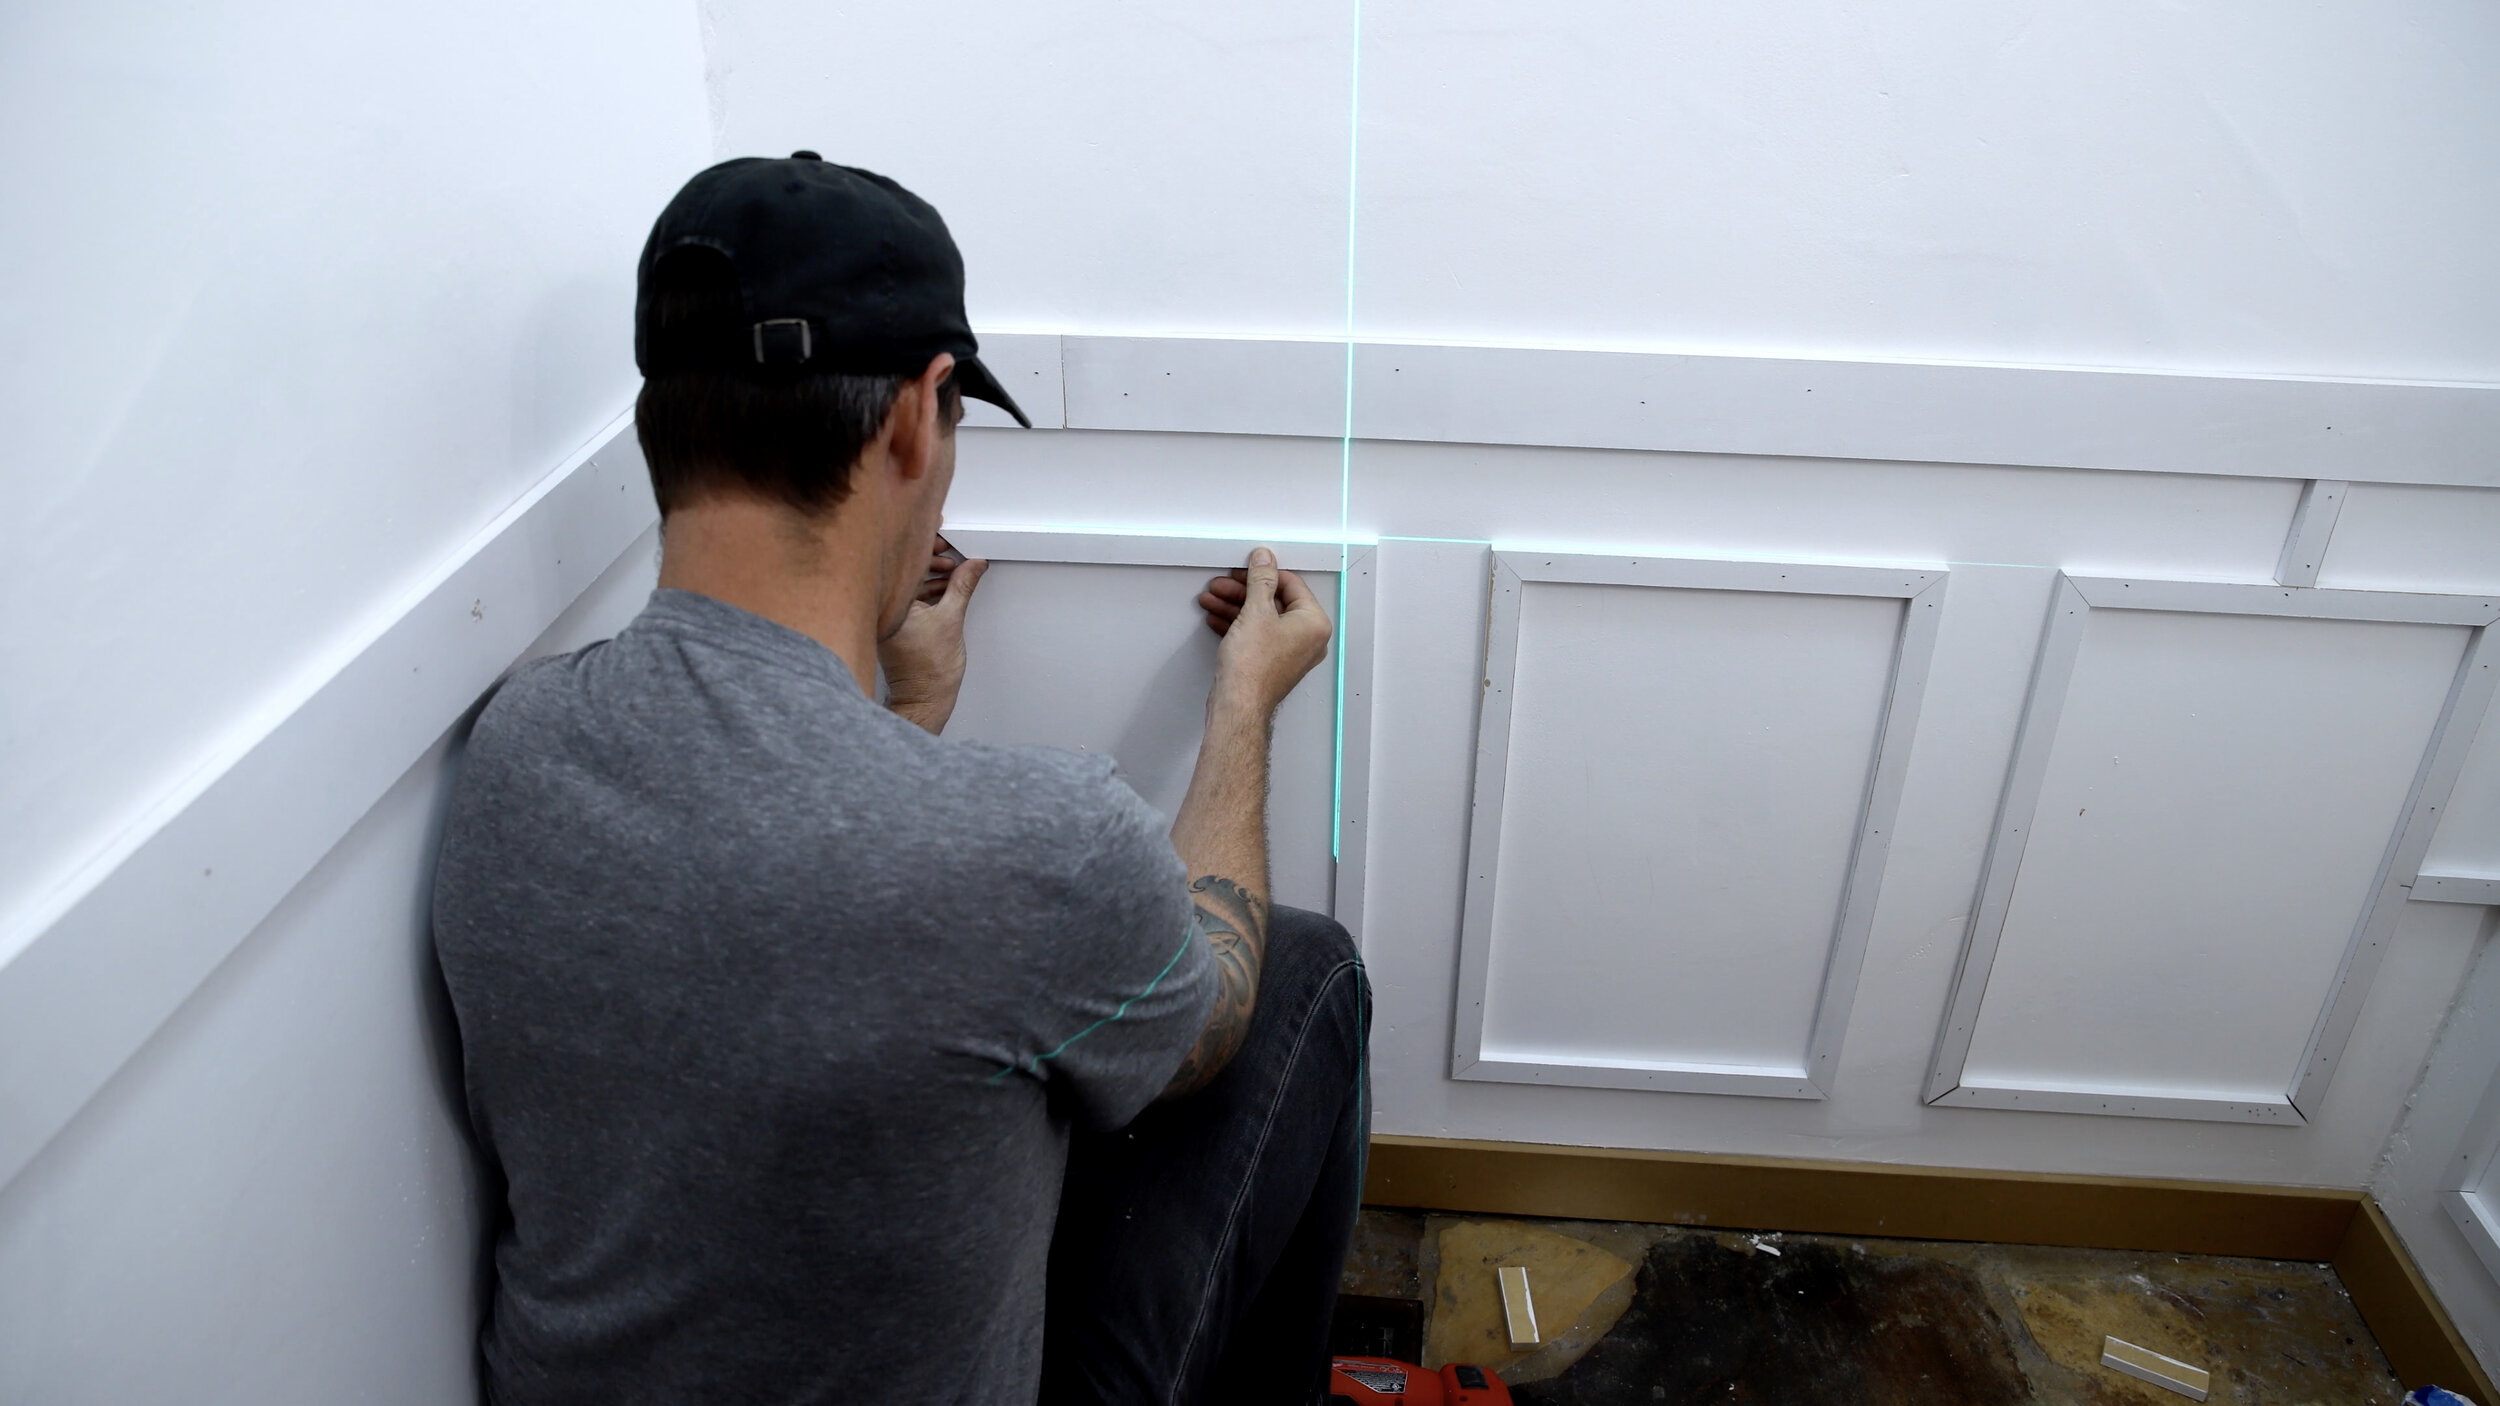
Step 4 was to add a texture back to the walls, but only in the sense the bathroom needed some sort of detail so it didn’t look like a blank slate. I did this by adding a chair rail trim detail. Think wainscoting, but no paneling. I cut 3 inch strips of 1/2 inch MDF to be the upper rail, and baseboard trim of the bathroom. If using MDF its important to seal the MDF before painting for two reasons. First it allows the paint to go on quicker by preventing the paint from soaking into the MDF, and second it helps waterproof the mdd which will swell with moisture if it gets wet and its not sealed. I also cut 1 inch strips of the 1/2 inch MDF, and this comprises the majority of the trim detail through a series of connected rectangles. This simple geometric pattern and simple technique of applying with a brad nailer adds detail and a classy tough to this small space for low cost. Check out the video if you’re interested to know more about how I did this.
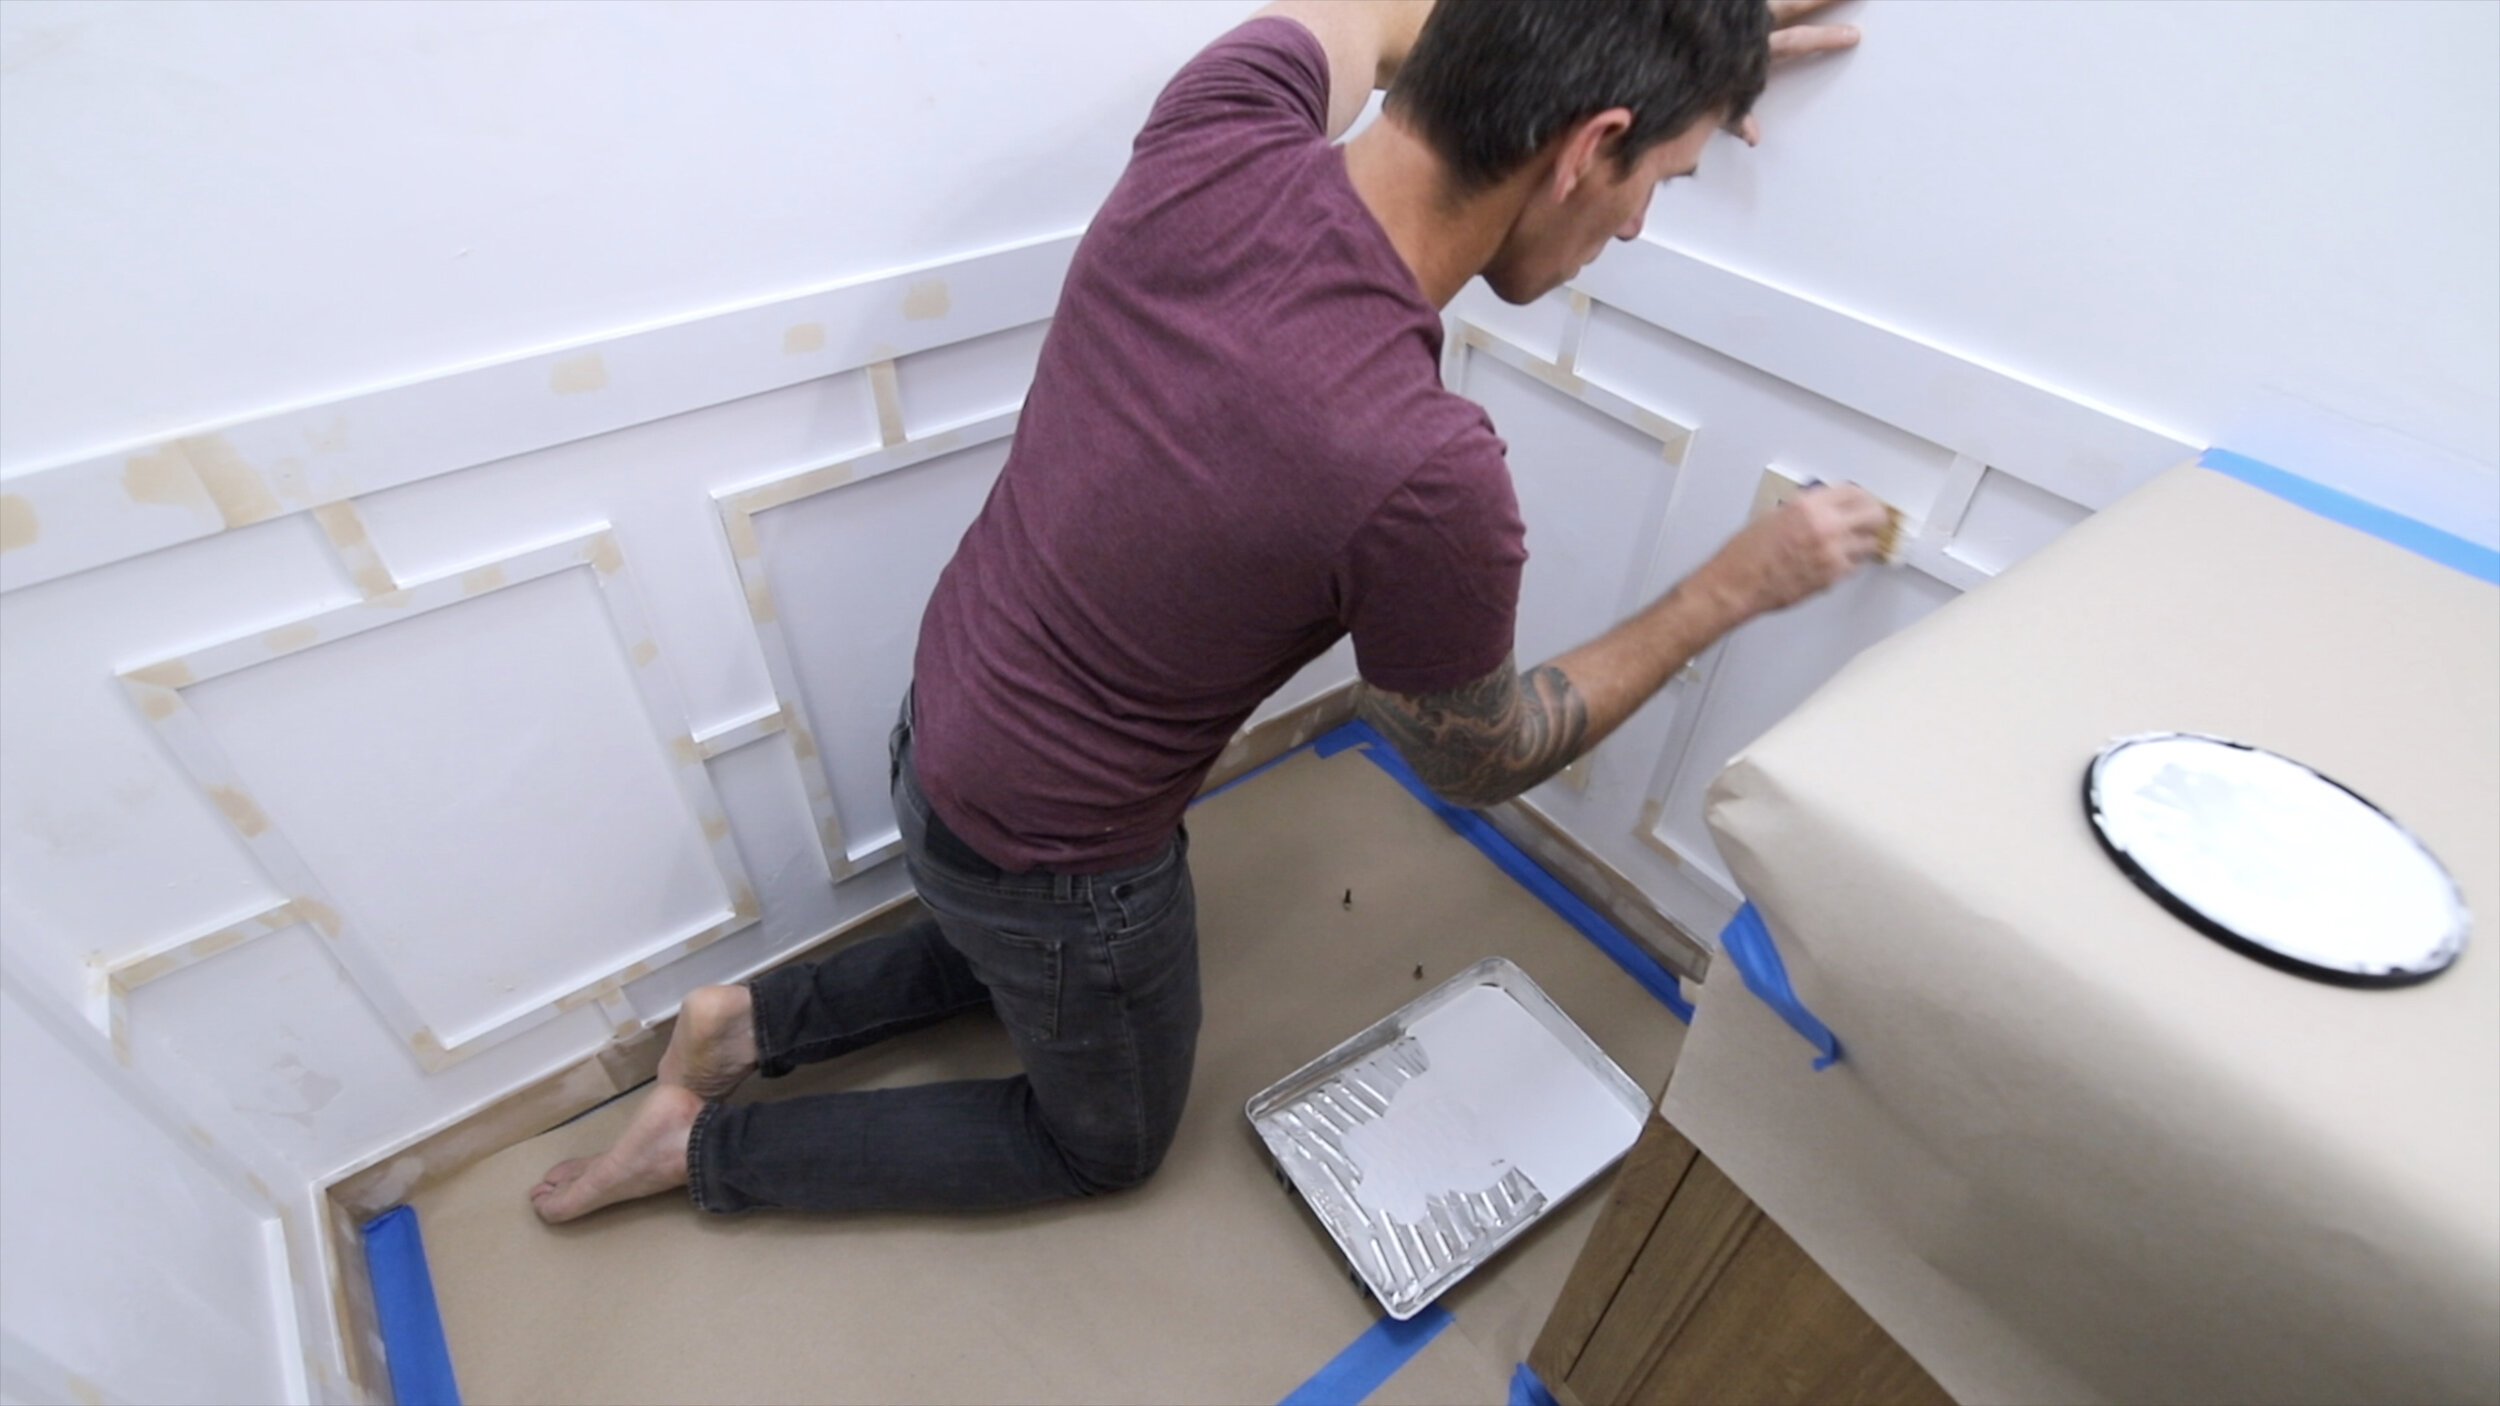
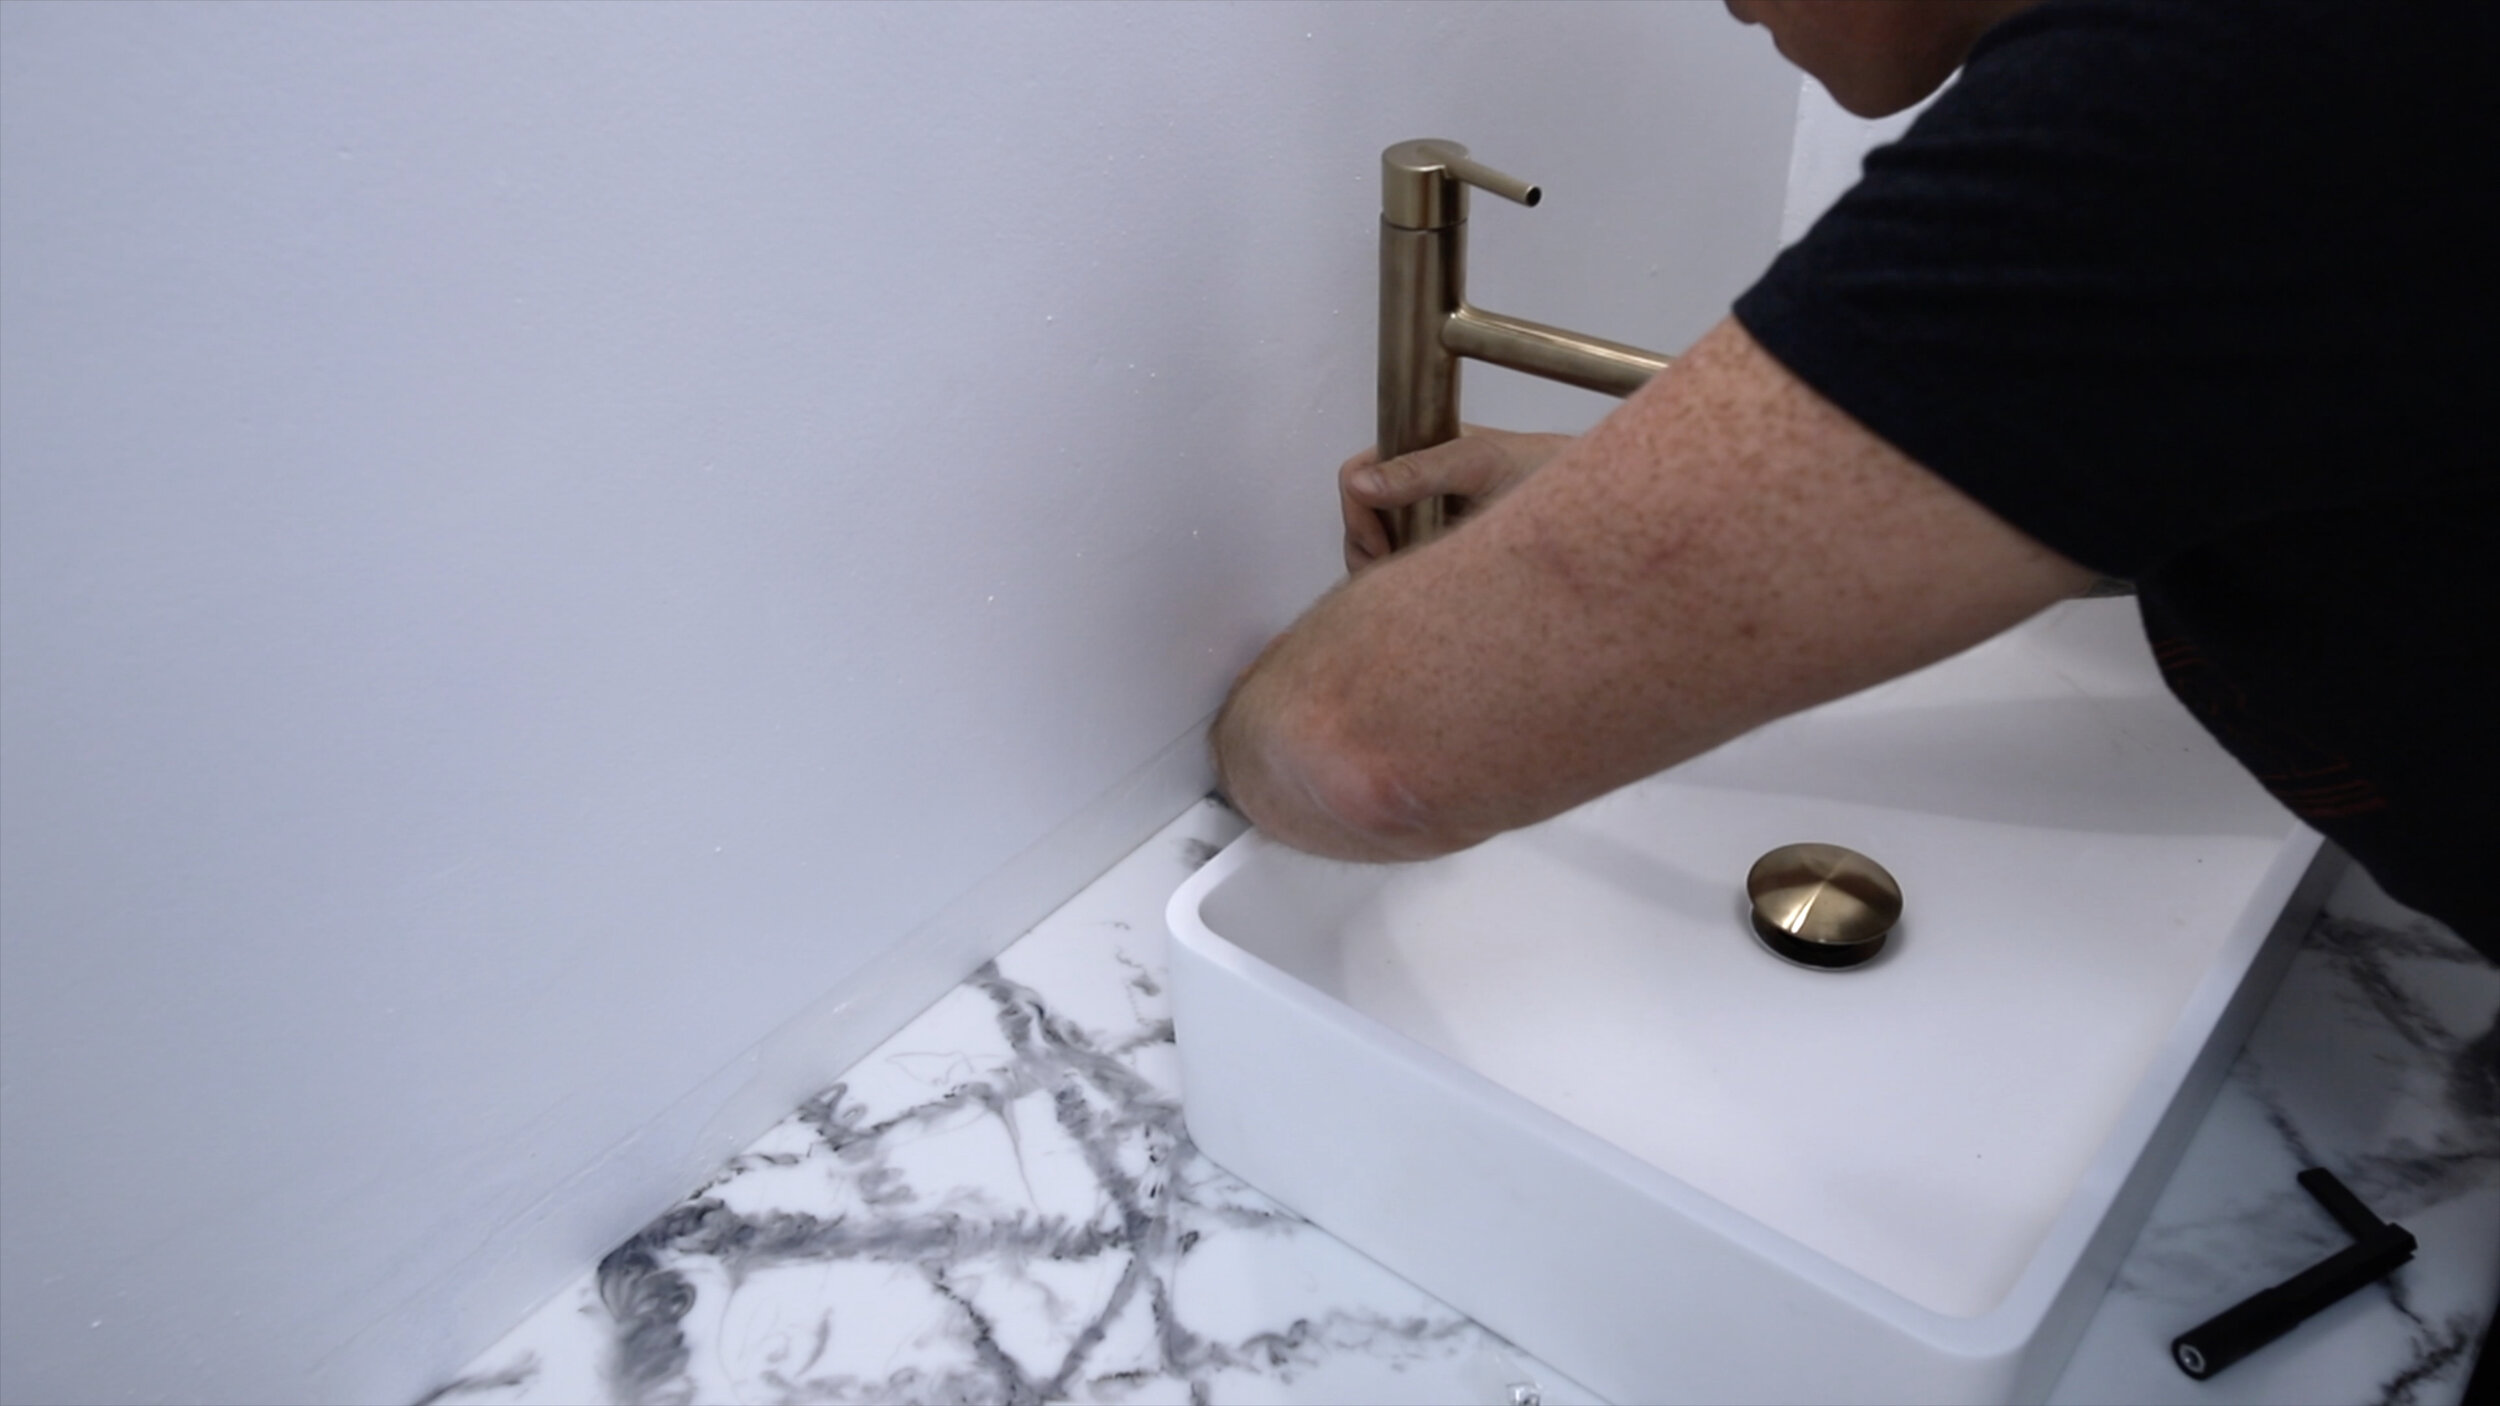
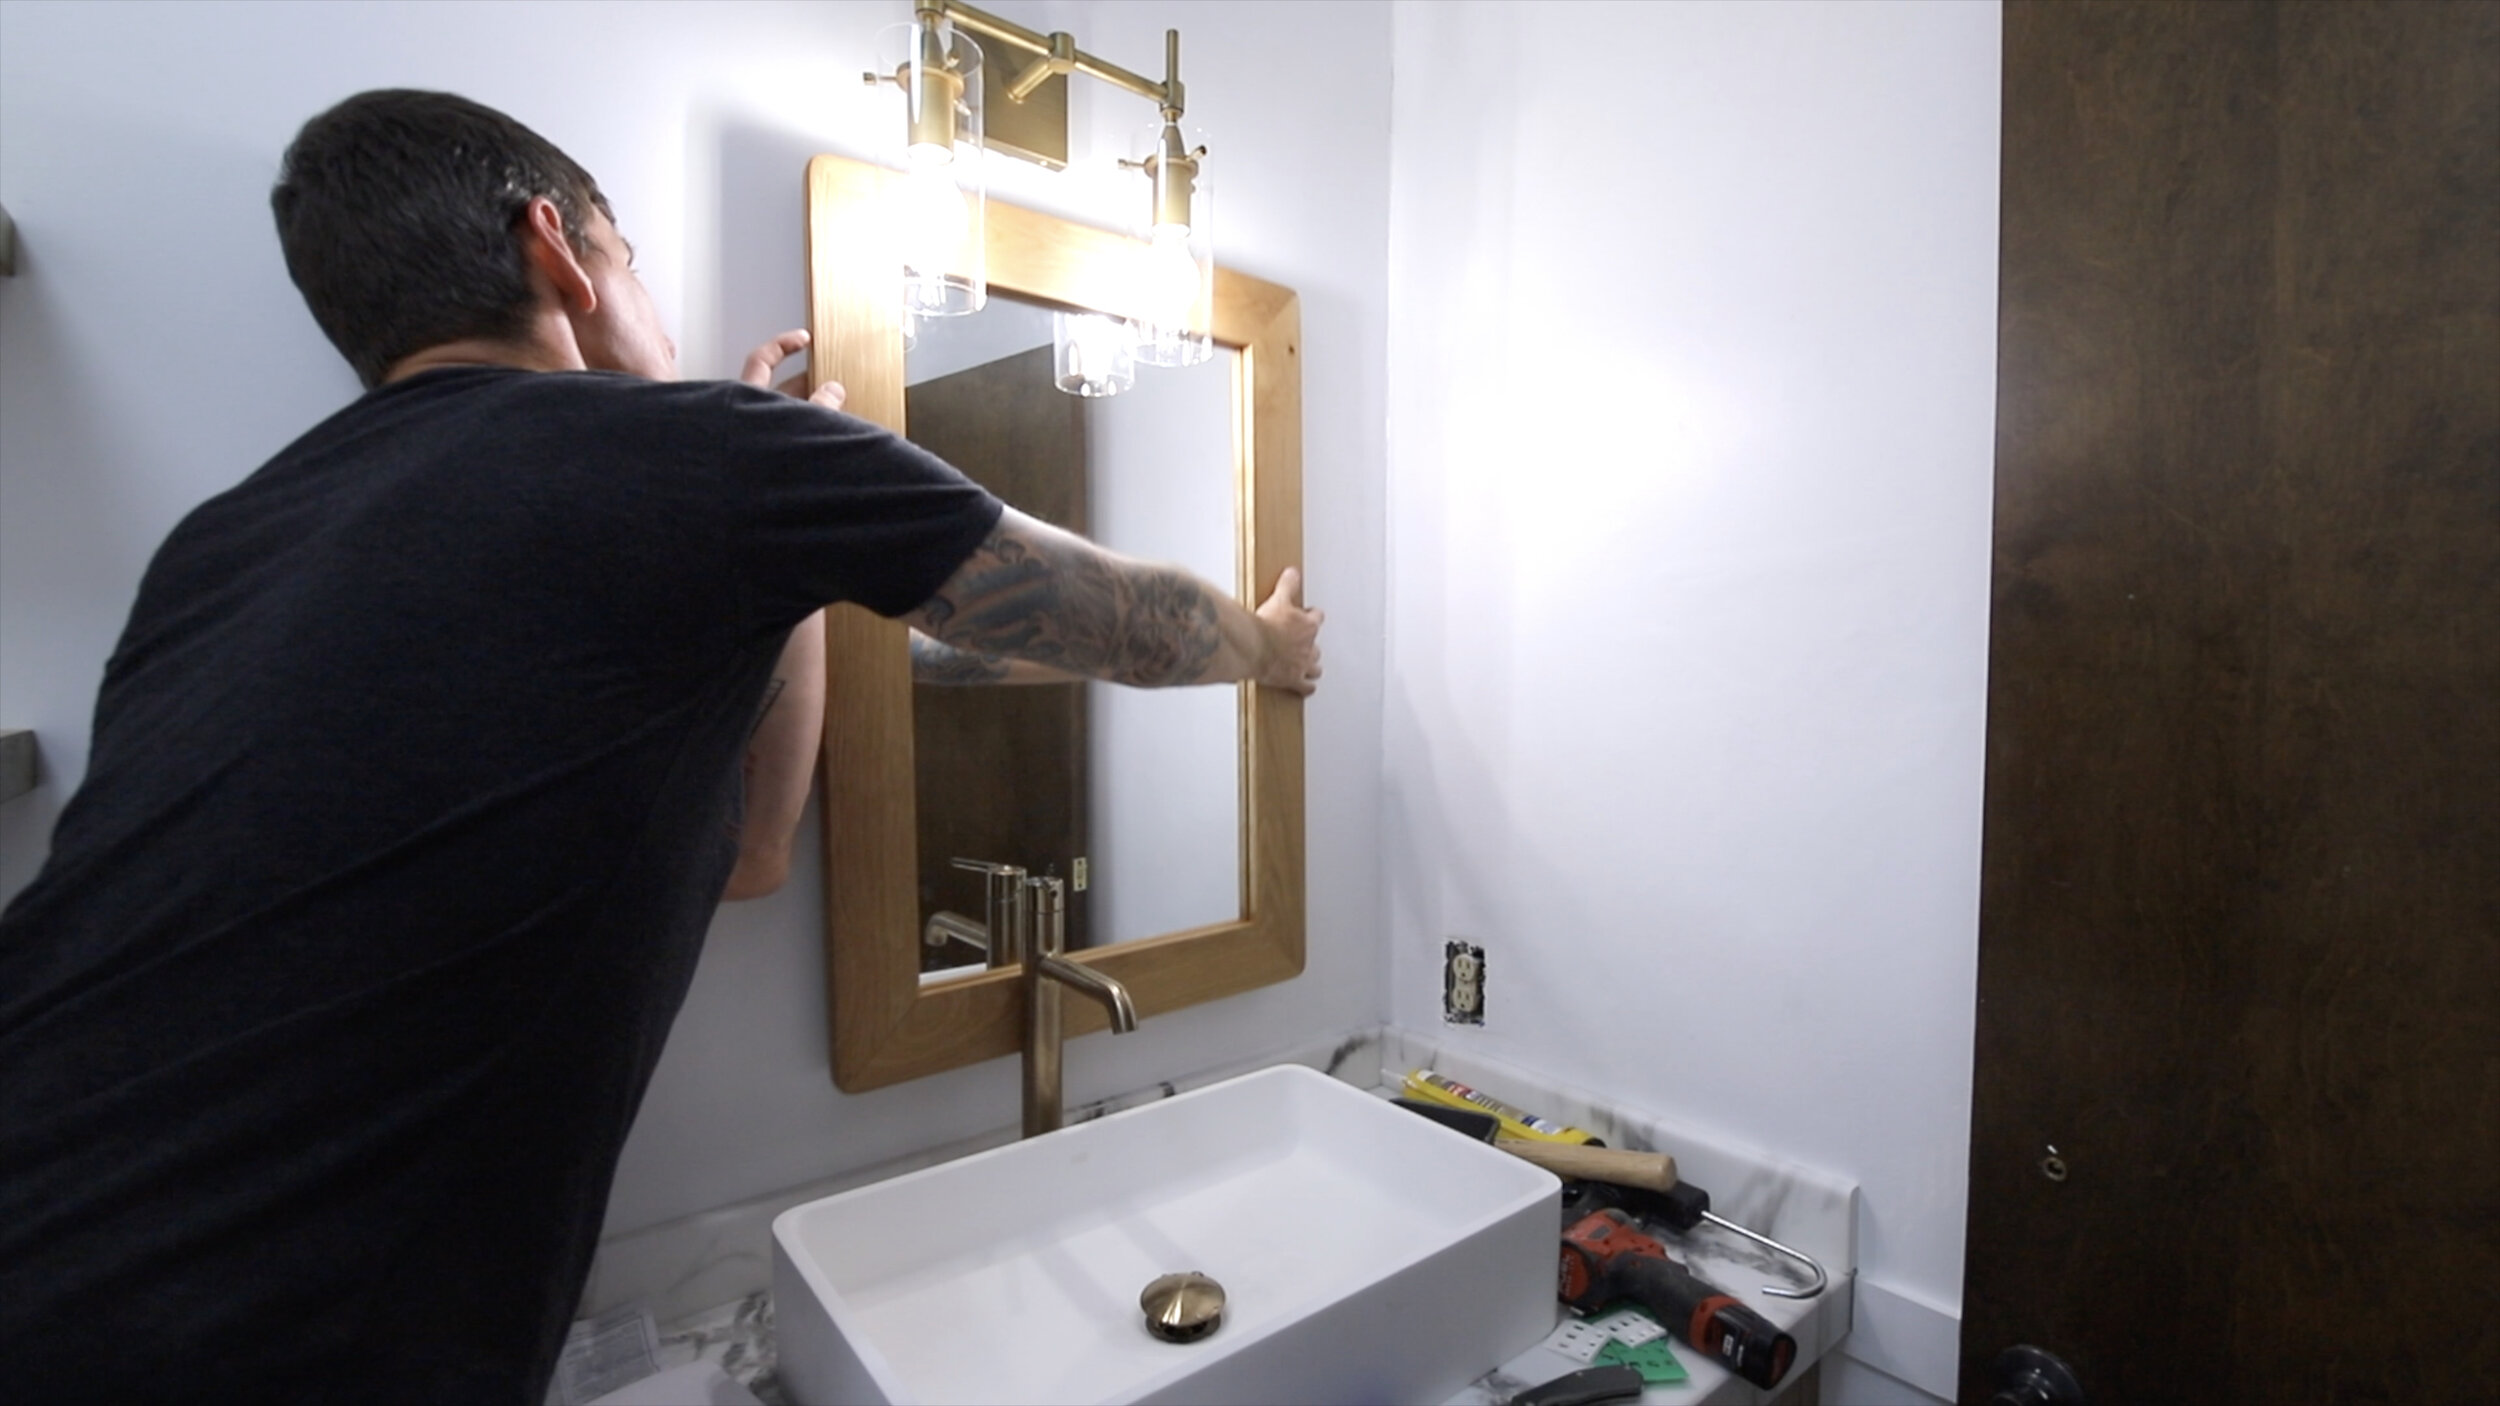
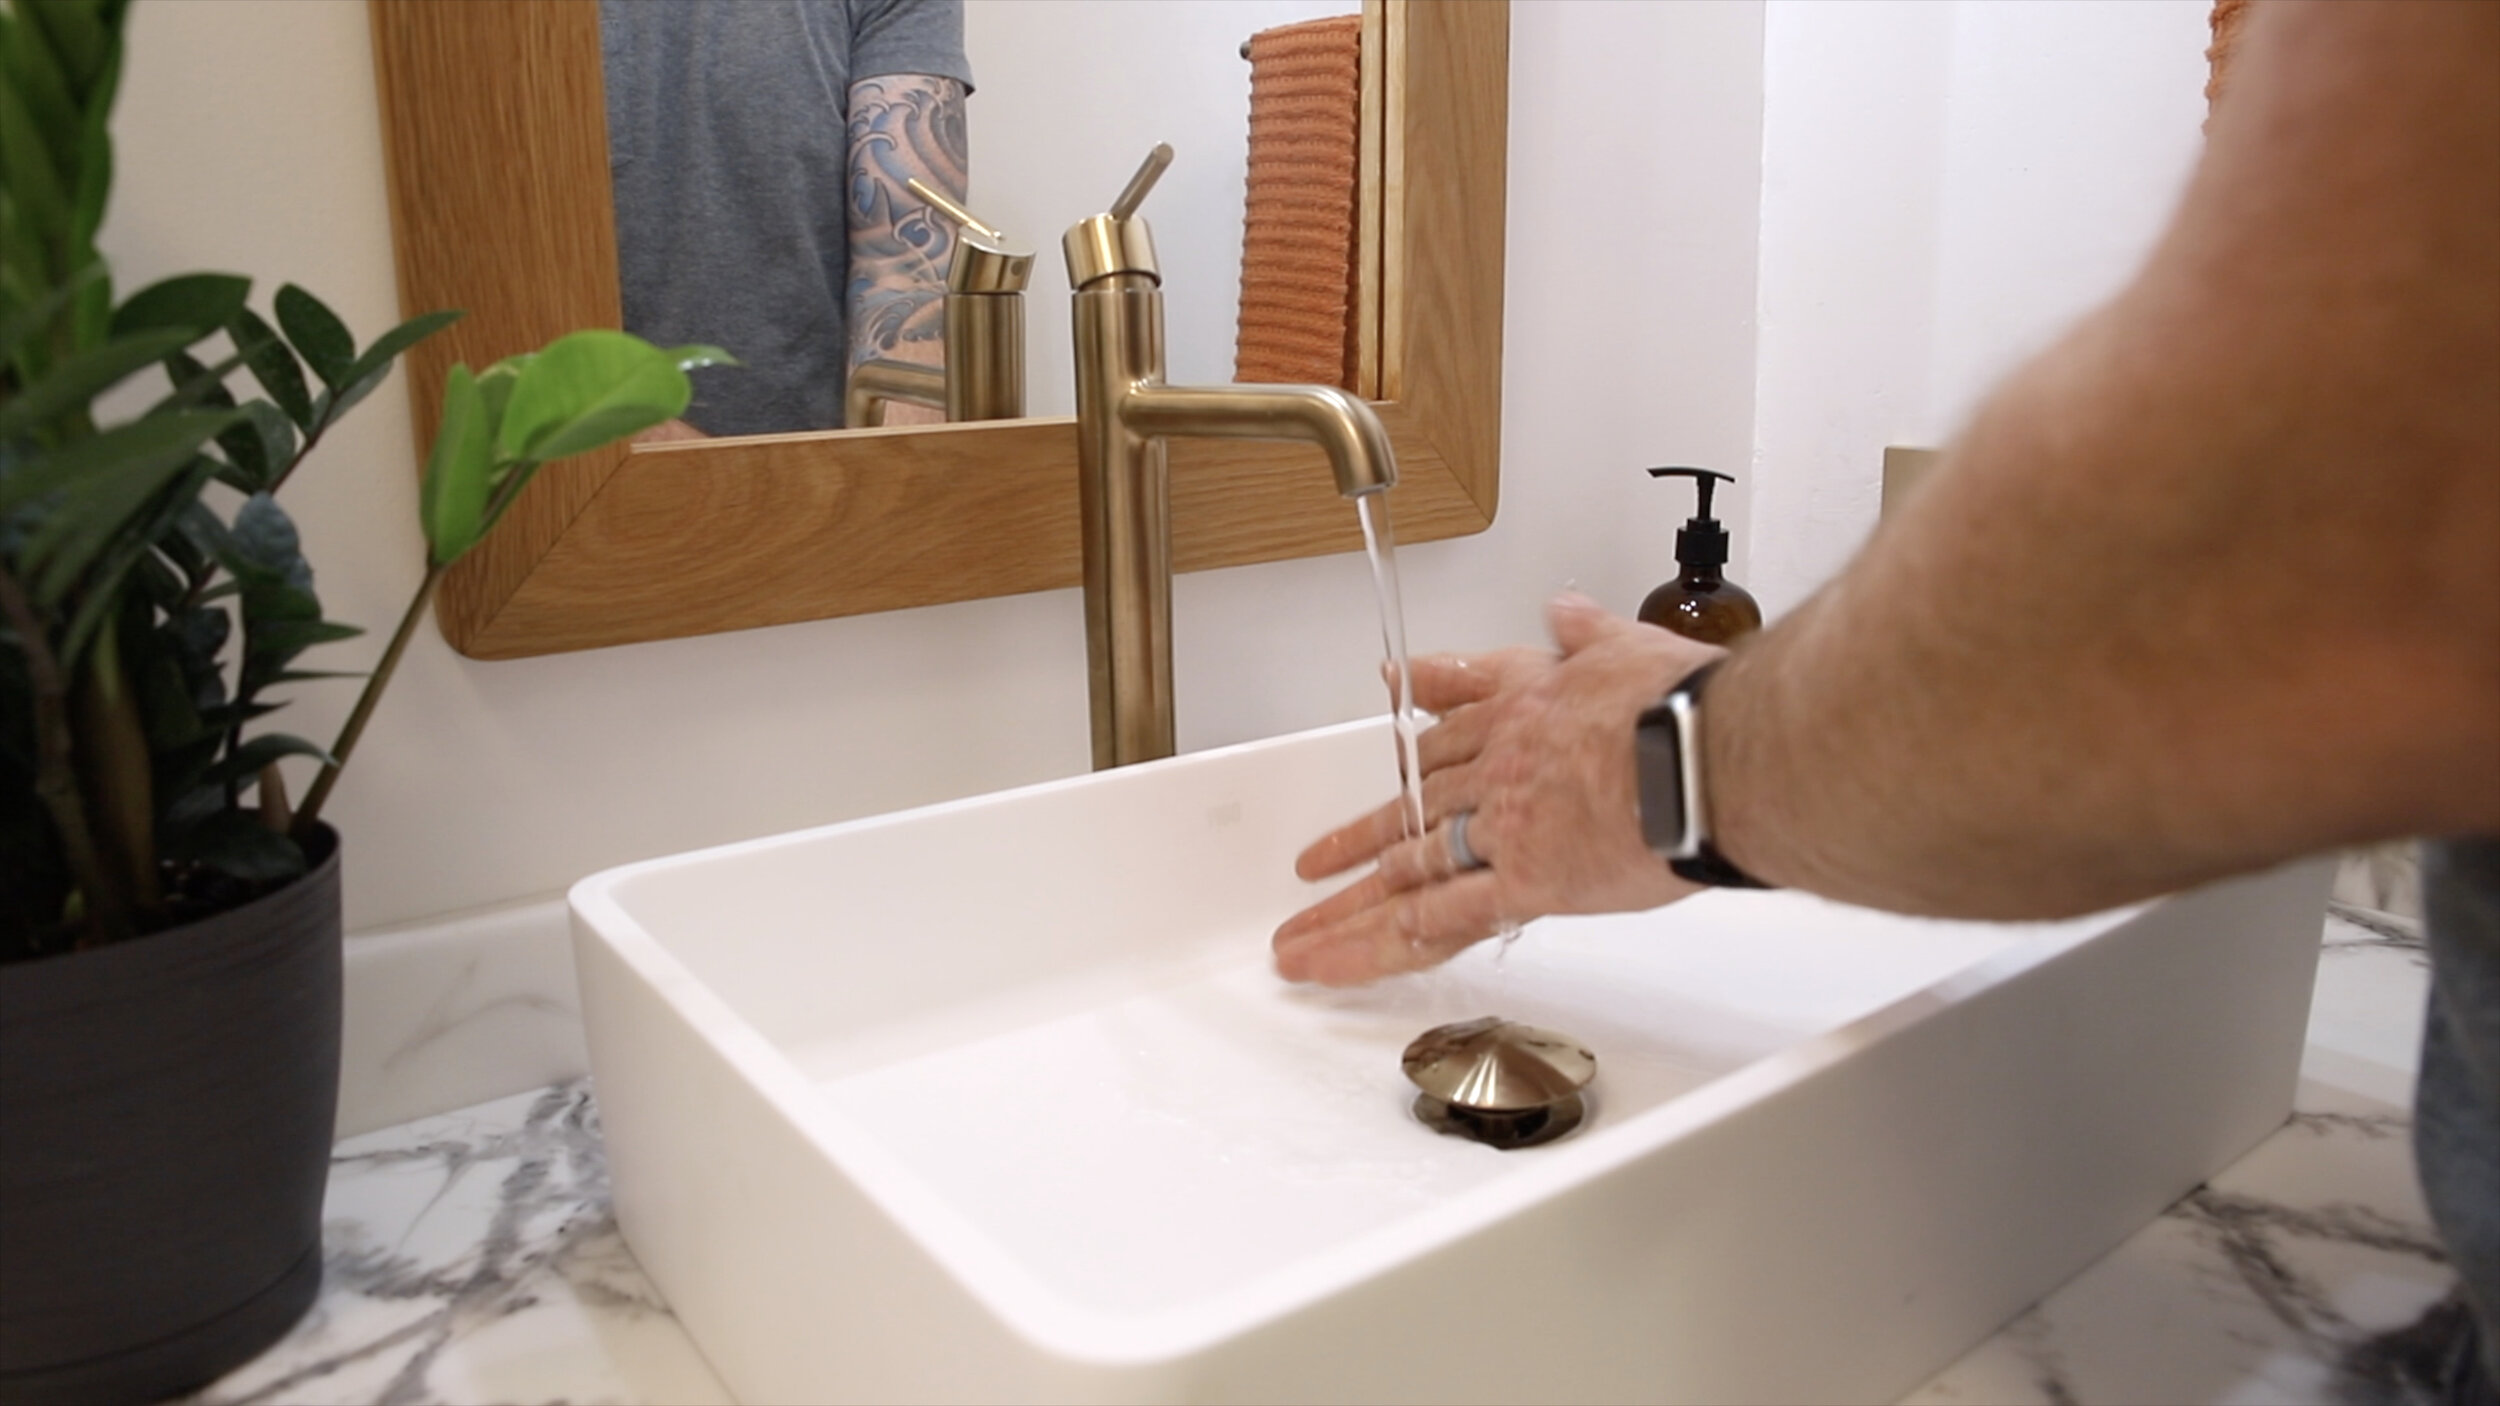
Step 5 is all about the materials you choose to put it all back together. I chose to build my own vanity out of plywood and oak, and added a countertop made from plywood with a faux marble epoxy finish. I added a vessel sink and Delta champagne bronze faucet and matching components to tie the room together. Choosing this combination paired well with those smooth white walls and chair rail trim made for a bright, classy, but somewhat modern space that was a huge transformation from the original bathroom. The best part is that everything went well! Fingers crossed the next project goes as smooth.
Make sure to check out all the links for the Husky Tools and Organization I used to make this project possible!