
Building a DIY Dream Desk (For 2)

Working from home in style
Disclaimer: This post is sponsored by the Home Depot Prospective program, and I’ve teamed up with Husky Tools for the next year to highlight their tools and equipment. I chose all the tools I am highlighting based on my actual needs, and these opinions and uses are my own.
Husky Dream Shop Tools
For the rest of 2020 and into 2021 I’ll be building out the Ultimate Husky Dream Shop, and this project features the following Husky products each with an affiliate link to purchase.

-Husky Heavy Duty 61 in. Mobile Workbench with Flip Up Pegboard - Link to Buy

-Husky 52 in. Adjustable Height Work Table with 2-Drawers - Link to Buy

-Husky 2-in-1 Extendable Square - Link to Buy

-Husky 12-in-1 Quick-Load Ratcheting Screwdriver - Link to Buy
(Make sure to check out the full build video on my YouTube channel Jonny Builds)
Like everyone else going through the current pandemic my family has had to adjust to this new normal. For us this means Katie is working from home most days. The office/guest room has become Katie’s domain while I have set up shop at the kitchen table to do my computer work and editing. We have discussed the need for a dual work station desk in the past, but now the need is more pressing than ever. We discussed our individual needs and came up with this wishlist:
Her:
ample drawer space
clean, minimal design
separation of workspaces
Him:
room for dual monitor editing bay
solid wood, flat table top
unique styling
I jumped into Sketchup and began iterating until I came up with this industrial but modern, minimal design featuring an 8 foot long desk top and a circle cut out design that carries over from the legs to the drawer fronts.

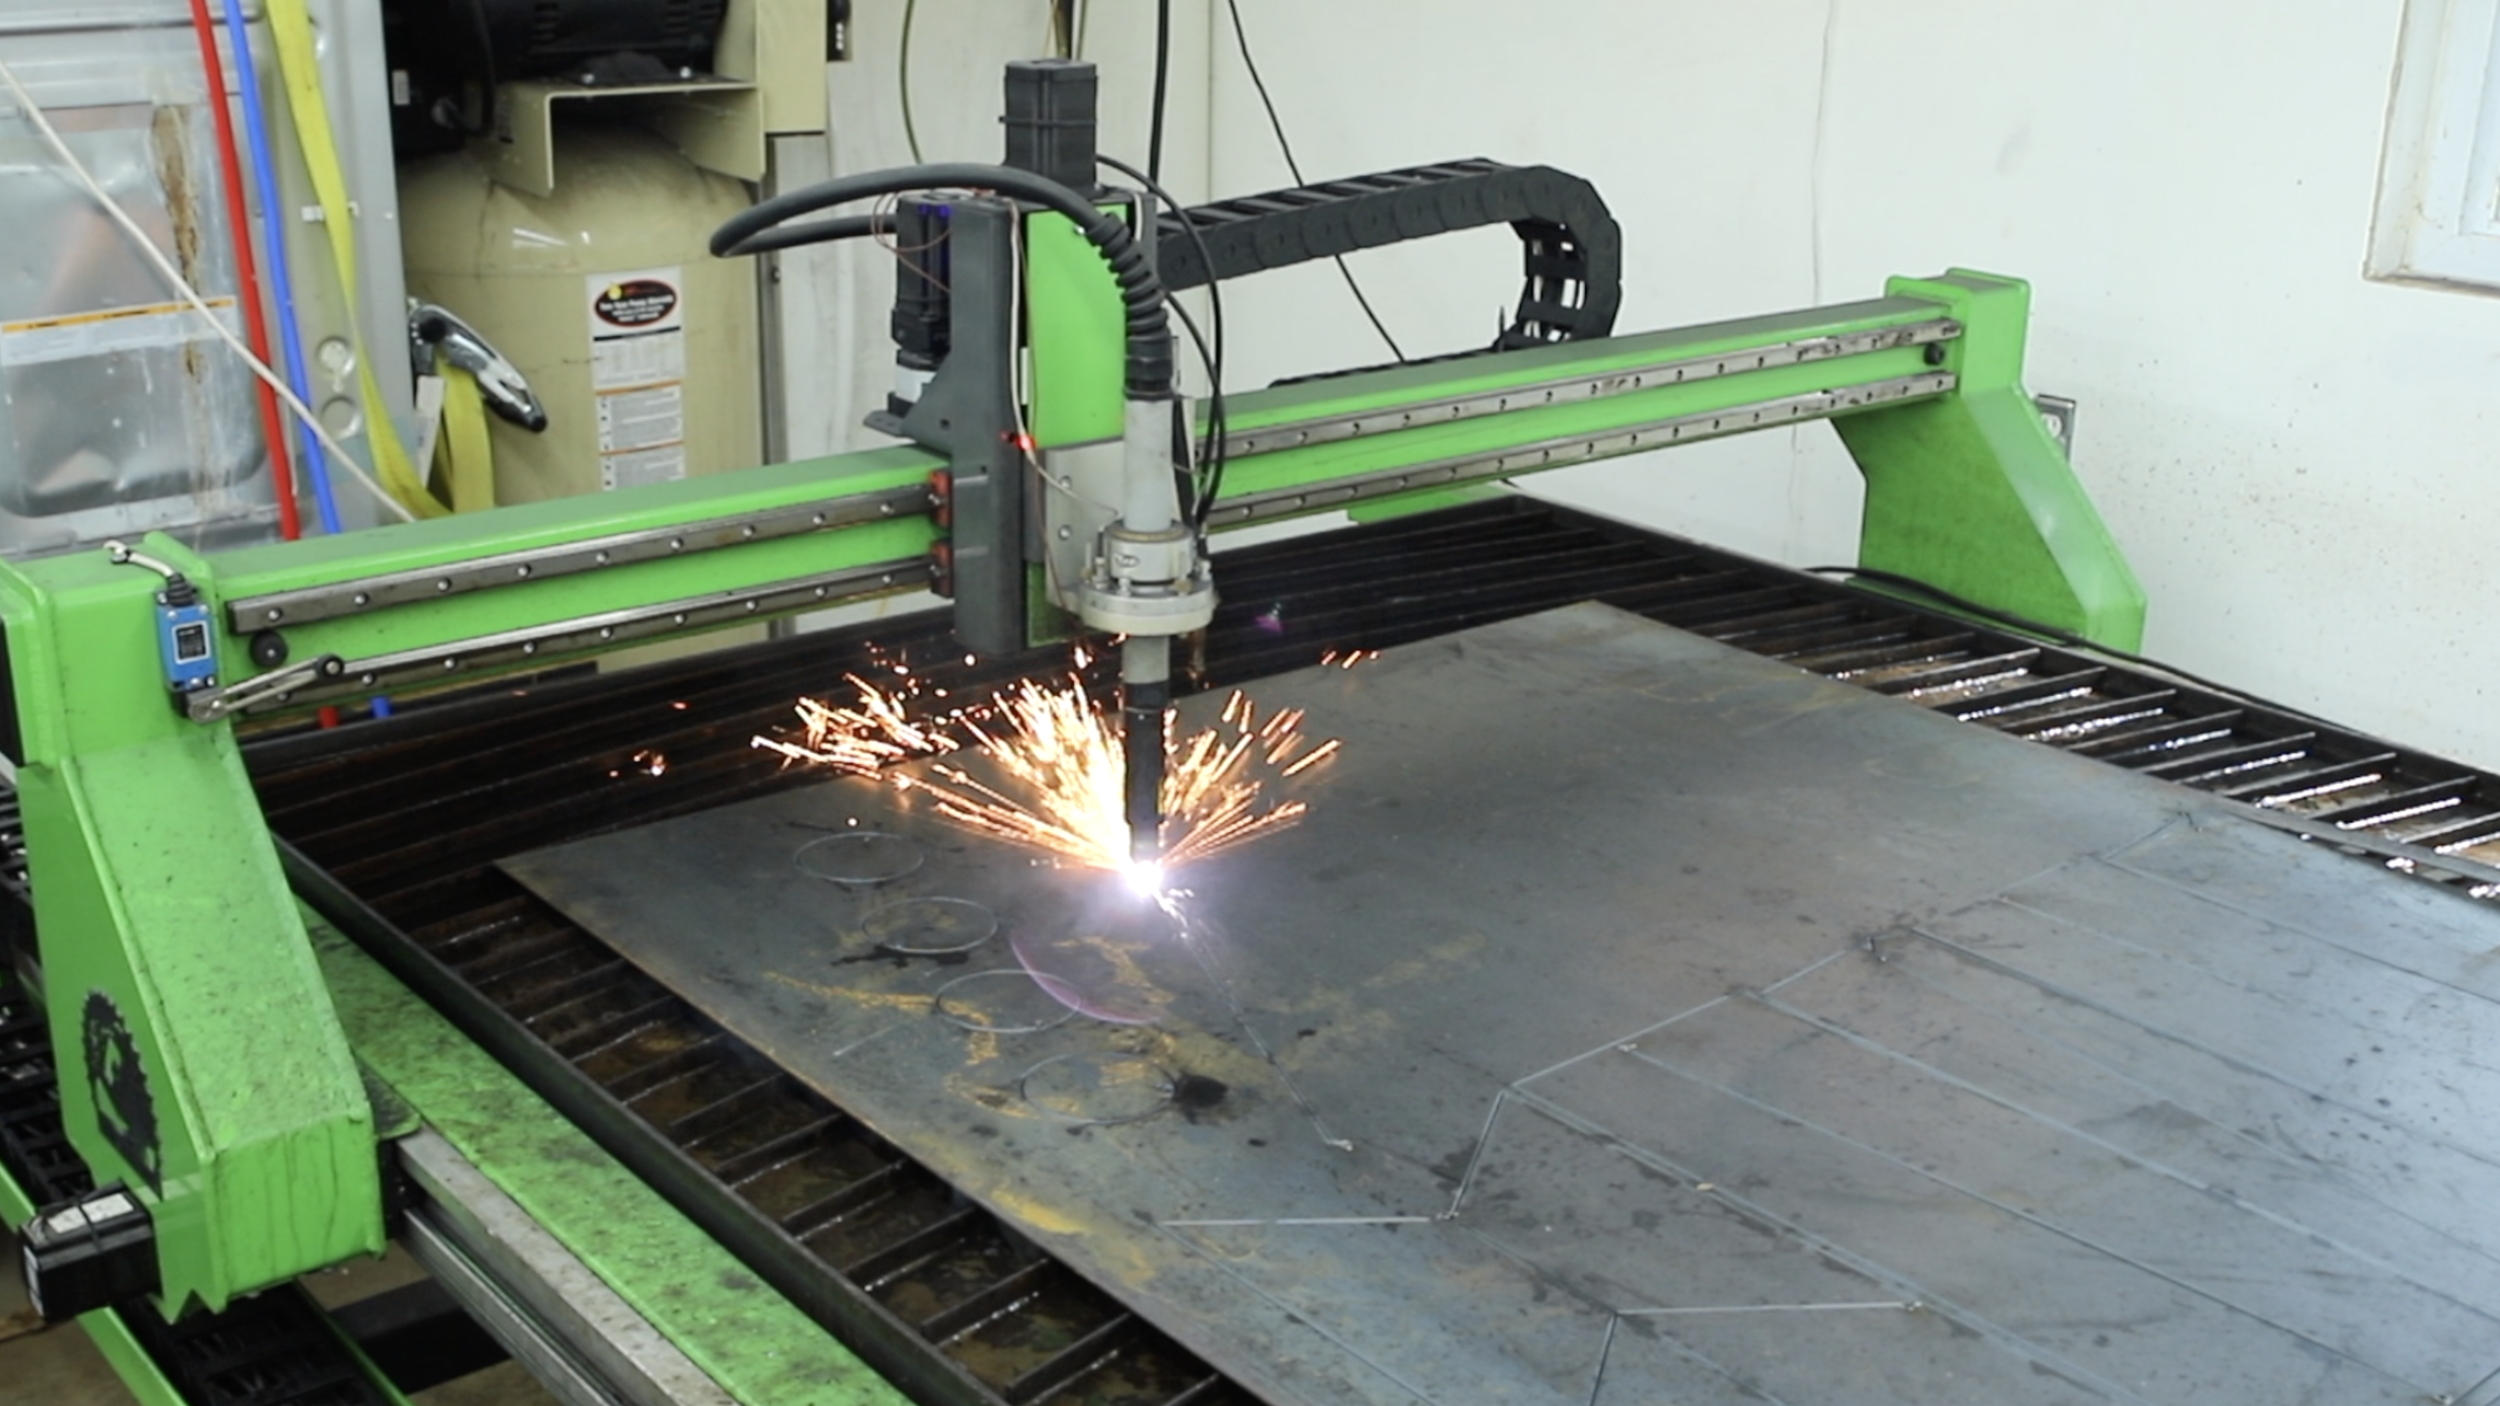
Using the Sketchup model I created SVG files of the legs and cabinet side panels and brought those out to my buddy Richard from 42 Fab. 30 minutes later I was leaving Richard’s shop with the 4 desk leg cut outs and cabinet side panels all cut from 1/8 inch steel open Richard’s plasma table. I think a good point to make here is how accessible this type of fabrication is. You’re likely to have a sign maker or fabrication shop close by with a plasma table. A job like this cost less than $100 in labor and materials to get the cut outs.

Back in my shop I welded on 2 inch flat bar to the leg cut outs to create what is essentially a tapered I-Beam leg. Last I spray painted them grey to match the color palate for this project which includes the bright yellow backdrop for the circle cut outs in the cabinet.

For the table top I went with beech because of it’s light color and straight grain. I milled the boards down to six 4 inch by 1 1/2 inch thick 8 foot long boards and glued these up into the table top using dominos for alignment.

The cabinet that separates the two workspaces is 18 inches wide and features 3 drawers. The bottom drawer extra tall so it can serve as a filing cabinet. (Another must-have from Katie!) I made the cabinet from 3/4 inch baltic birch plywood with 45 degree miters reinforced with more dominos. The drawer faces were cut on my new X-Carve Pro CNC to ensure I got precise sizing and circle cut outs.

The drawers were made from 1/2 inch birch plywood, and I cut a 1/4 rabbet in the bottom to accept the 1/4 inch drawer bottom. In the past I’ve just screwed on the drawer bottoms, but this process of using my router table to cut in that 1/4 dado is quick and repeatable. The drawers are much more sturdy this way, and frankly just look better.

Anther first on this project was inlaying c channel into the underside of that beech table top. I made my own c channel from 2 inch, 1 inch leg 1/8 inch c channel I picked up from the steelyard. I drilled in elongated holes that allow for seasonal wood movement while helping to keep this 8 foot long table top flat for a long time to come. I decided to use my X Carve Pro to carve in the grooves on the underside of the table top, and this worked really well. I installed the c channel using threaded inserts and 1/4-20 bolts.

Last up was the final assembly putting this whole desk together and we have been loving it! We each have about 32 inches of personal workspace, I have my dual monitors, and Katie has her drawers and filing cabinet. Win, win, win! For more details on the build check out the YouTube video, and if you would like the Sketchup file I’ve linked it here.

Circling back around to the Husky Dream shop the highlighted Husky tools were invaluable in this build and beyond. I’ve needed a table saw outfeed table for 6 months after moving into my shop. The Husky 52 inch 2 drawer adjustable height work table fits this need better than I envisioned. It nestles perfectly on my SawStop 36 inch PCS table saw with sliding table extension. The adjustable height of the table allows me to dial in the height of the outfeed perfectly. I had a few folks suggest I rout in grooves to match the miter slots on the table which is a common feature in outfeed tables. The beauty of using this Husky adjustable work table is I can quickly drop the height just enough to clear the miter slots if I’m using more of my sleds. The two wide drawers are perfect for table saw accessories like my push sticks, angle gauge, safety glasses, and tape measure. At $249 this table is an absolute bargain.

Something I have always struggled with is staying organized. Who knows how many countless works hours I’ve lost just looking for the thing that I…JUST…HAD! The addition of the Husky 61 inch 10 drawer tool cabinet and workbench has been a game changer in organization and layout. The large upper drawer houses all my ratchets and sockets as well as the measuring and marking tools I use most often. All my drills now live neatly in a drawer, and I can instantly tell which one is missing. I have two drawers just dedicated to the various screws, and I can’t even begin to describe how satisfying it is to have them organized by screw length. One of my favorite features is the flip up pegboard that features an upper shelf. My numerous battery charges of different brands all live in a perfect row on this shelf with plenty of space to plug them all in into the integrated power strip on the side.

One of the more clever tools in my shop is the Husky 2 in 1 extendable square. It has a sturdy machined aluminum construction with easy to ready markings. The square is 6 inches, but extends to 12 inches to mark larger materials without having to mark half the line, flip the square top the other side, and mark the other half. The most satisfying thing is how sturdy the Husky square is when it’s in the extended position. It locks in position and there is no play in the extension arm. When you’re done the square closes with a satisfying snap that friction locks the extension arm in place. At $17 this square is a steal, and honestly my favorite square in the shop.

I’ve always been a fan of ratcheting screwdrivers, and the Husky 12 in 1 Quick Change Ratcheting Screwdriver is the best of the bunch. Bit changes are a breeze as is changing the direction of the action. I love it so much I keep two in the shop stashed on either ends so one is always nearby.

Make sure to check out the affiliate links above for these Husky products, and follow along as I continue to build out the Husky Dream Shop!
Jonny