
Building an Epoxy Coffee Table
Disclaimer: This post is sponsored by The Home Depot and contains reviews for several tools that I received as part of a paid partnership with The Home Depot Prospective tool review program. While I am being paid to review some of the tools in this article, those reviews are my honest opinions. Thanks.
Materials/Tools:
4/4 Ash
6/4 Soft Maple
3 gal Total Boat Thick Set Epoxy
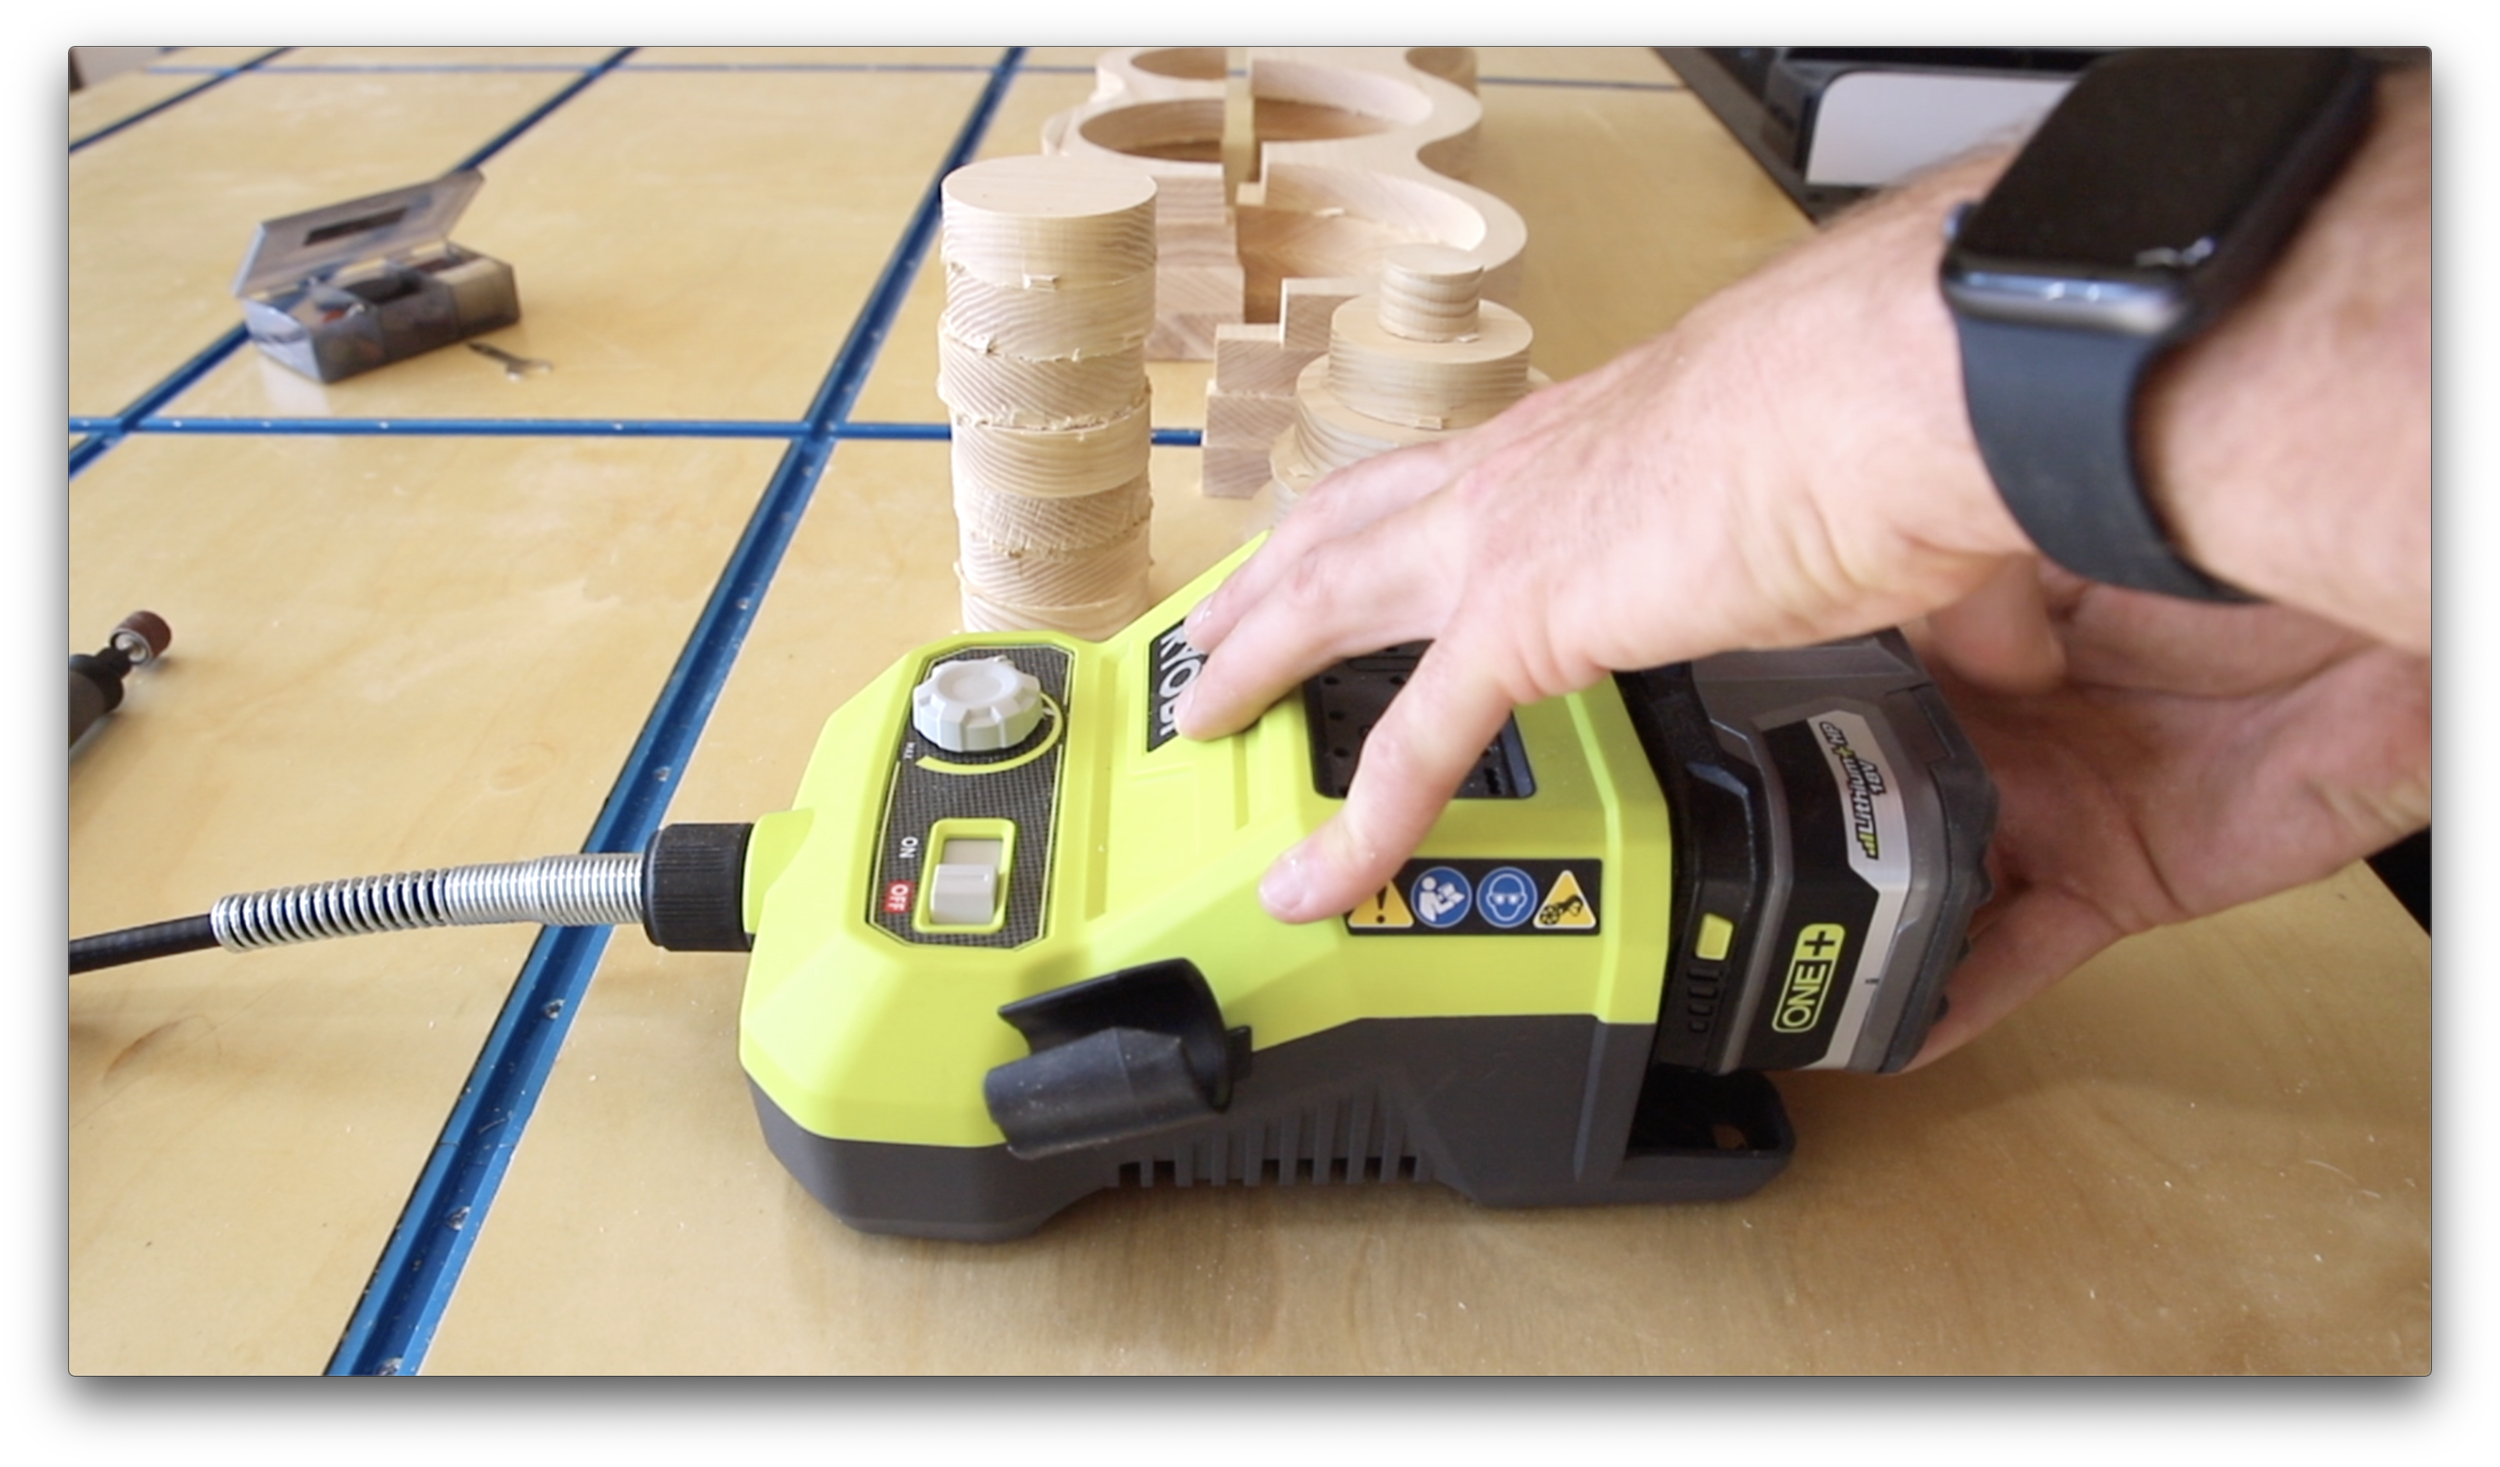
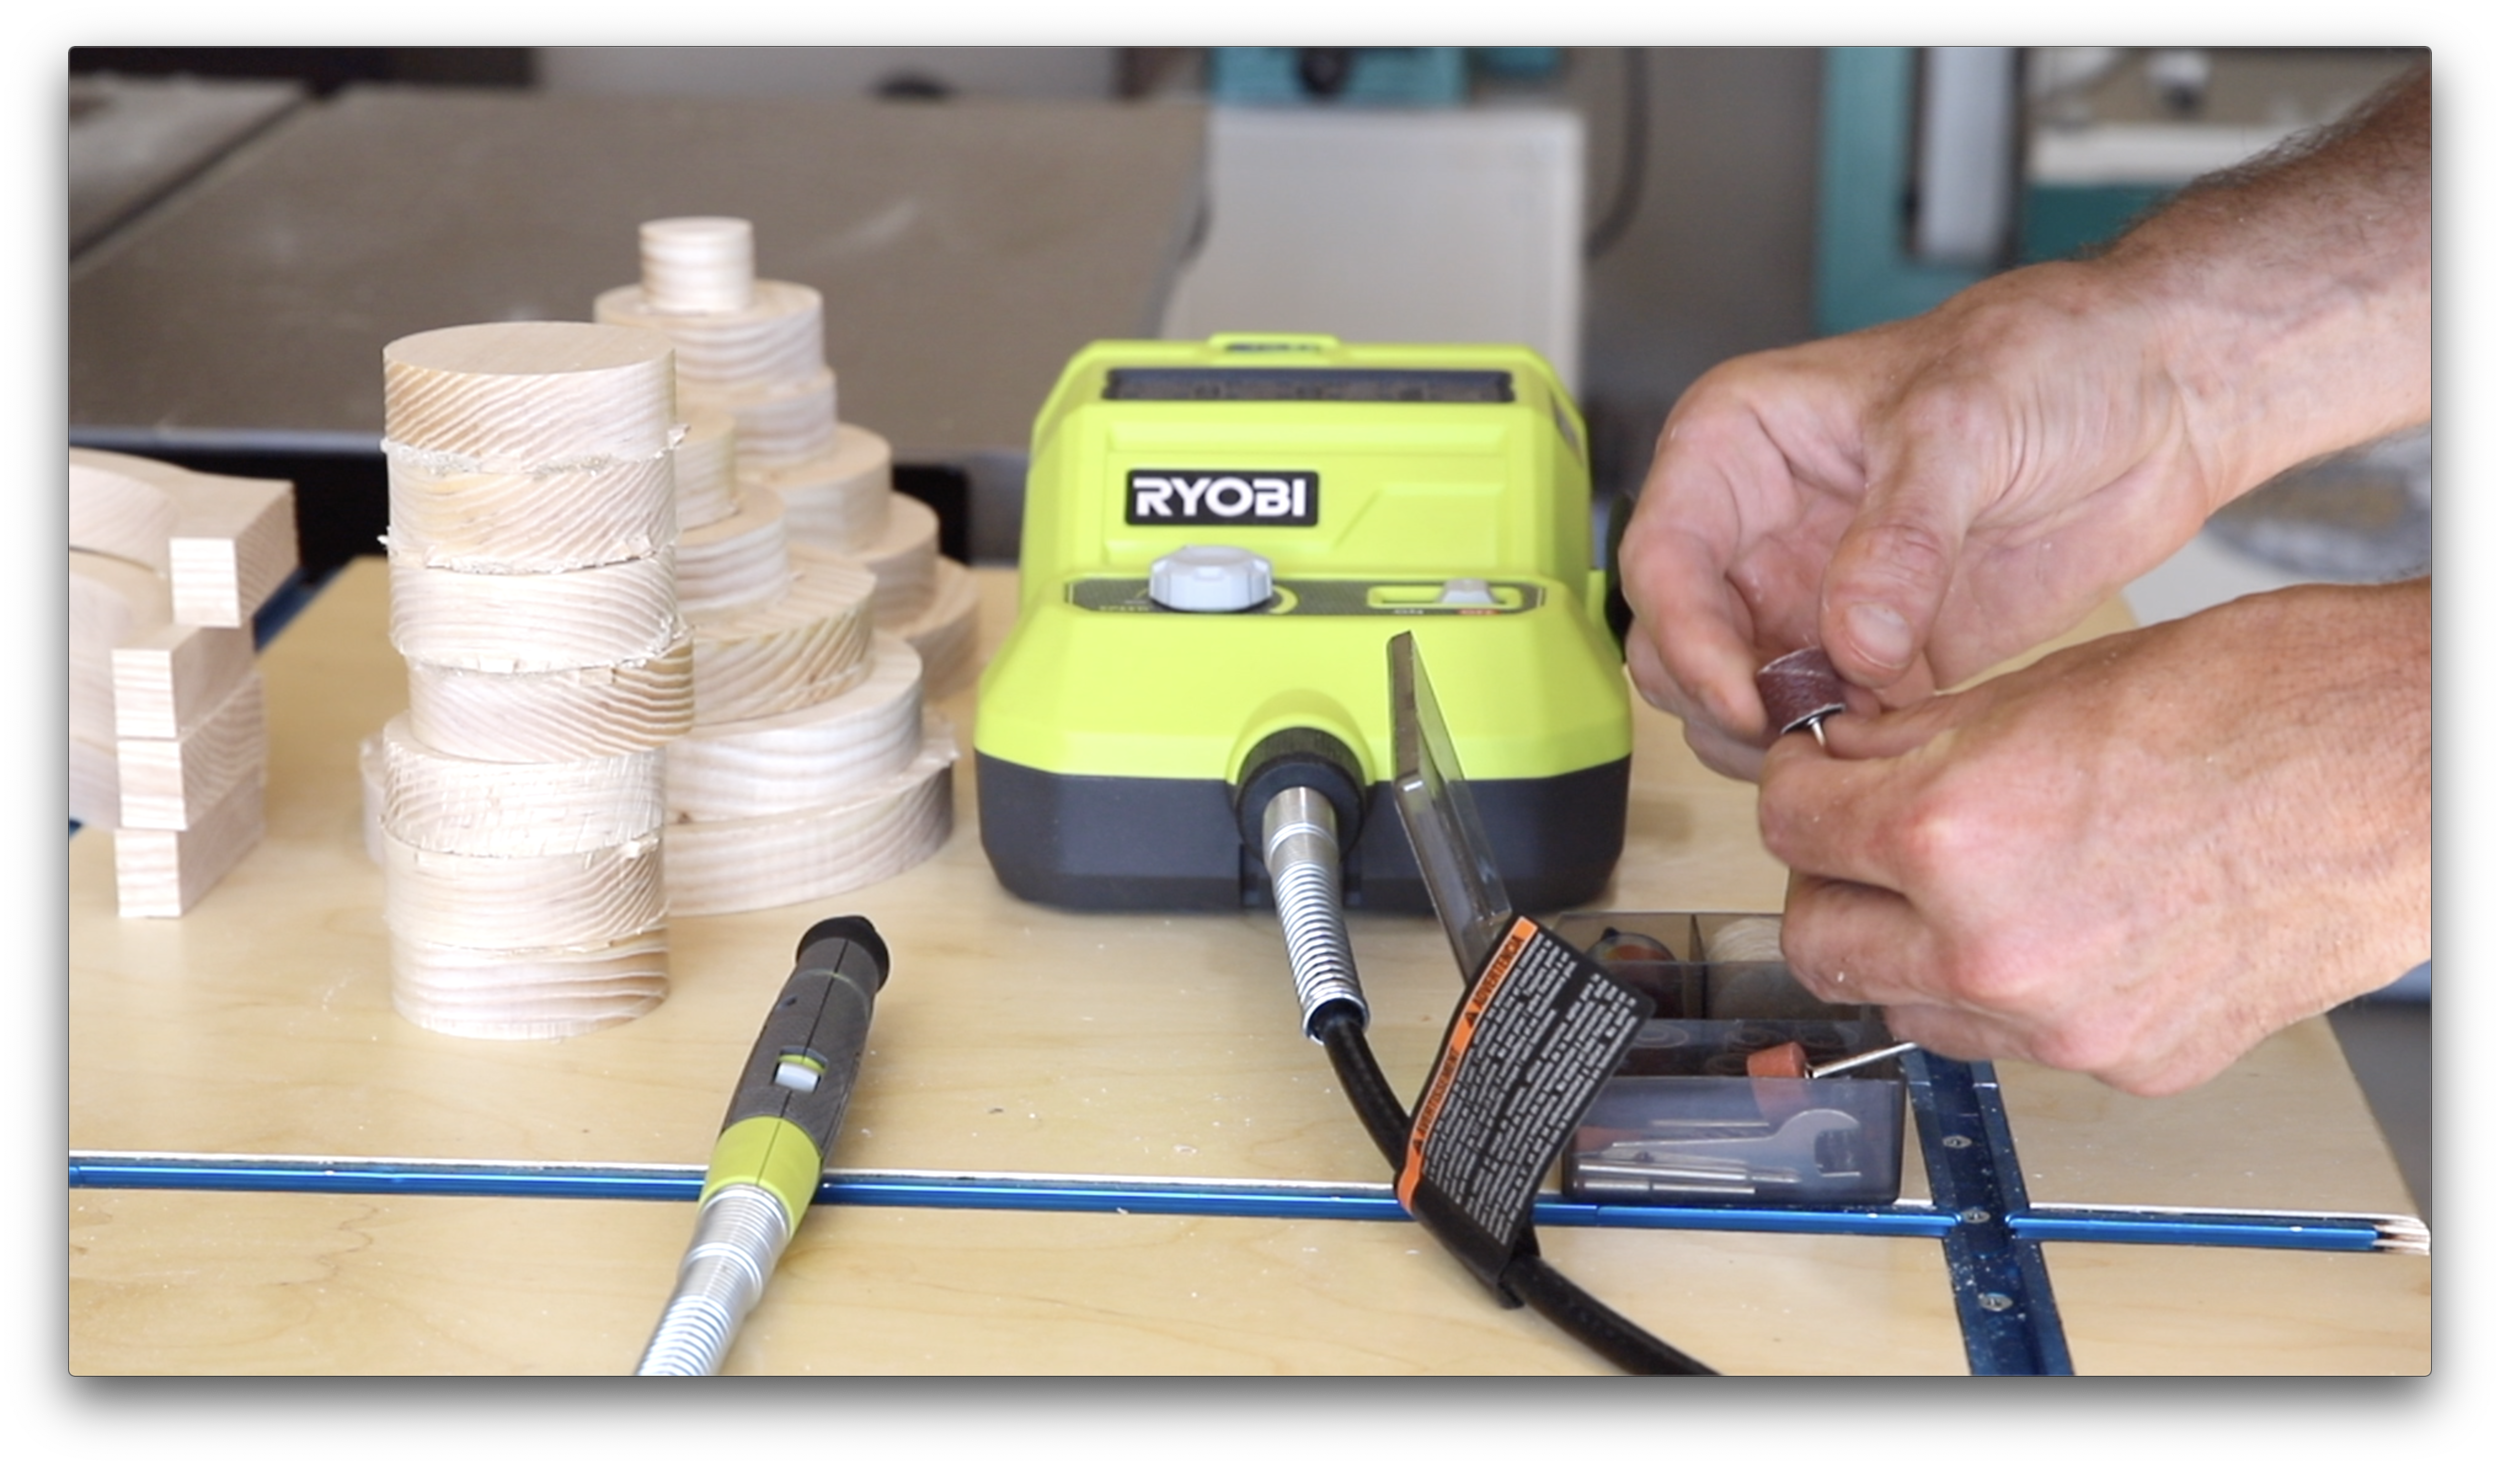
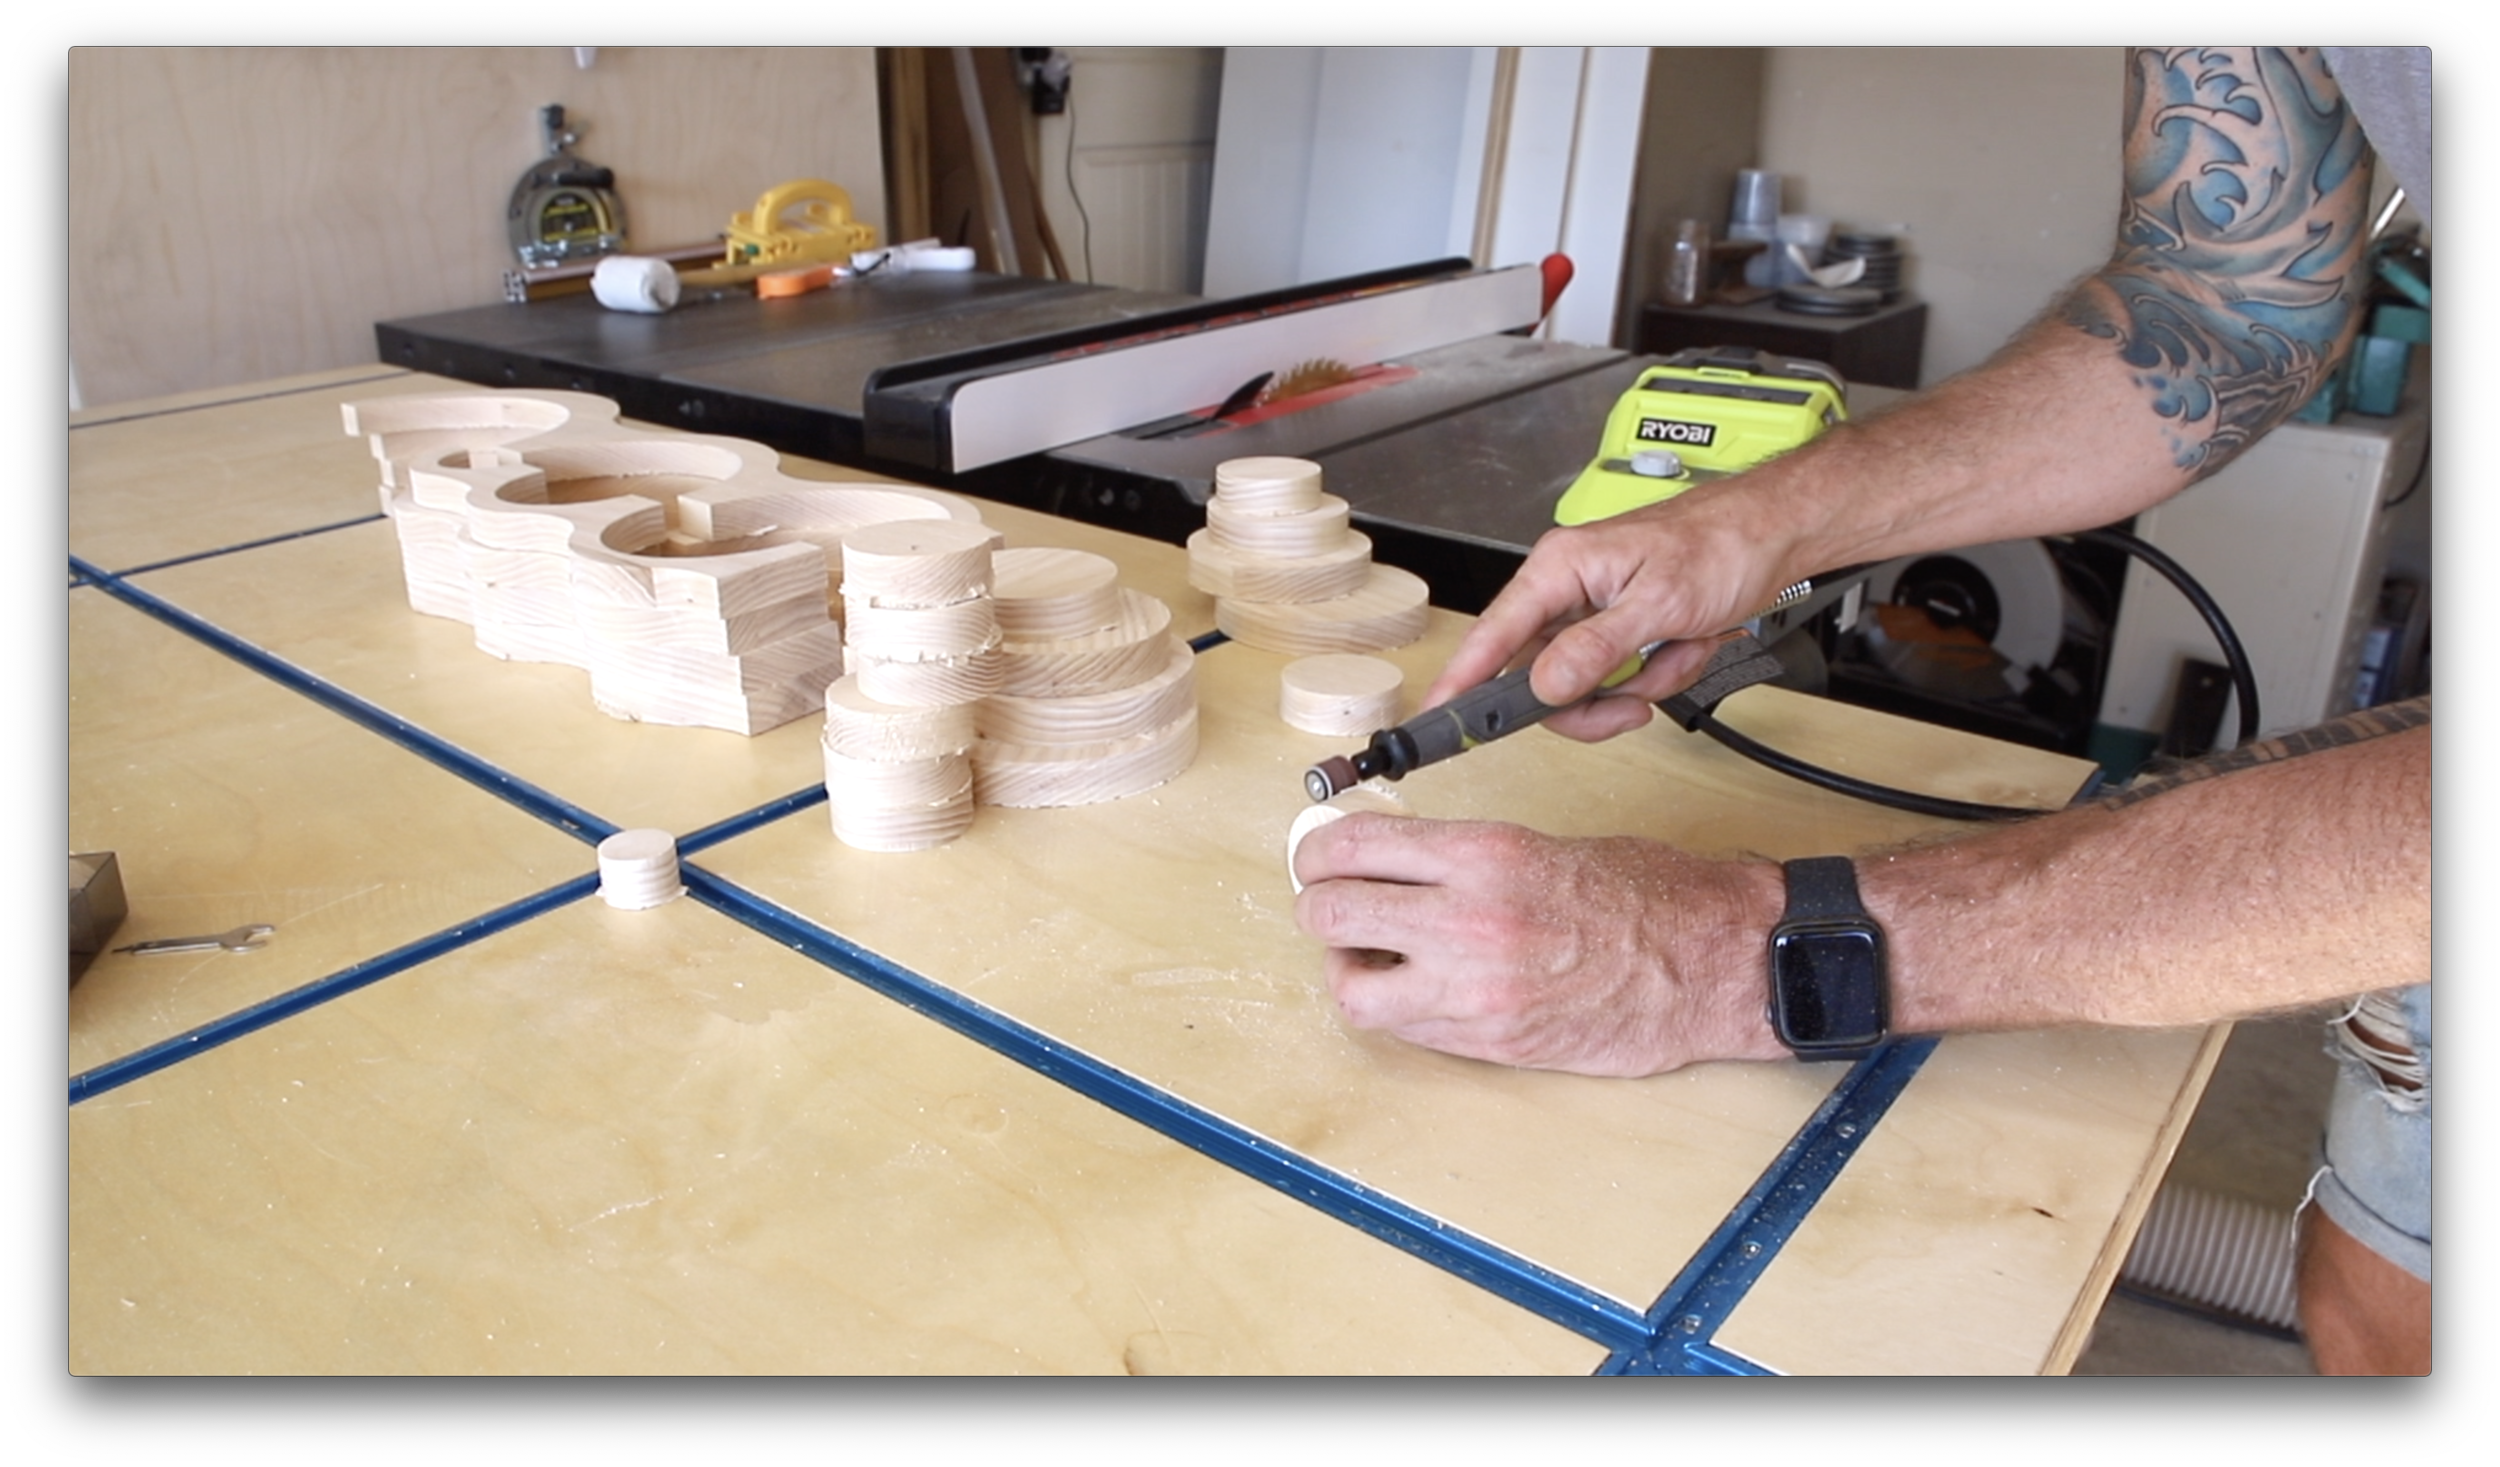
Ryobi ONE+ 18V Rotary Tool - link to purchase
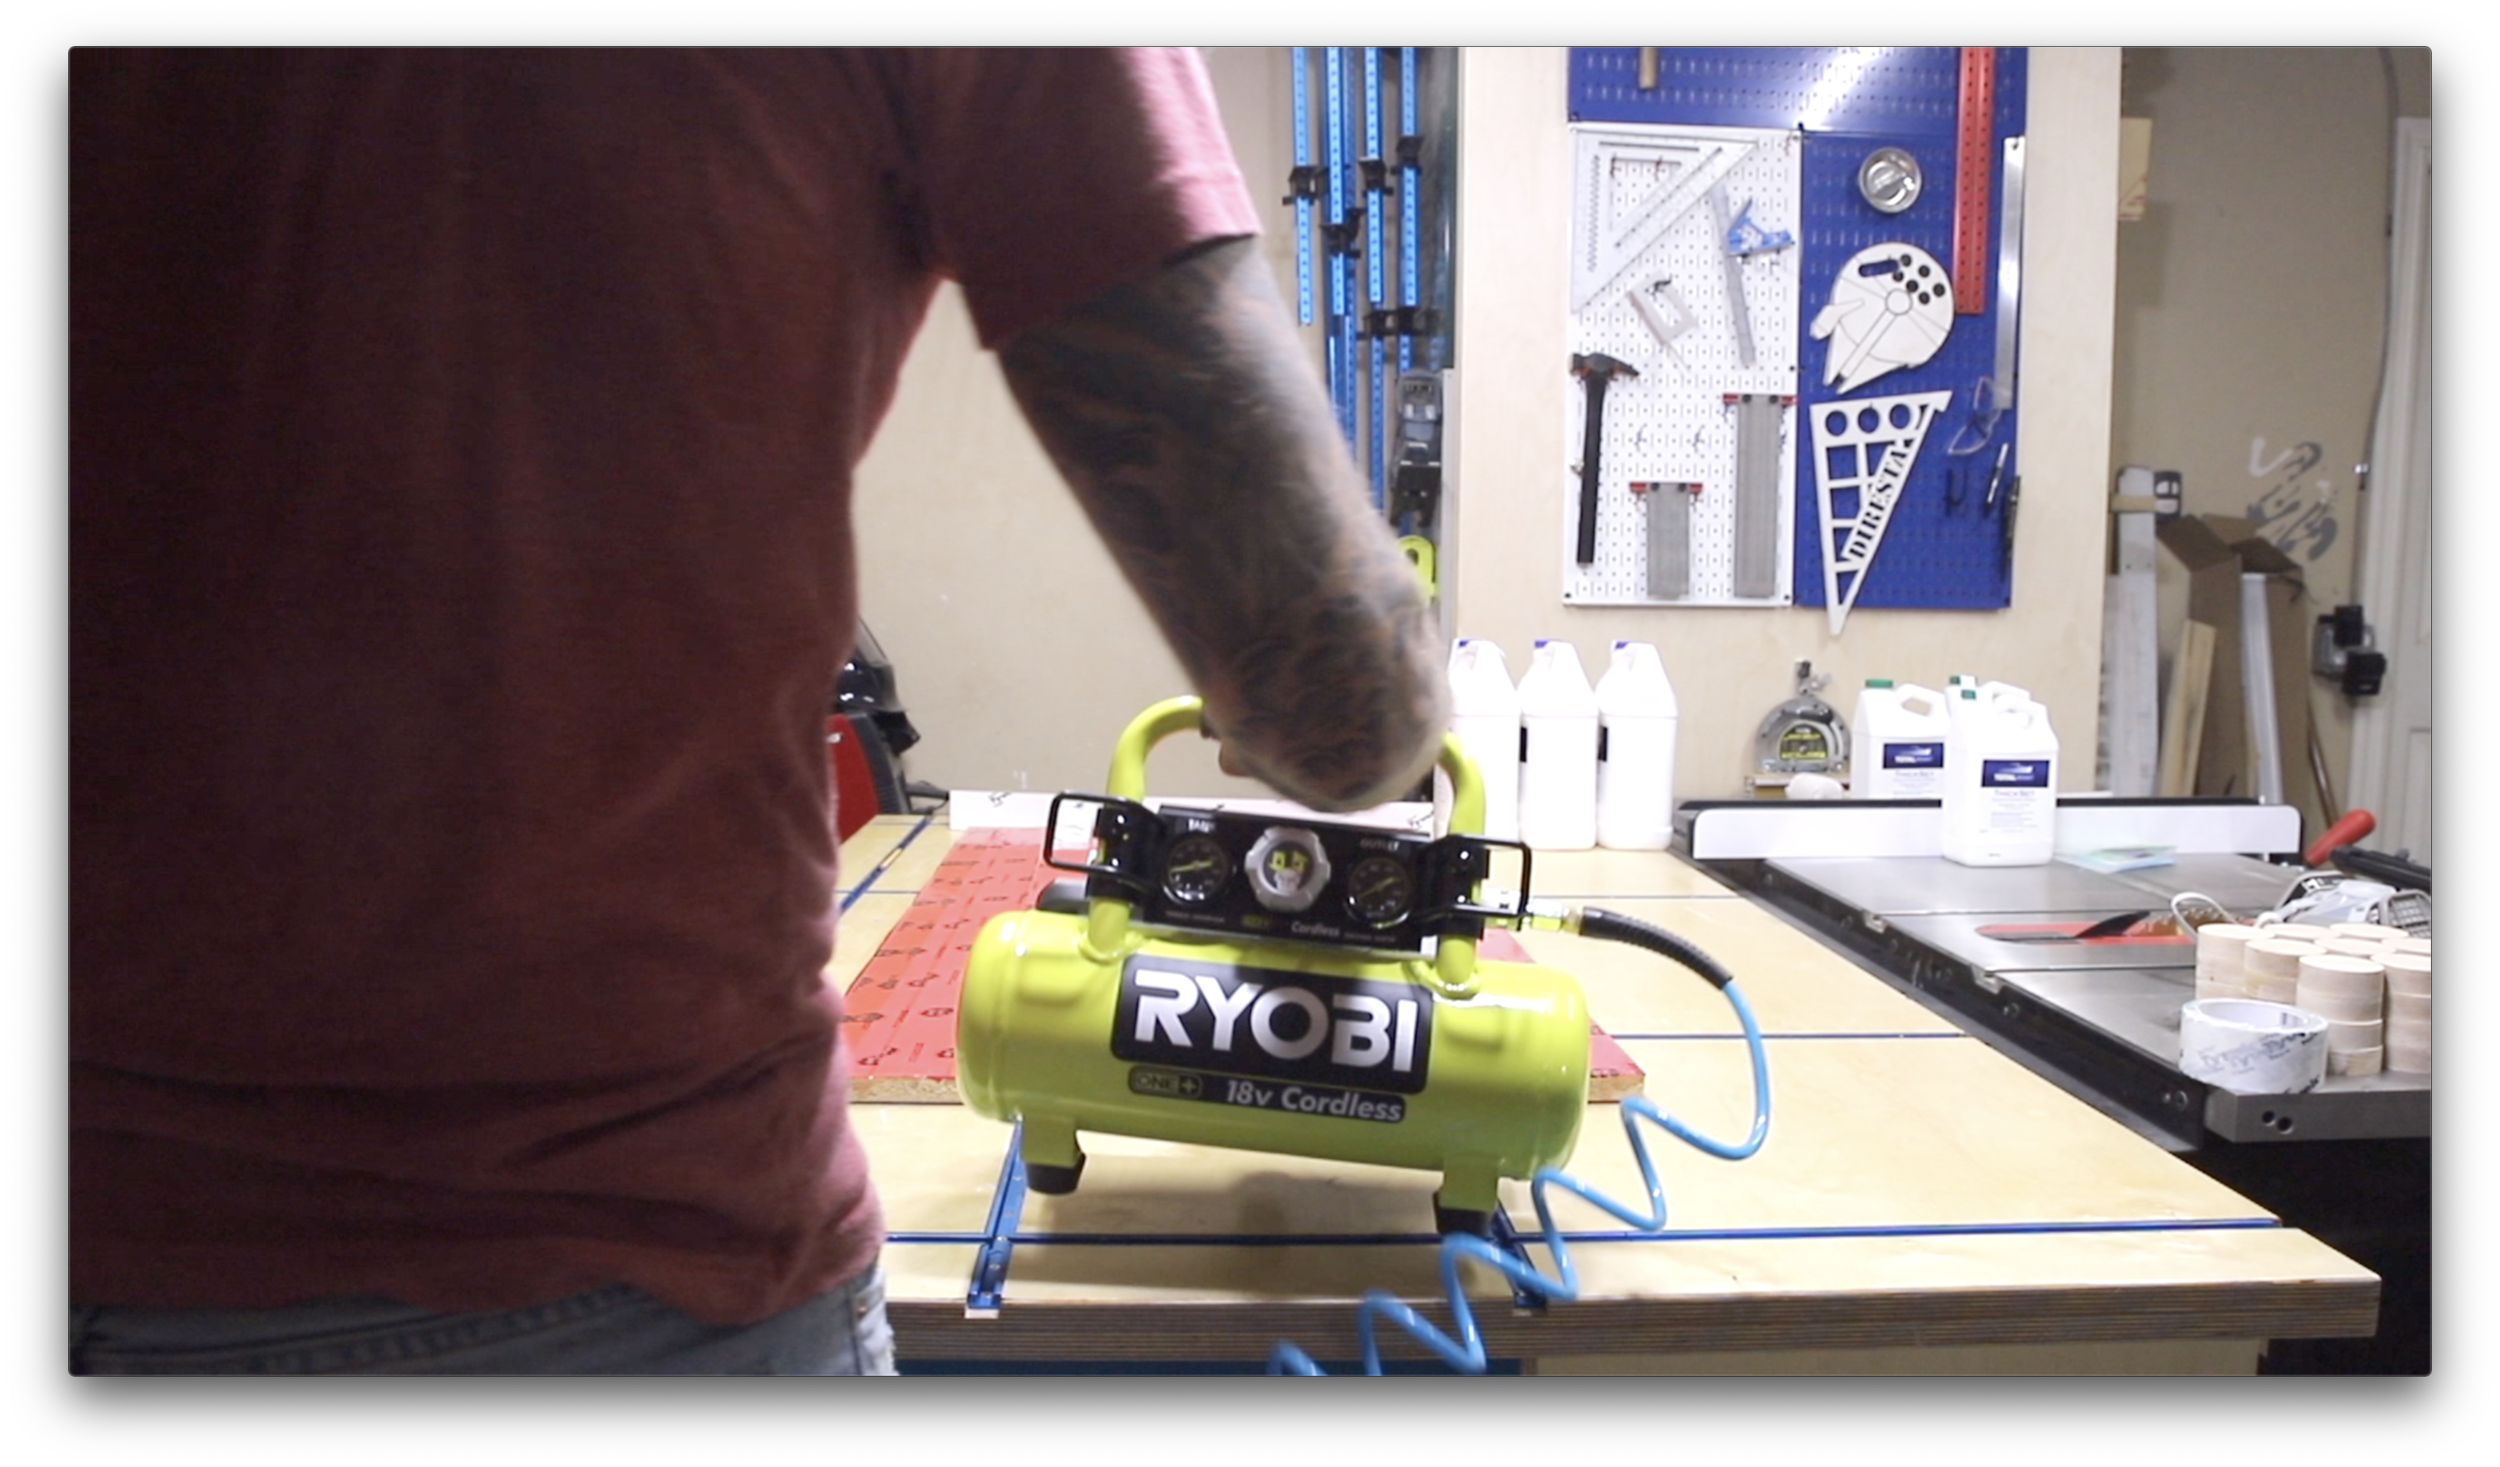
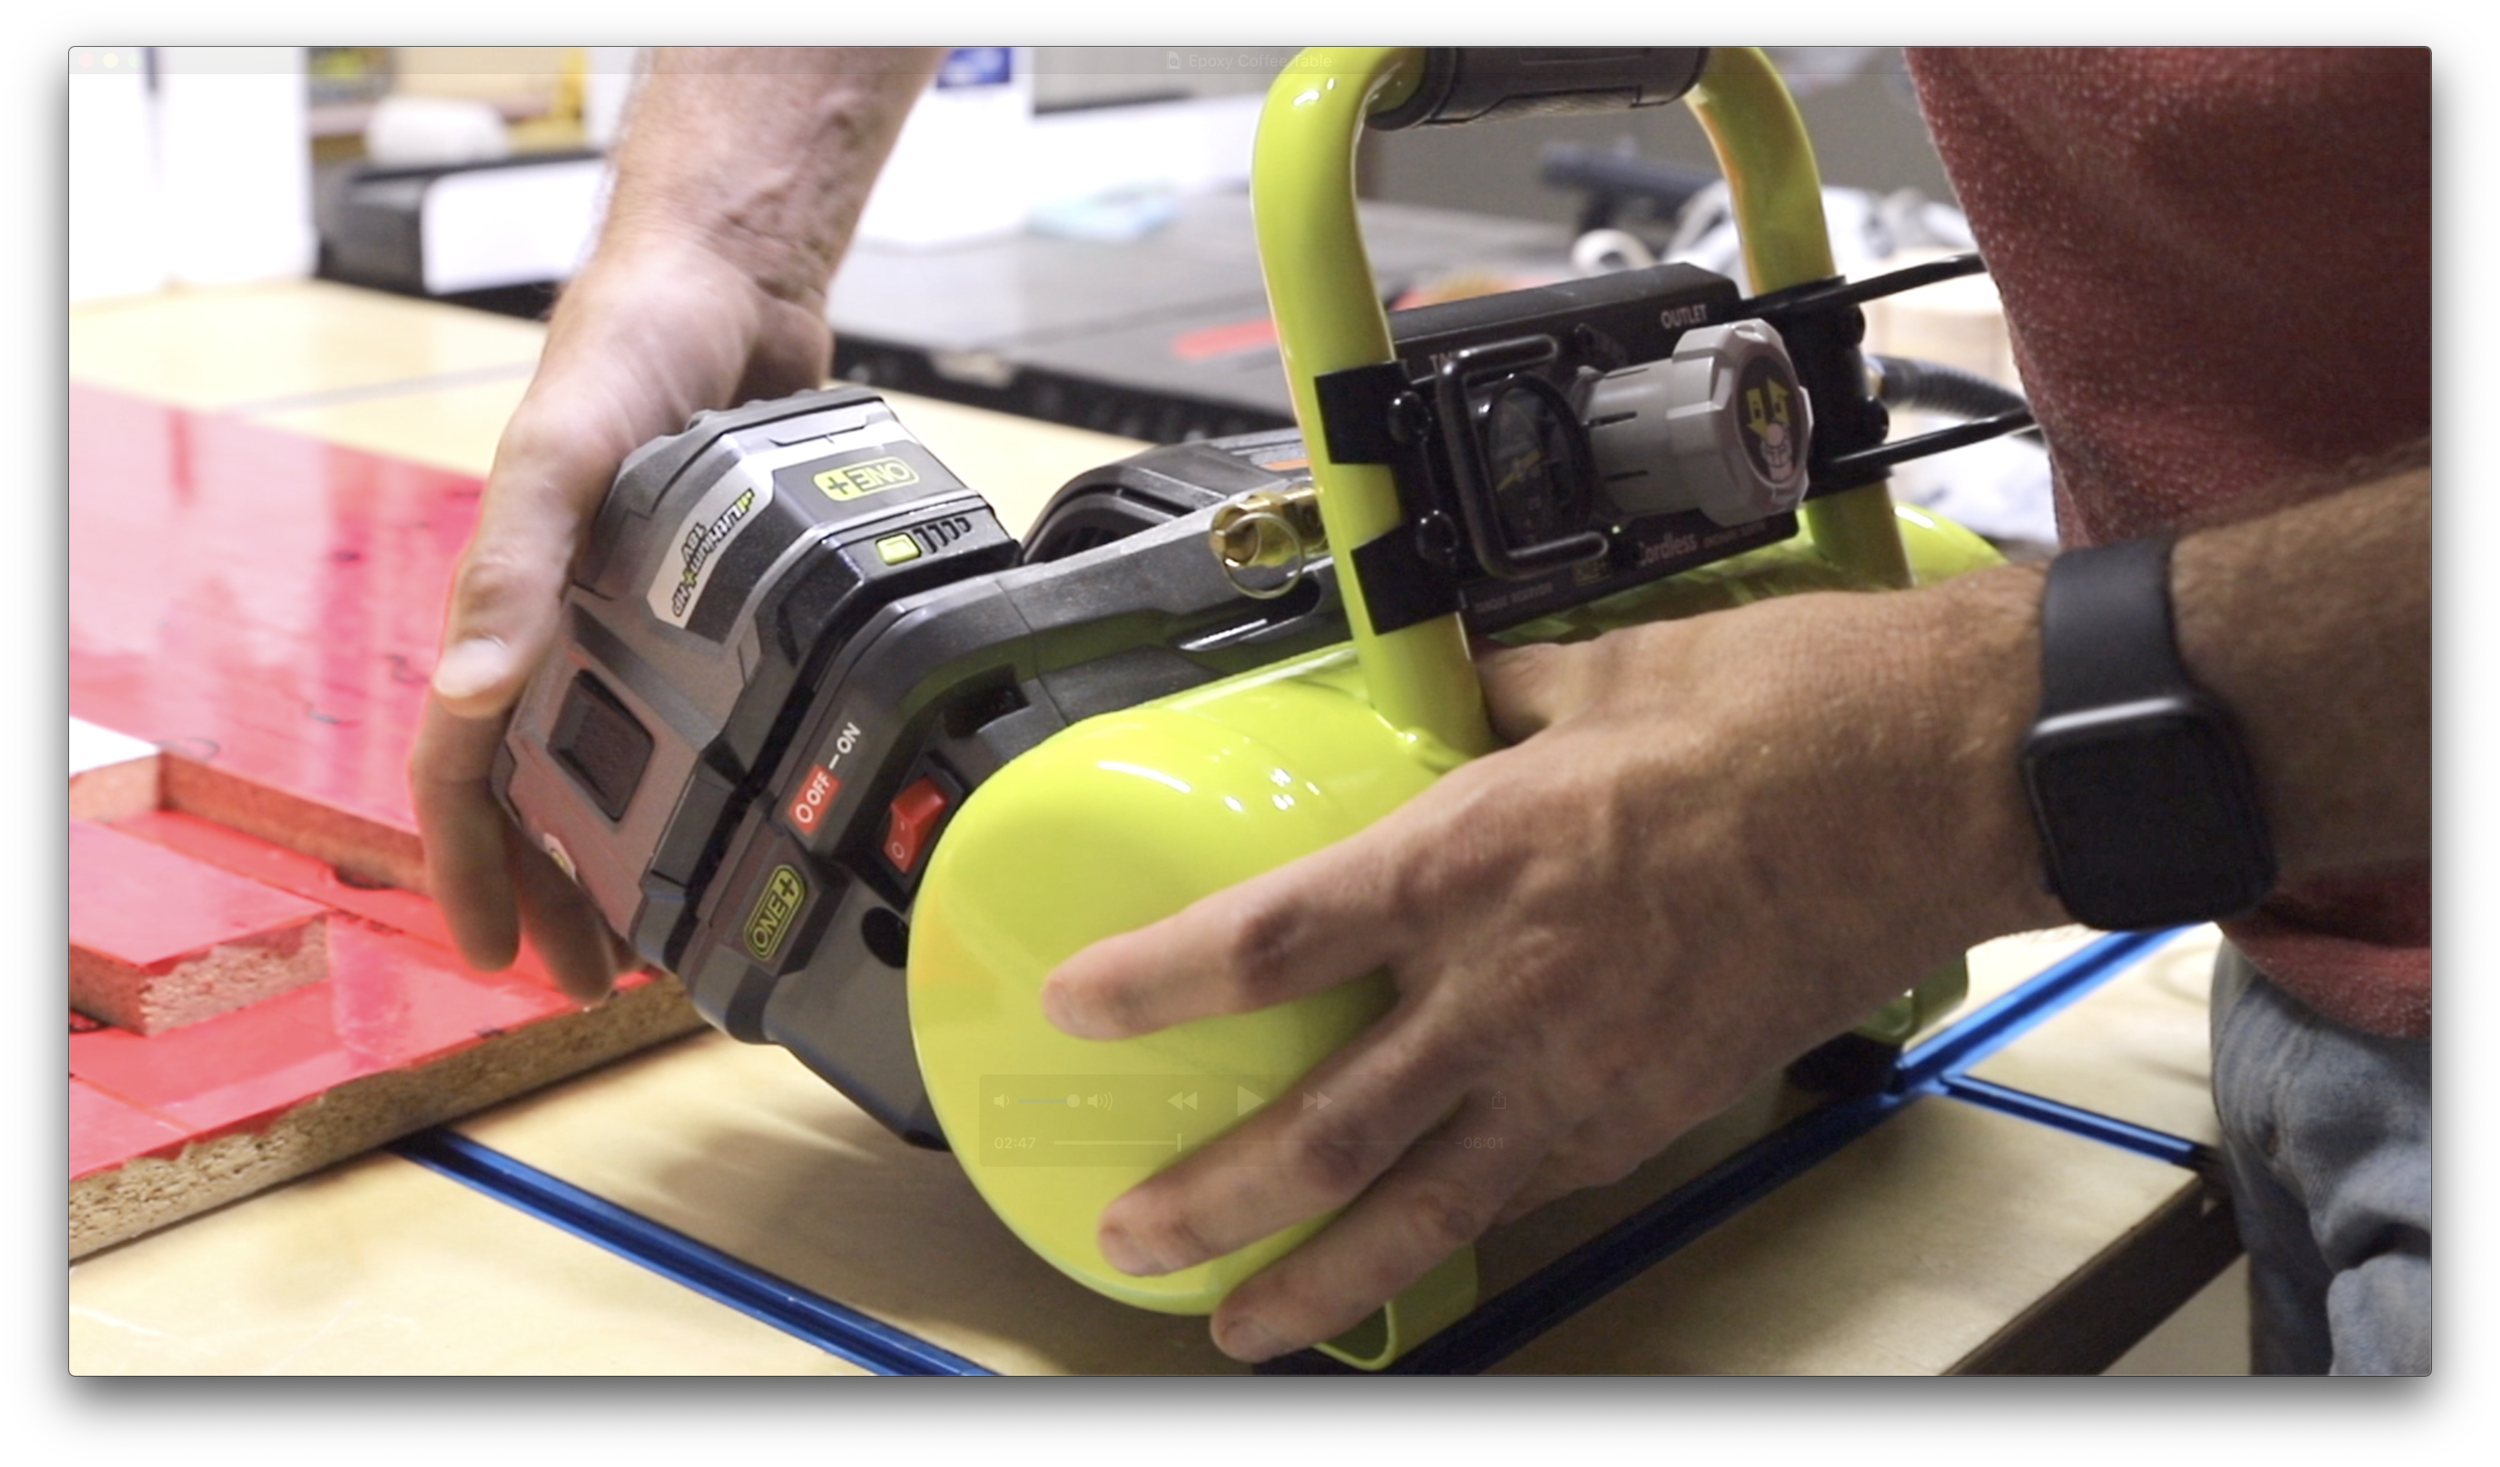
Ryobi ONE+ 1 Gallon Compressor - link to purchase
Ryobi ONE+ Trim Router - link to purchase

I’ve been wanting to build a resin and wood coffee table for some time now, but I wanted to try something a bit unique. This project was inspired by solar system diagrams, so I incorporated some of those shapes without trying to make it look like a solar system diagram. The end result was a bit different than what I had in mind, but this was a fun project nevertheless. I’m told this looks like a crop circle table.
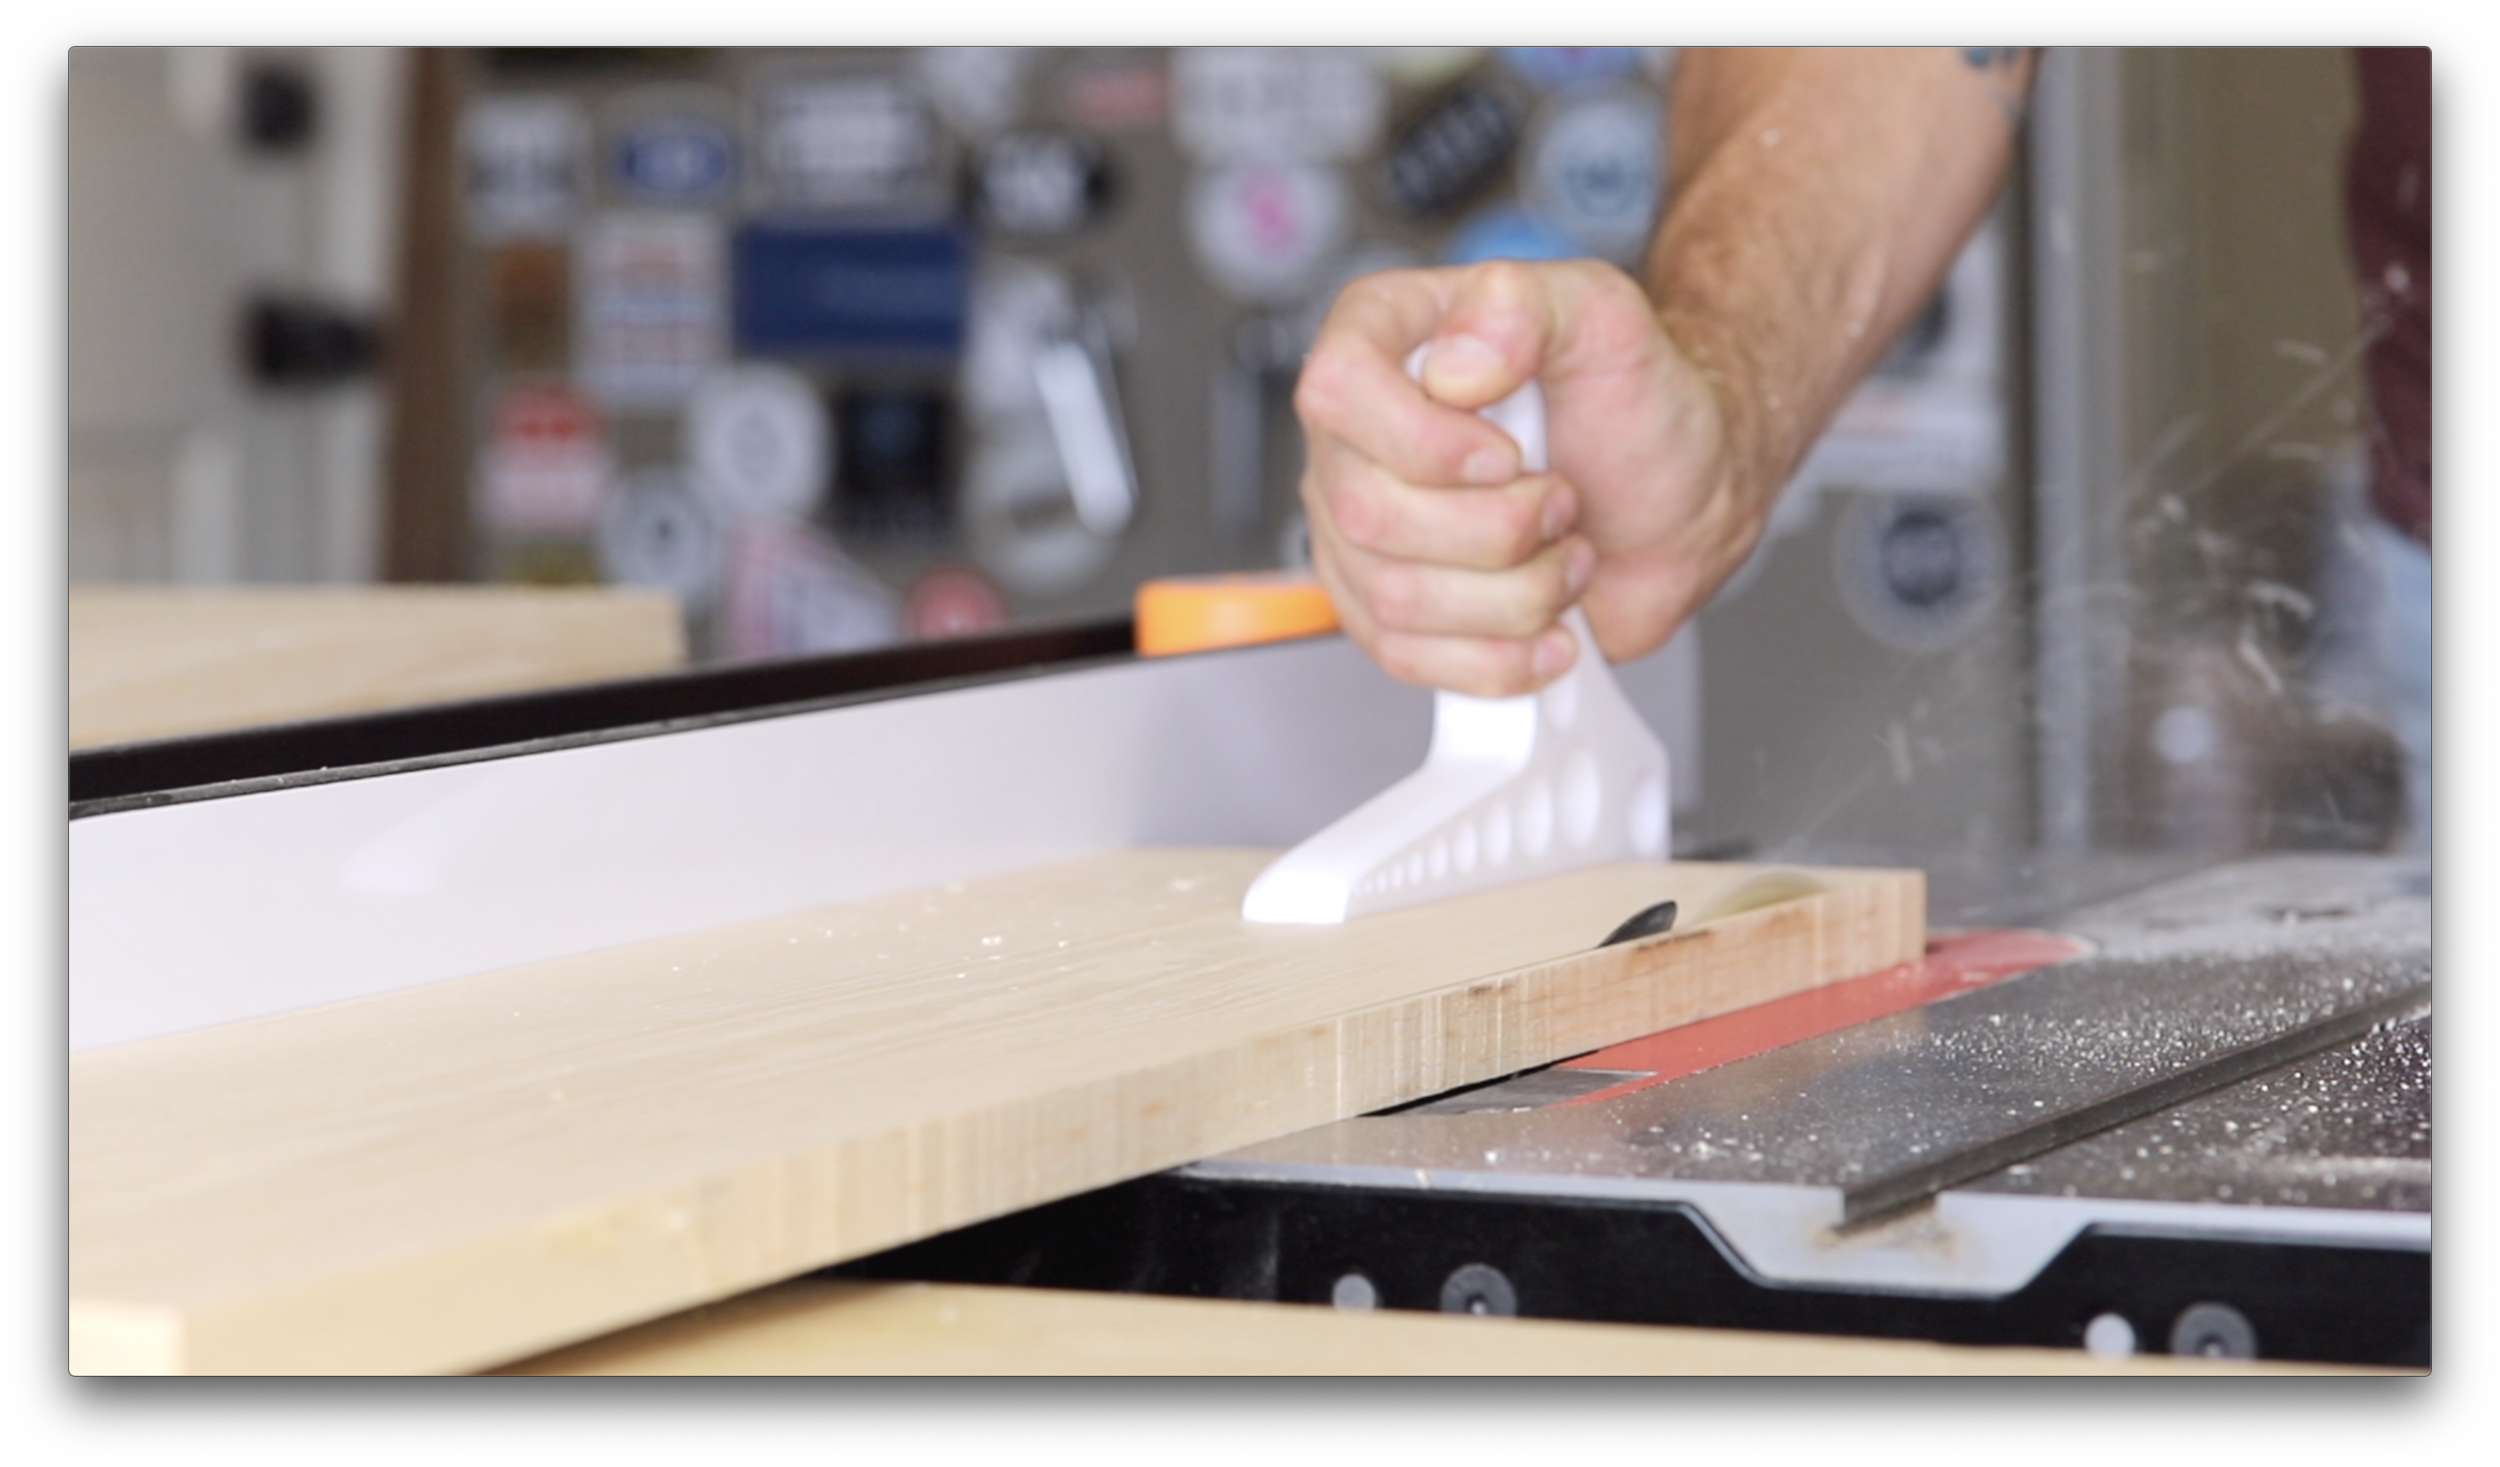
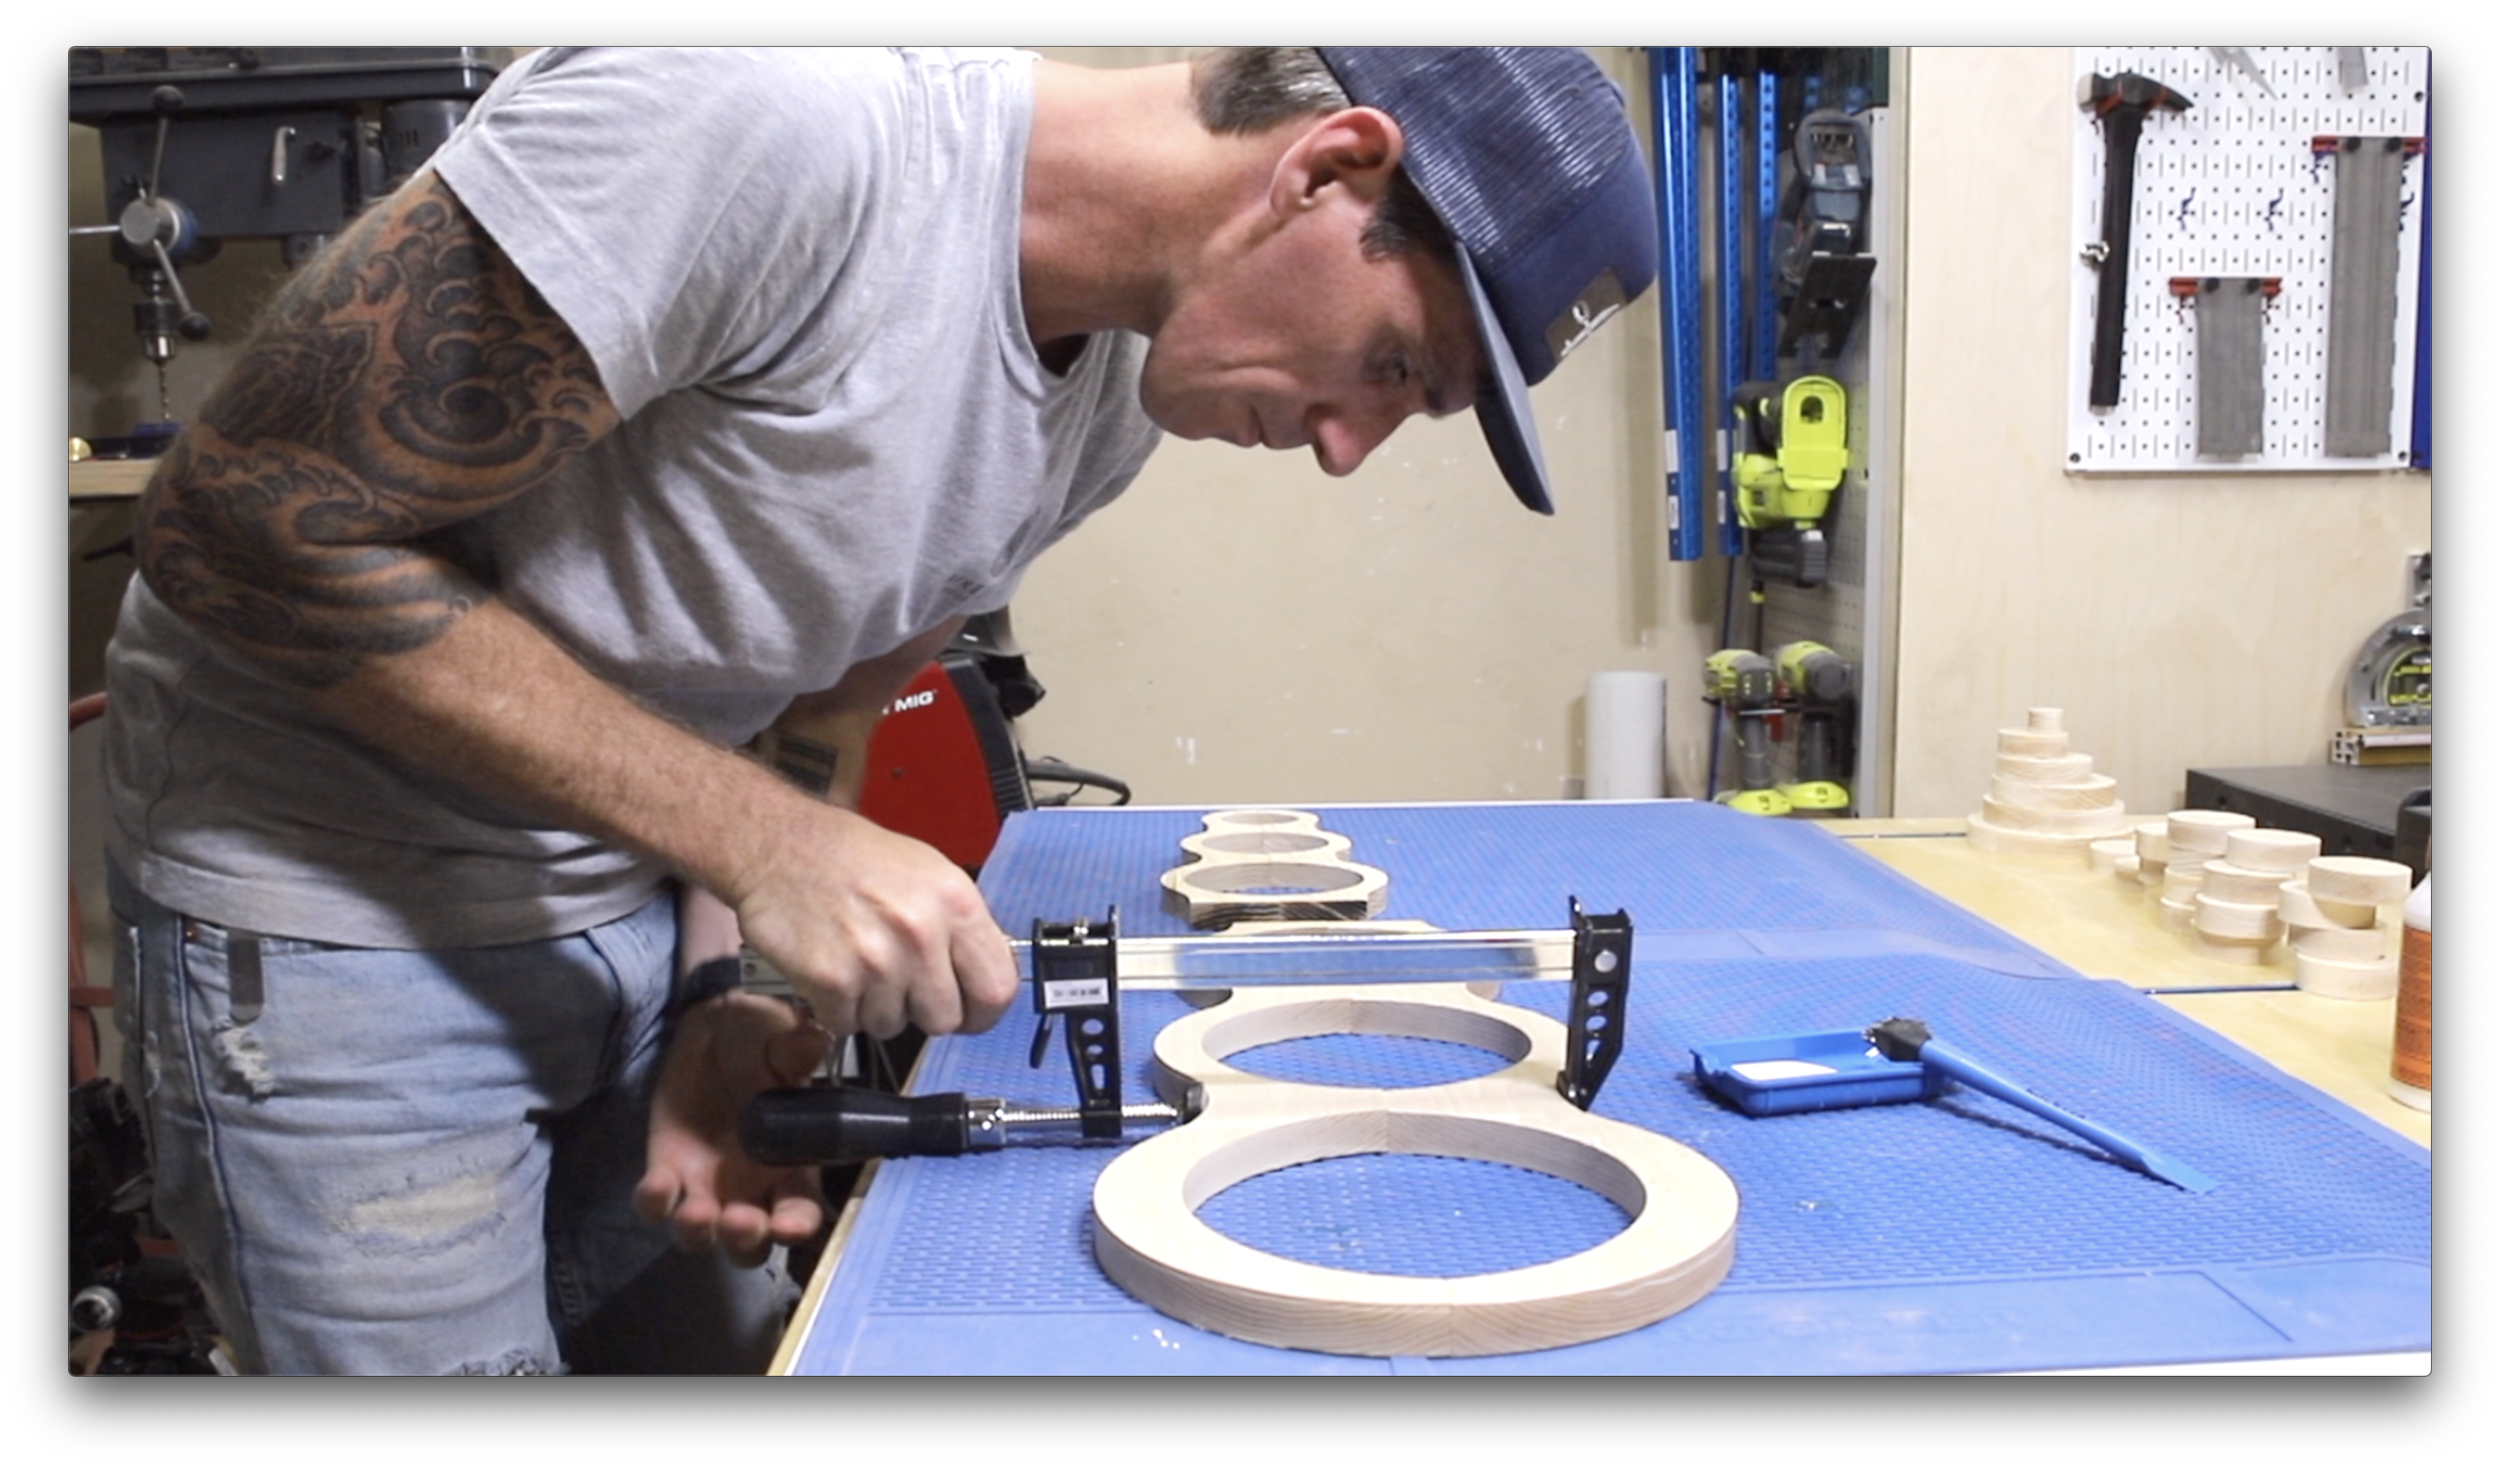
On to the build, I’m using 4/4 Ash hardwood to make 2 panels that are 30”x24”. This will allow the panels to fit in the bed of my X-Carve CNC. To create the cod for the CNC software I modeled the design in Sketch-up, and then exported that as an .SVG that I could plug into the Easel software. I set up the machine and carved out all my shapes.


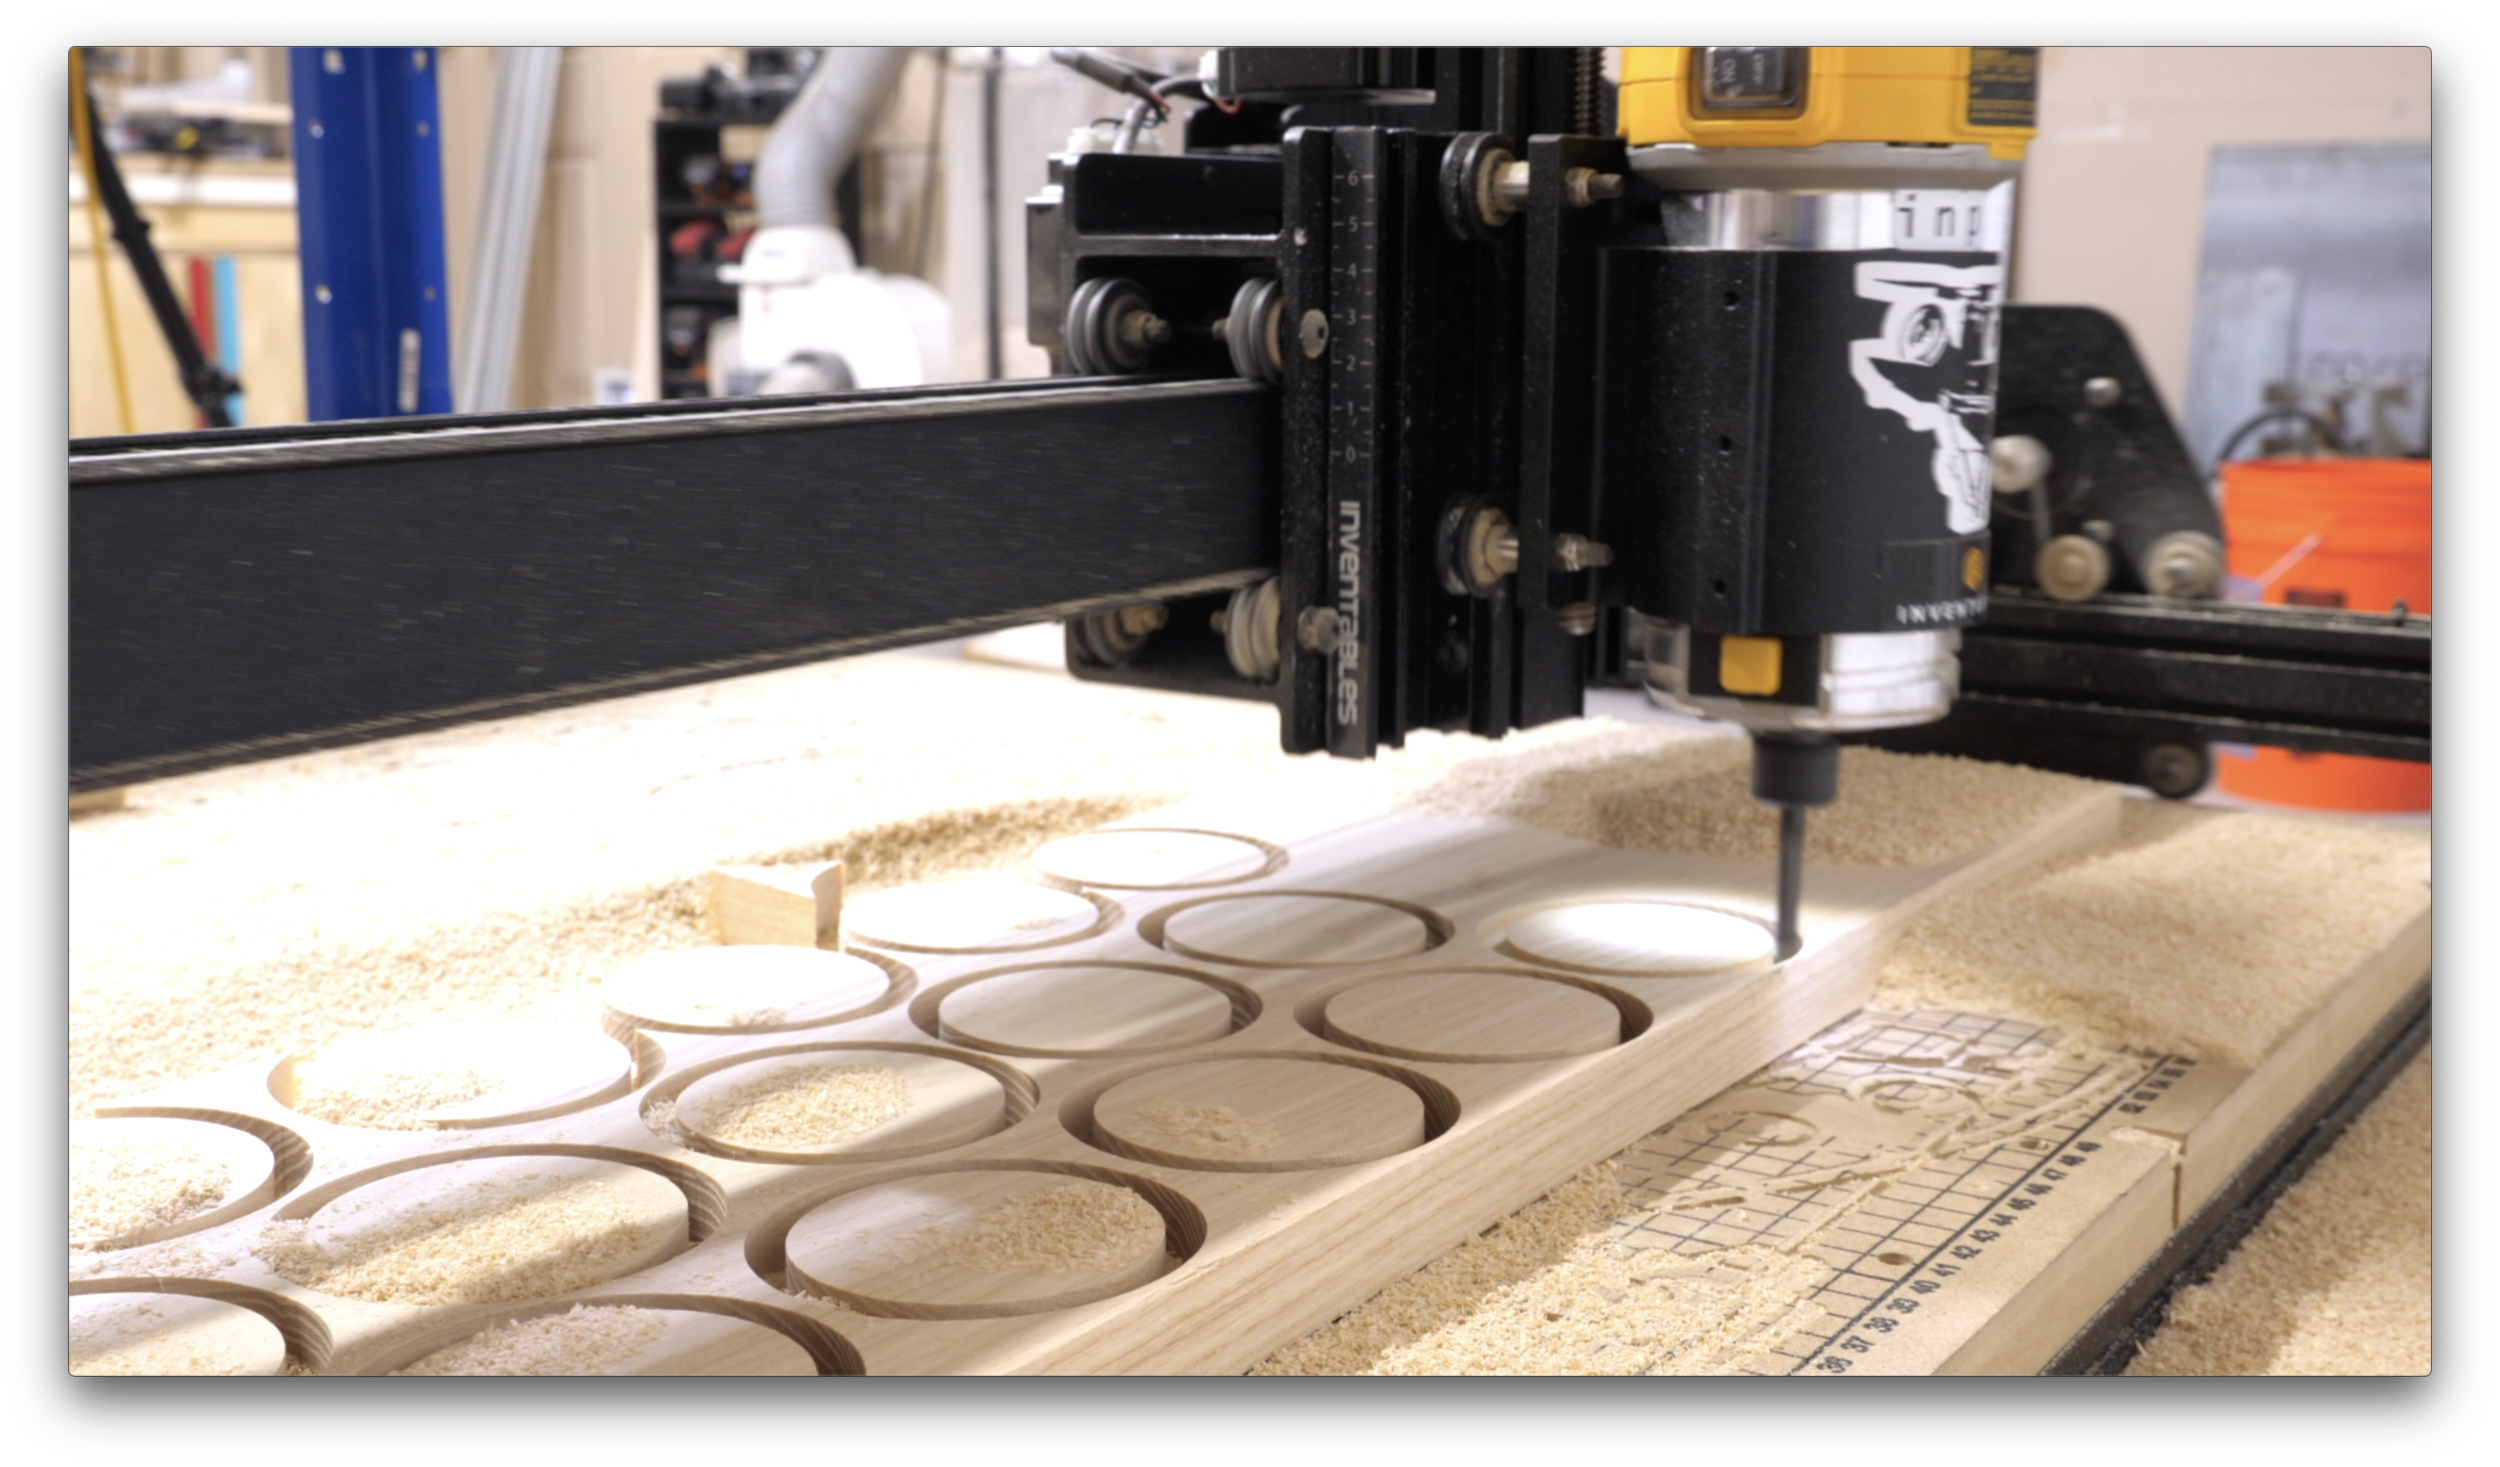
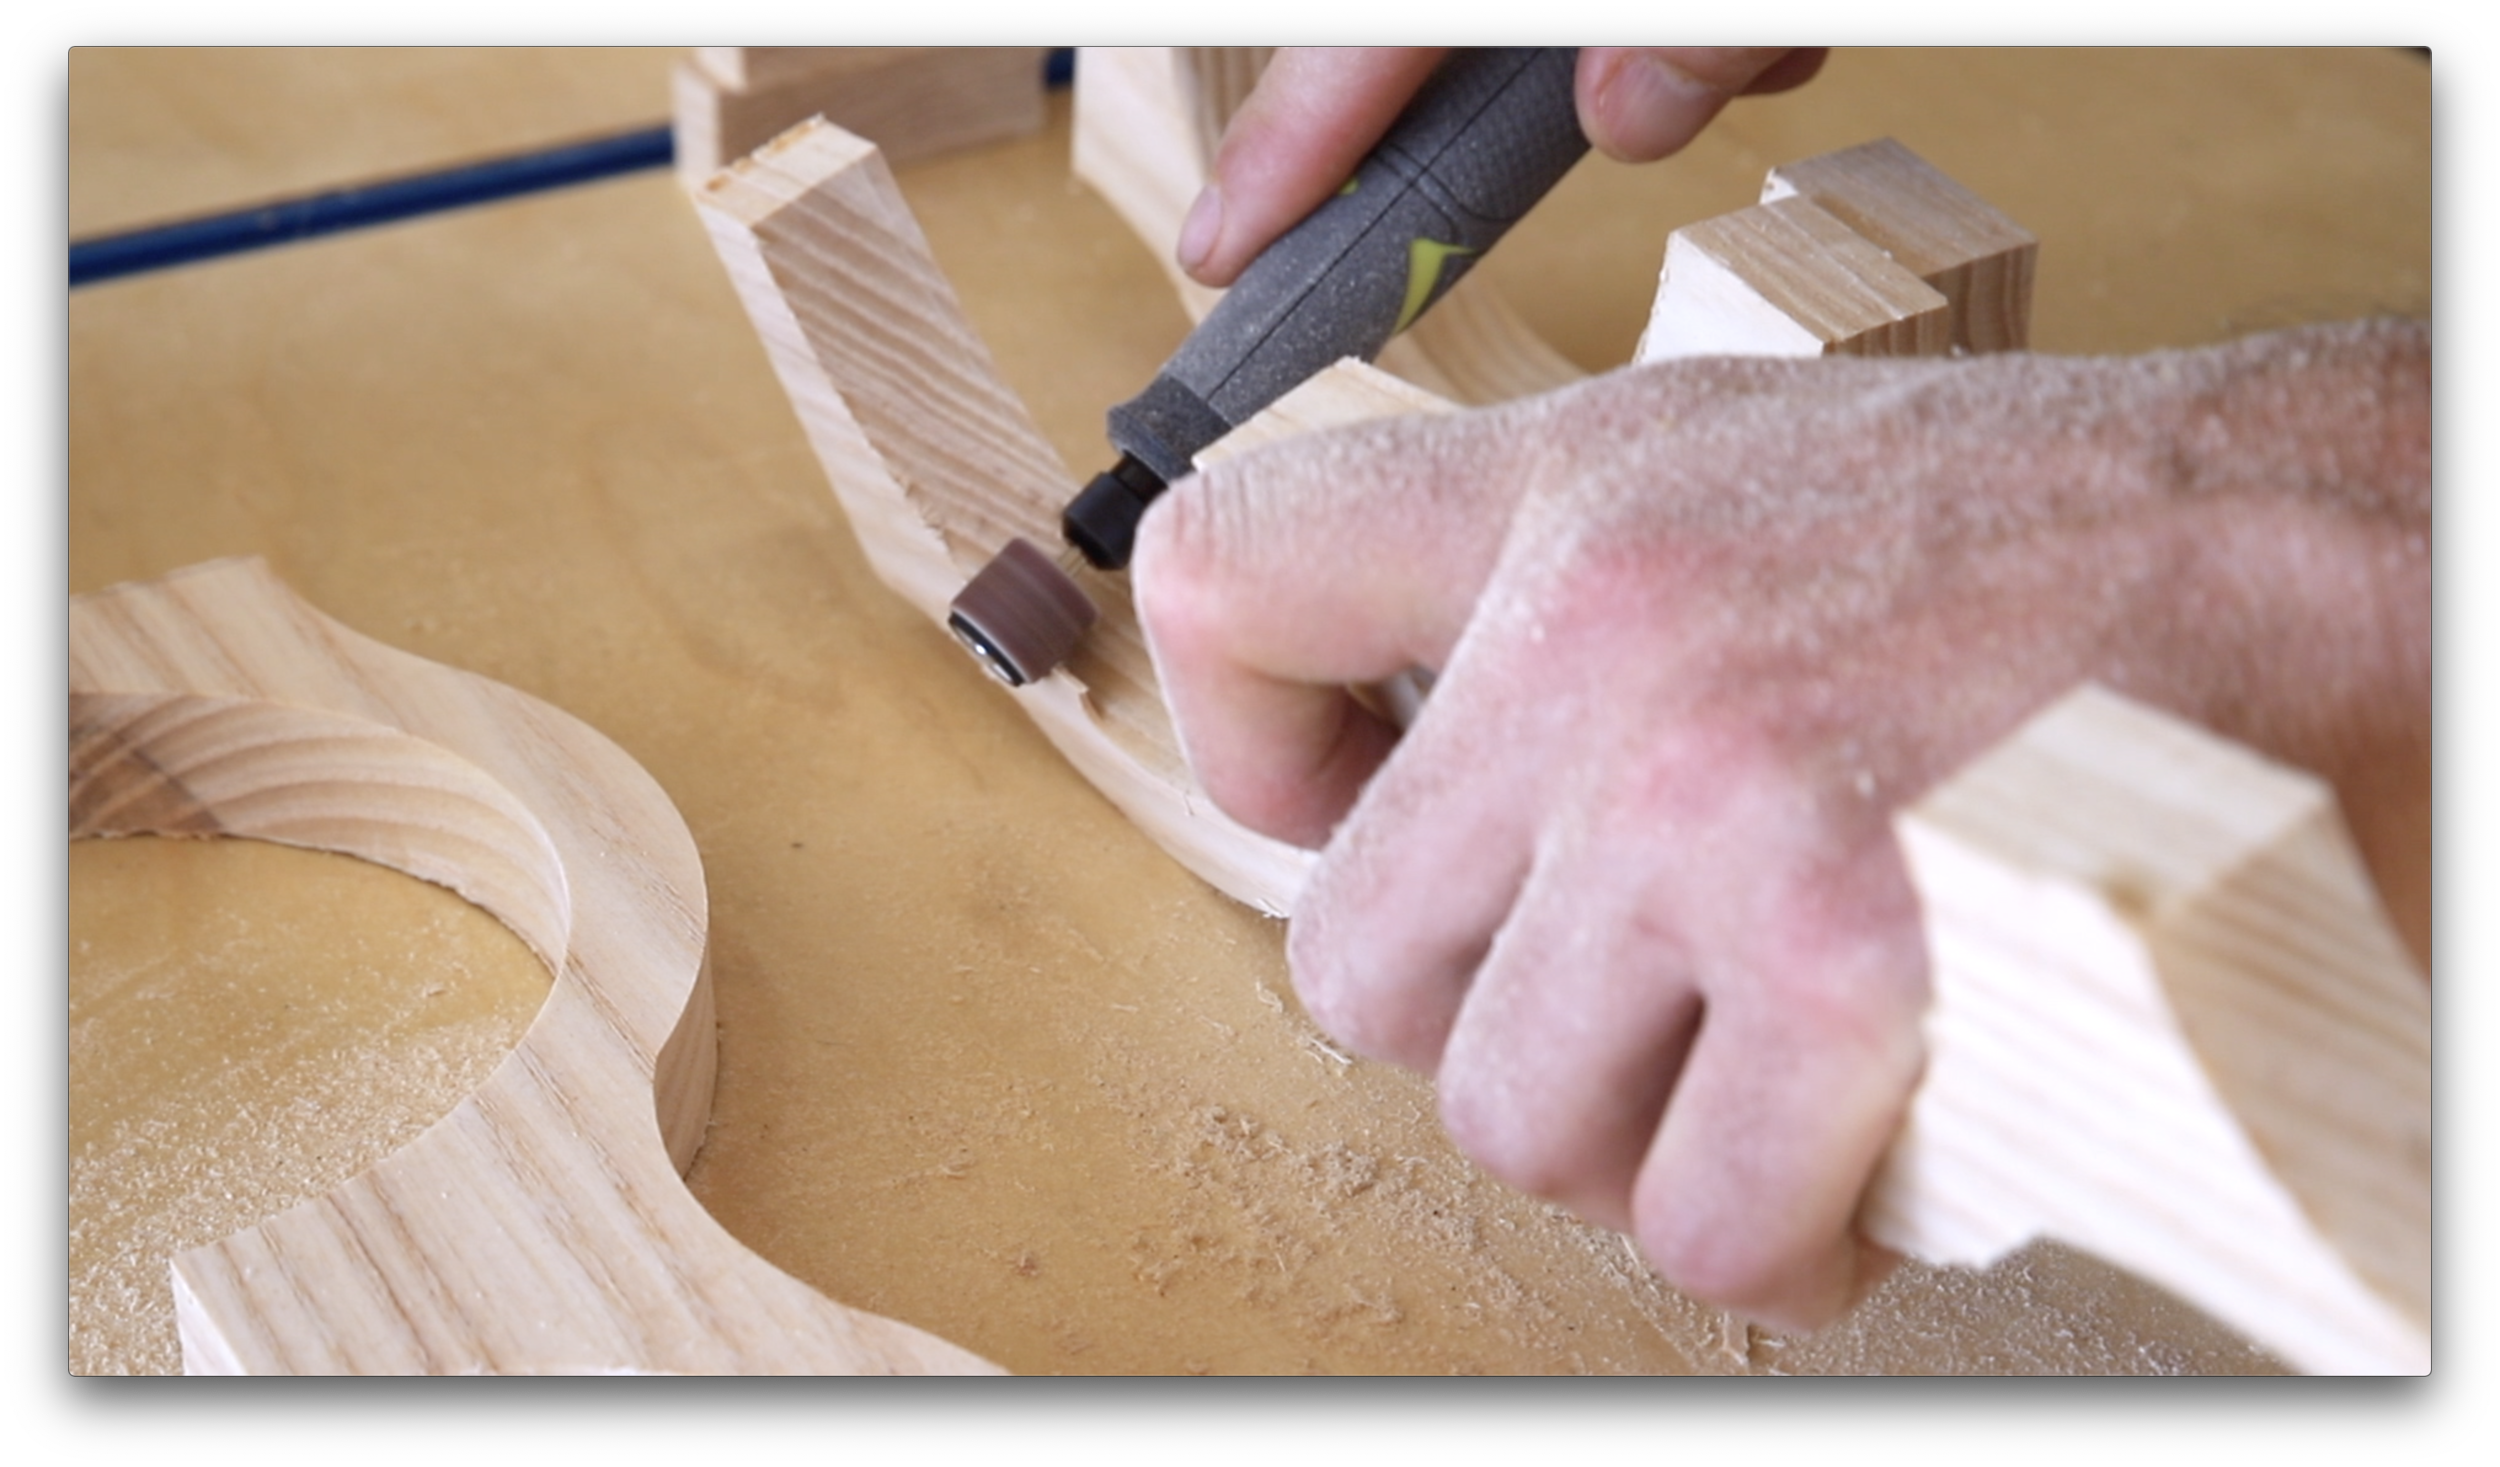
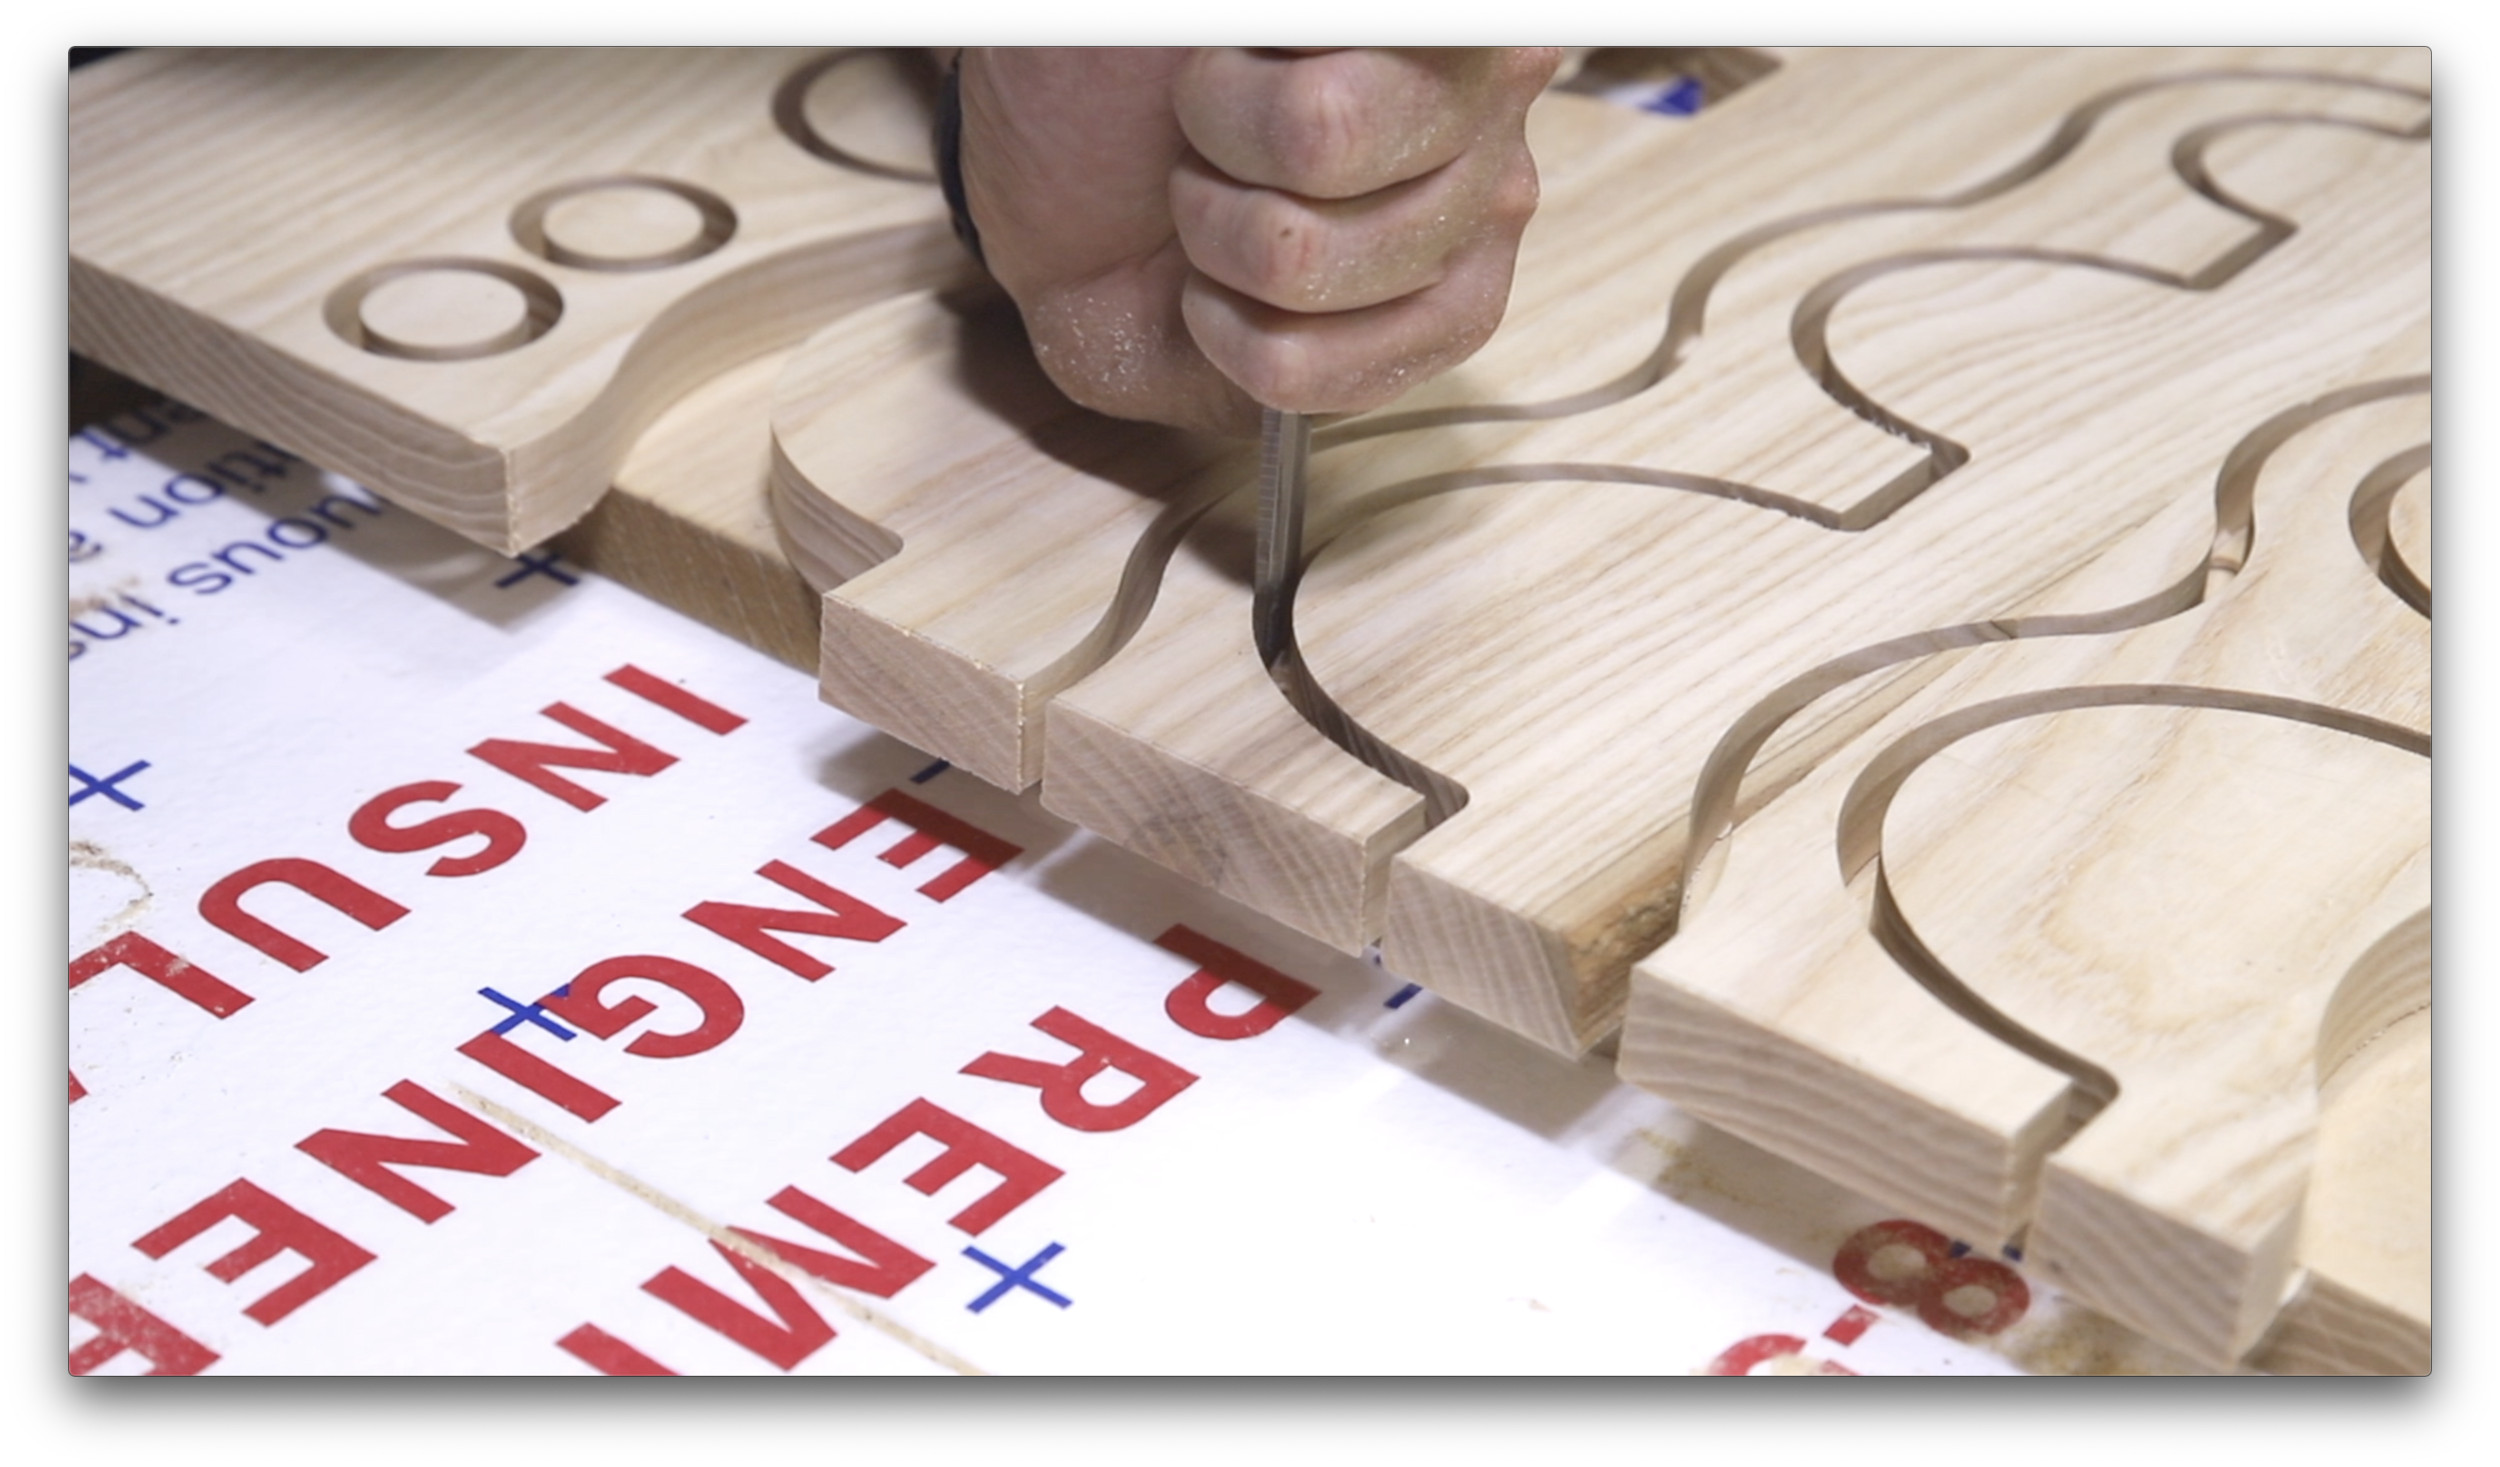
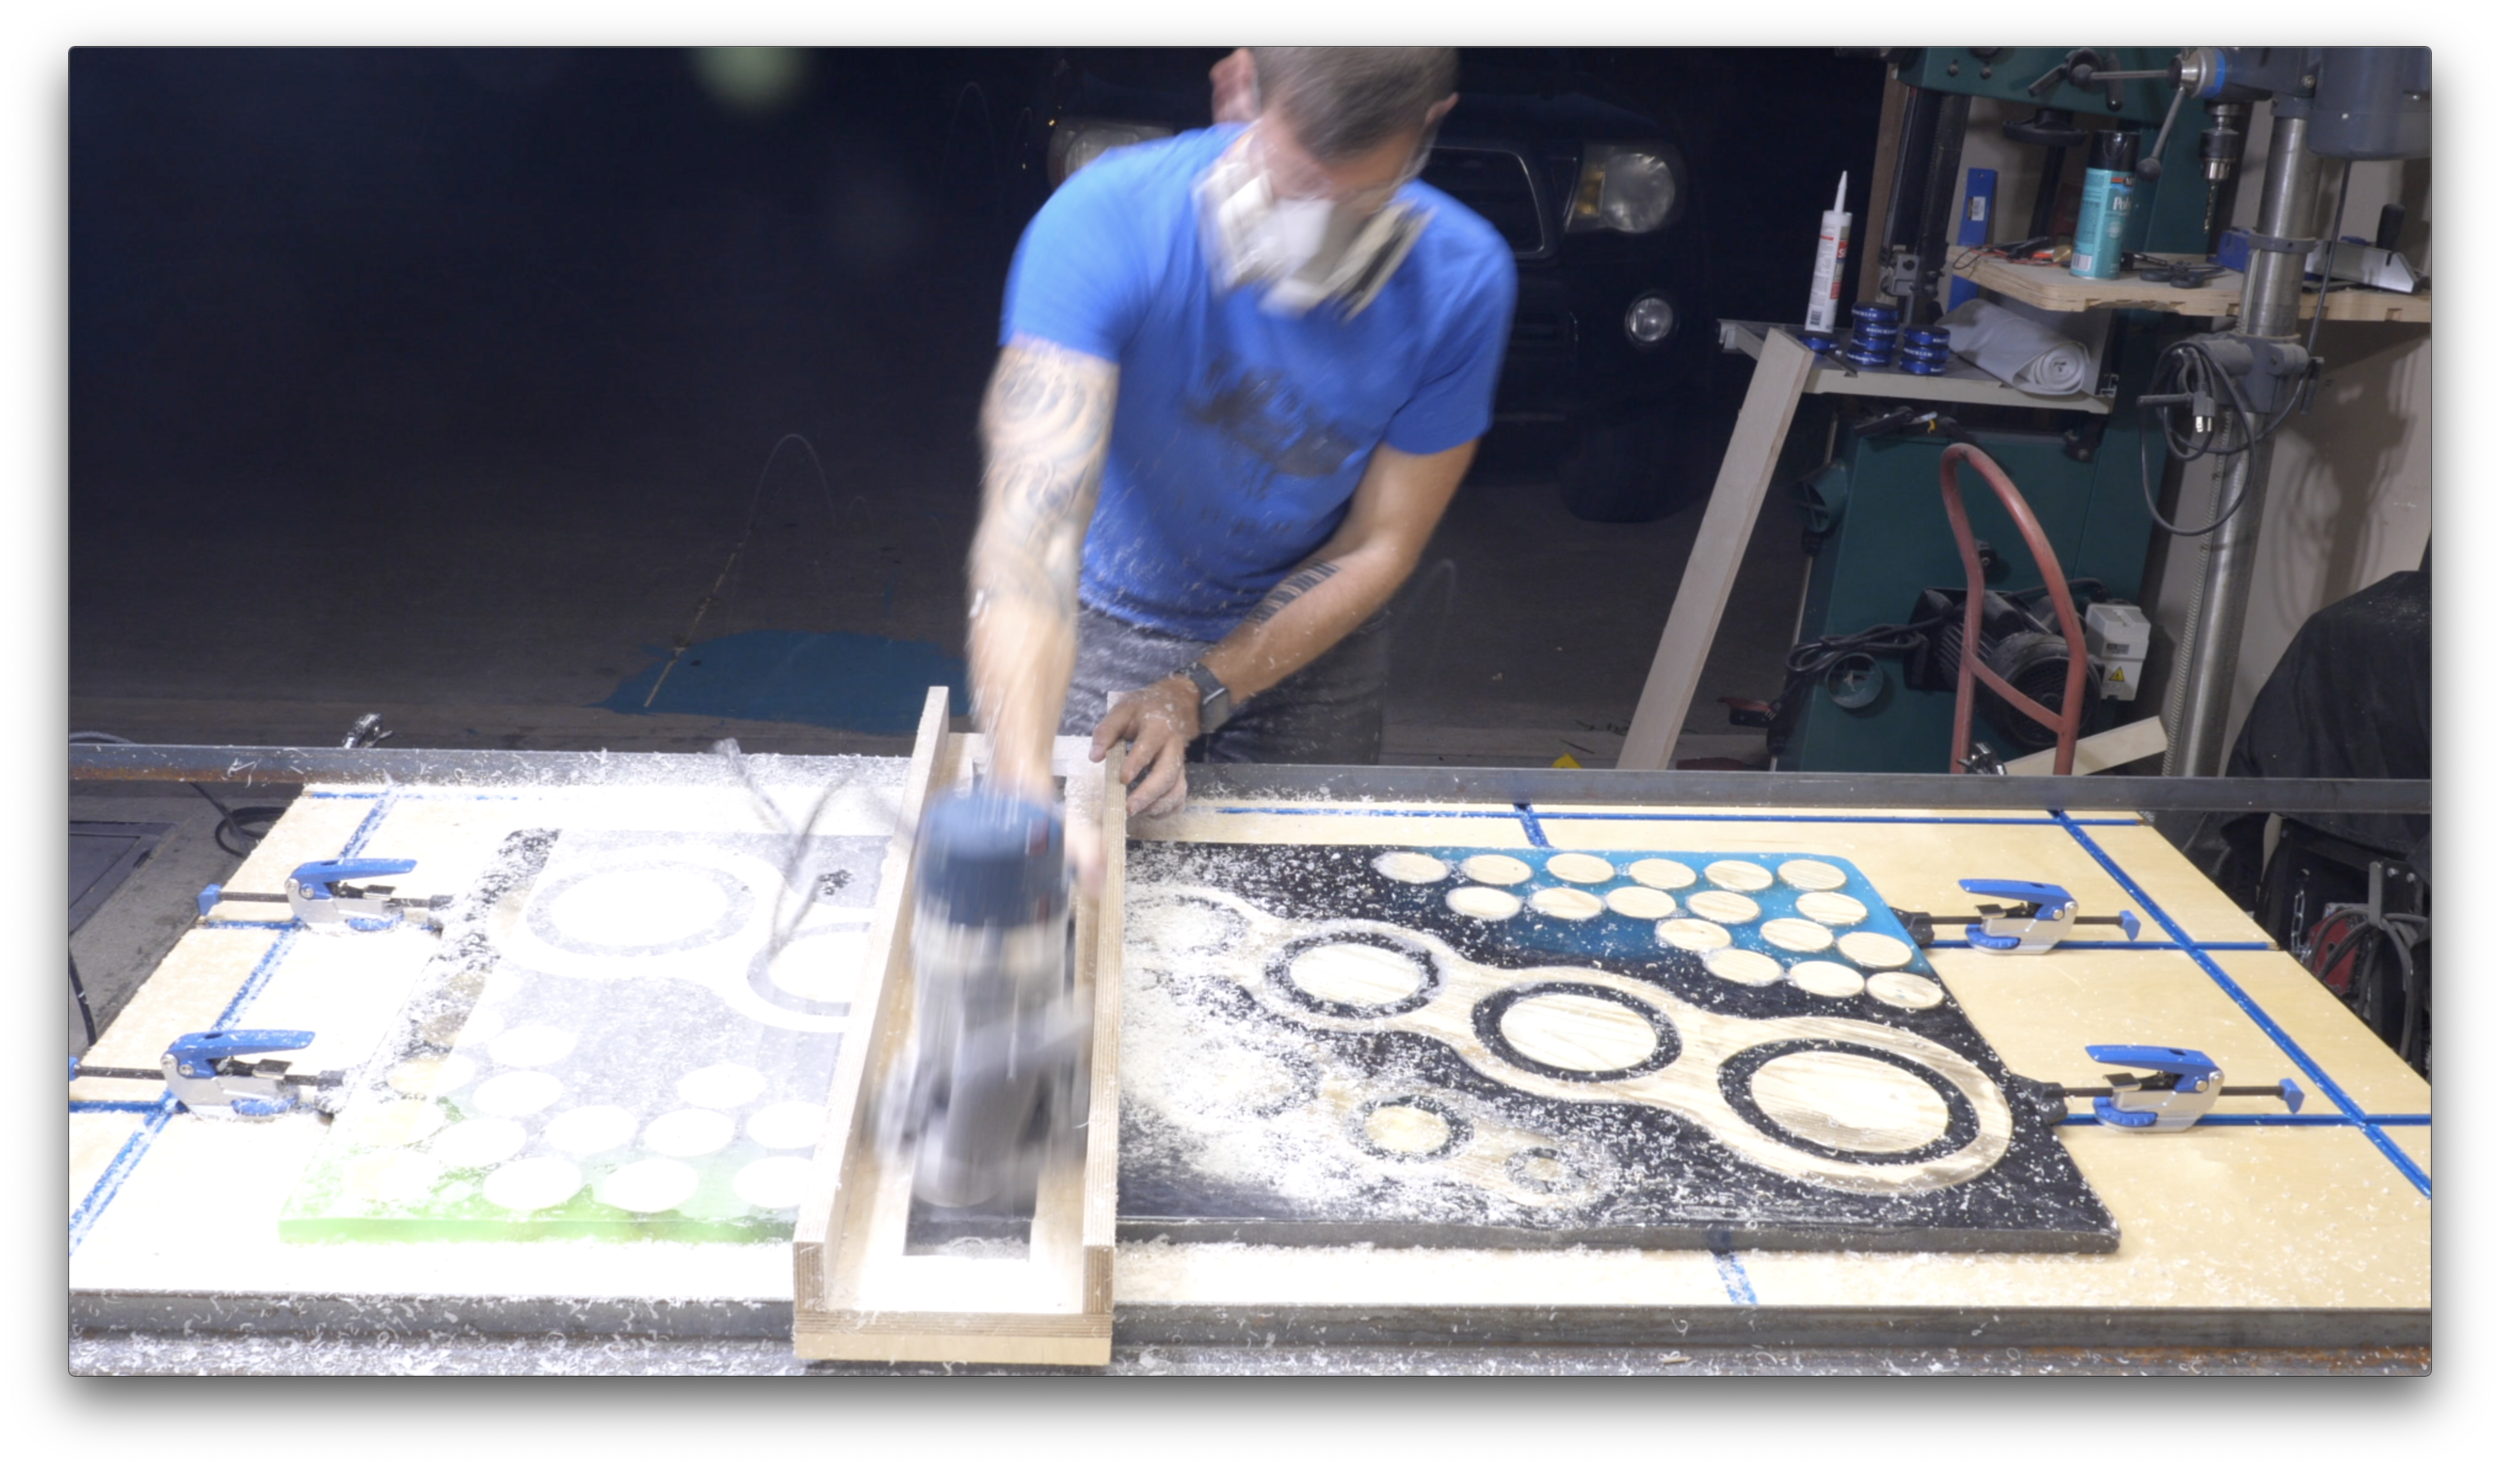
The X-Carve uses “tabs” to hold the pieces that get cut out to the rest of the material. This prevents the cut out pieces from getting flung out of the carving. I used a chisel to cut away all the tabs, but you’re left with some of the material that needs to be sanded flush with the sides of the piece. The Ryobi ONE+ 18V Rotary Tool was the perfect tool for this job because of its precision sanding capabilities. The Ryobi Rotary Tool comes with 33 accessories including small sanding collars that slip over the rubber collet accessory. Normally I would have to get out my orbital sander to sand away the tabs, but this is often too much tool for the job. It's also hard to get a full size orbital sander into some of the tight curves of the pieces of this project where I had tabs to sand away.
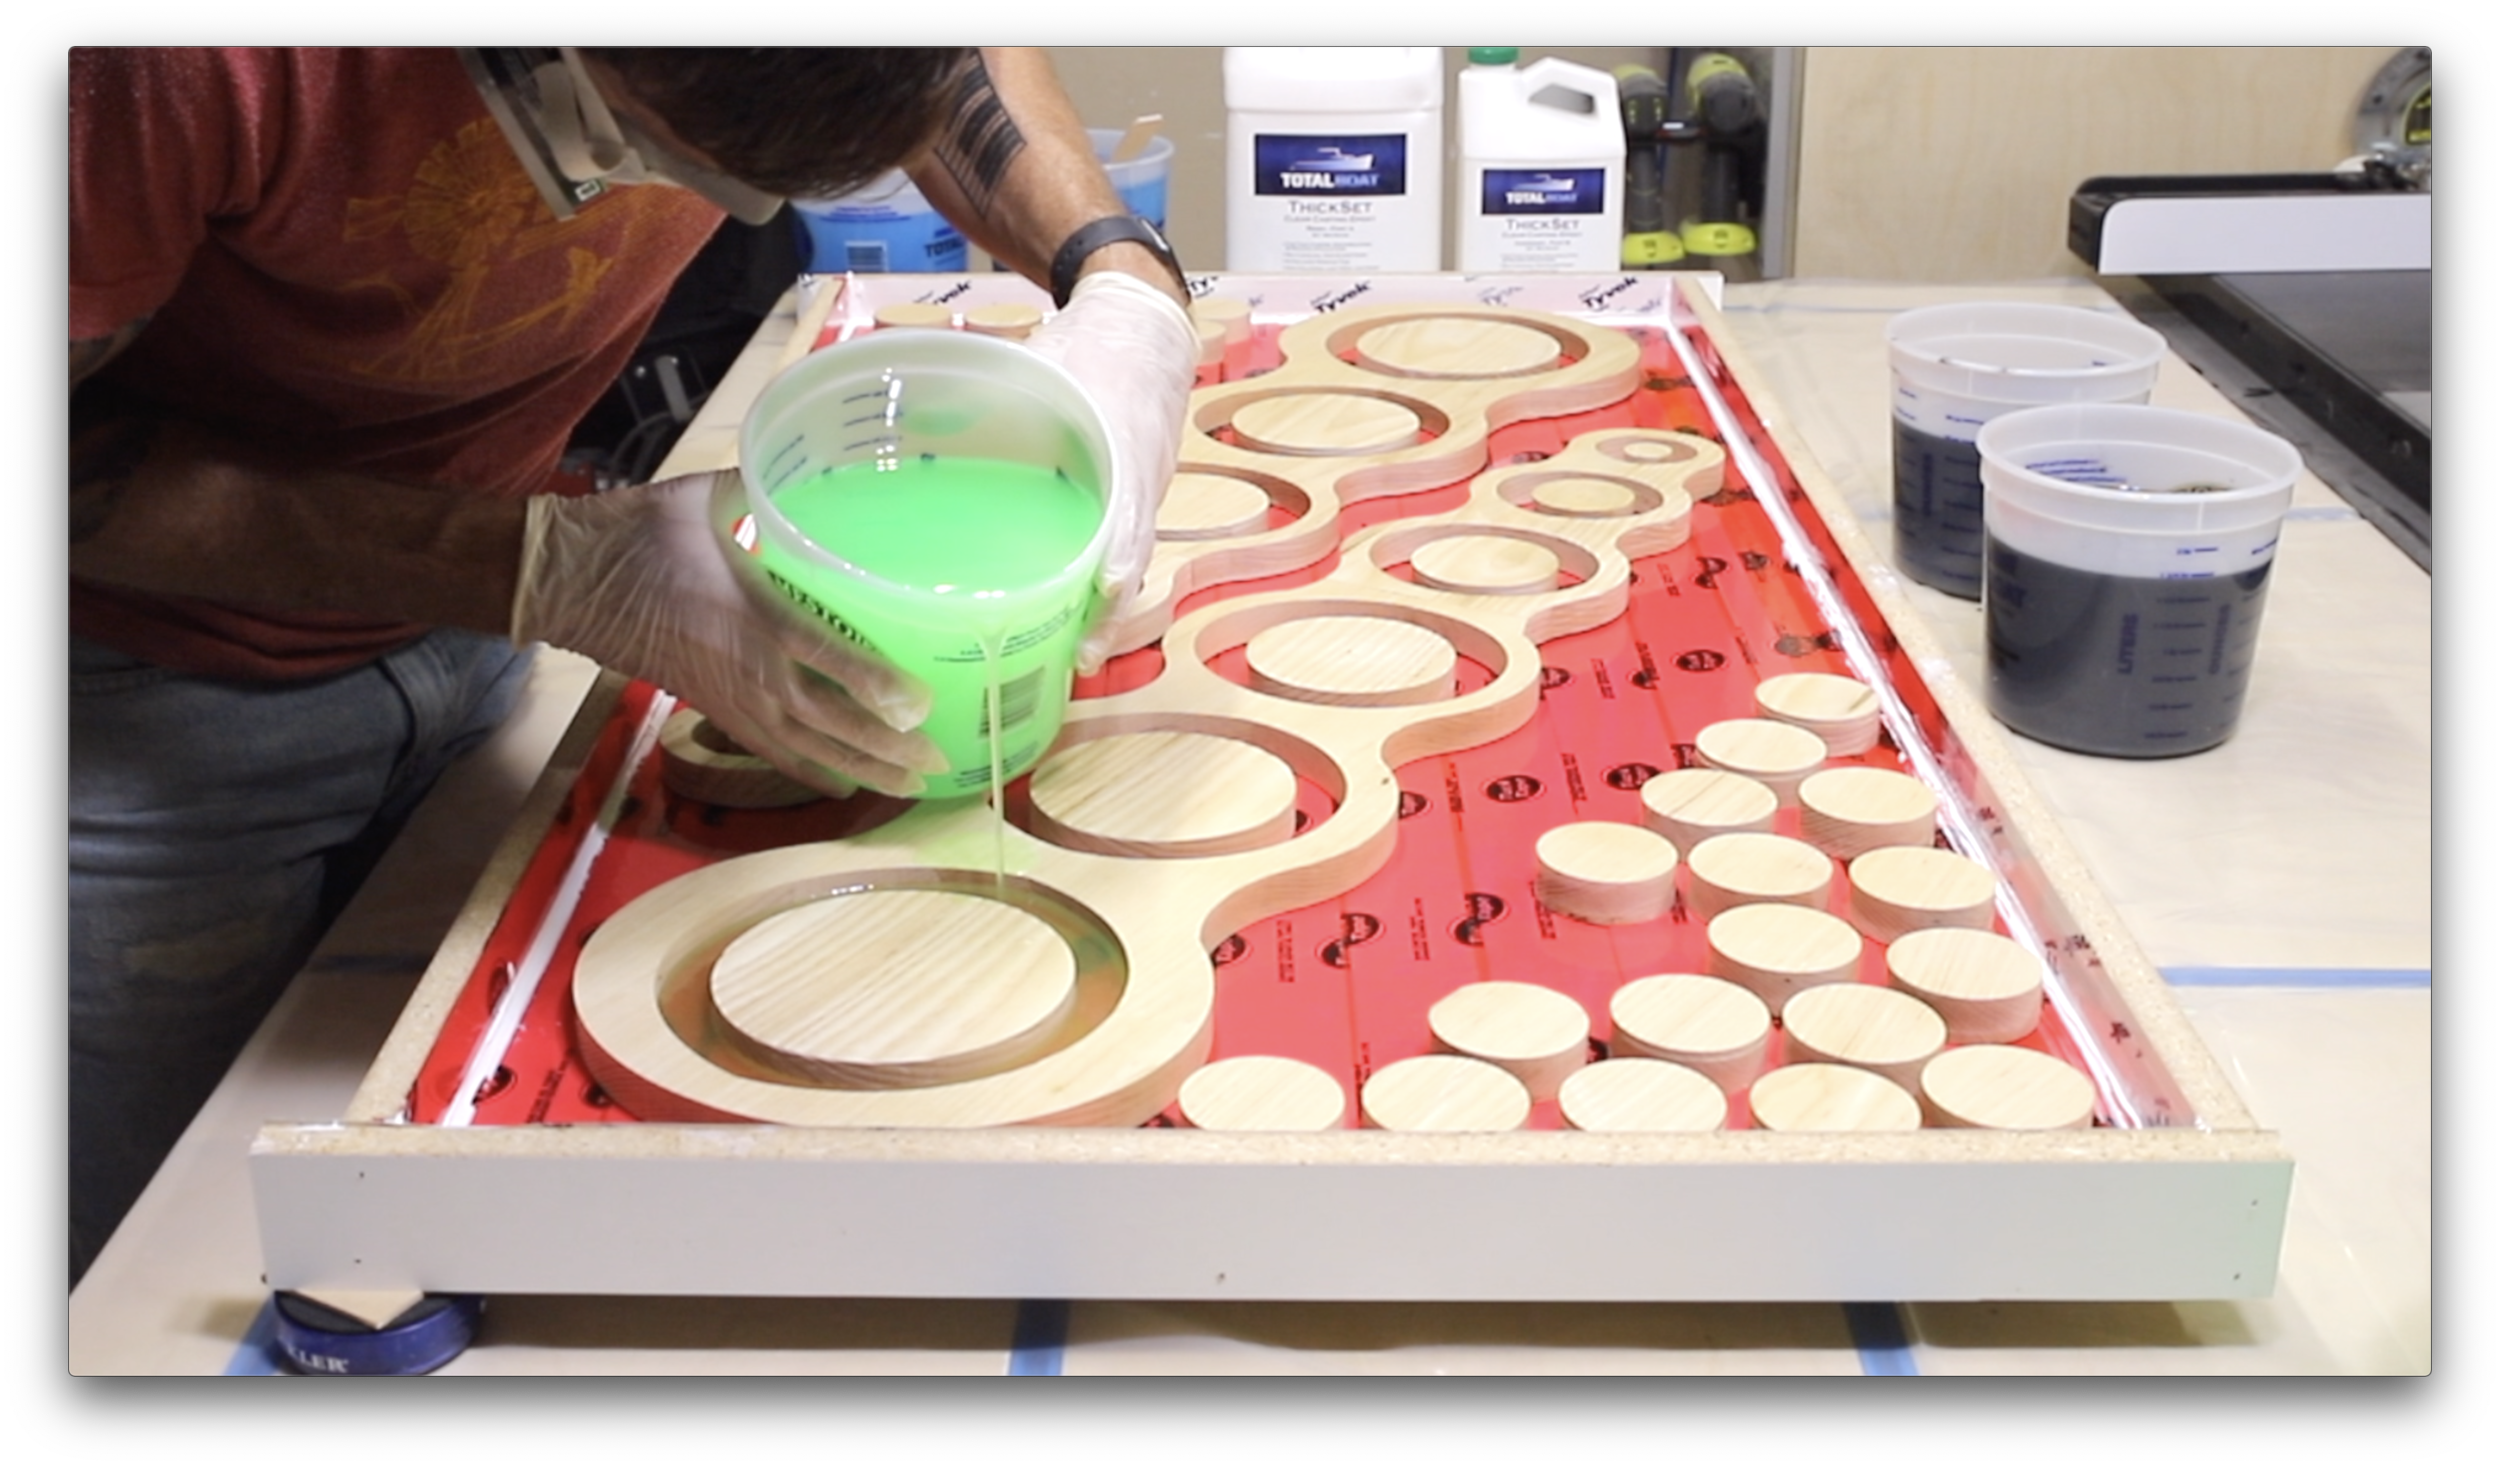
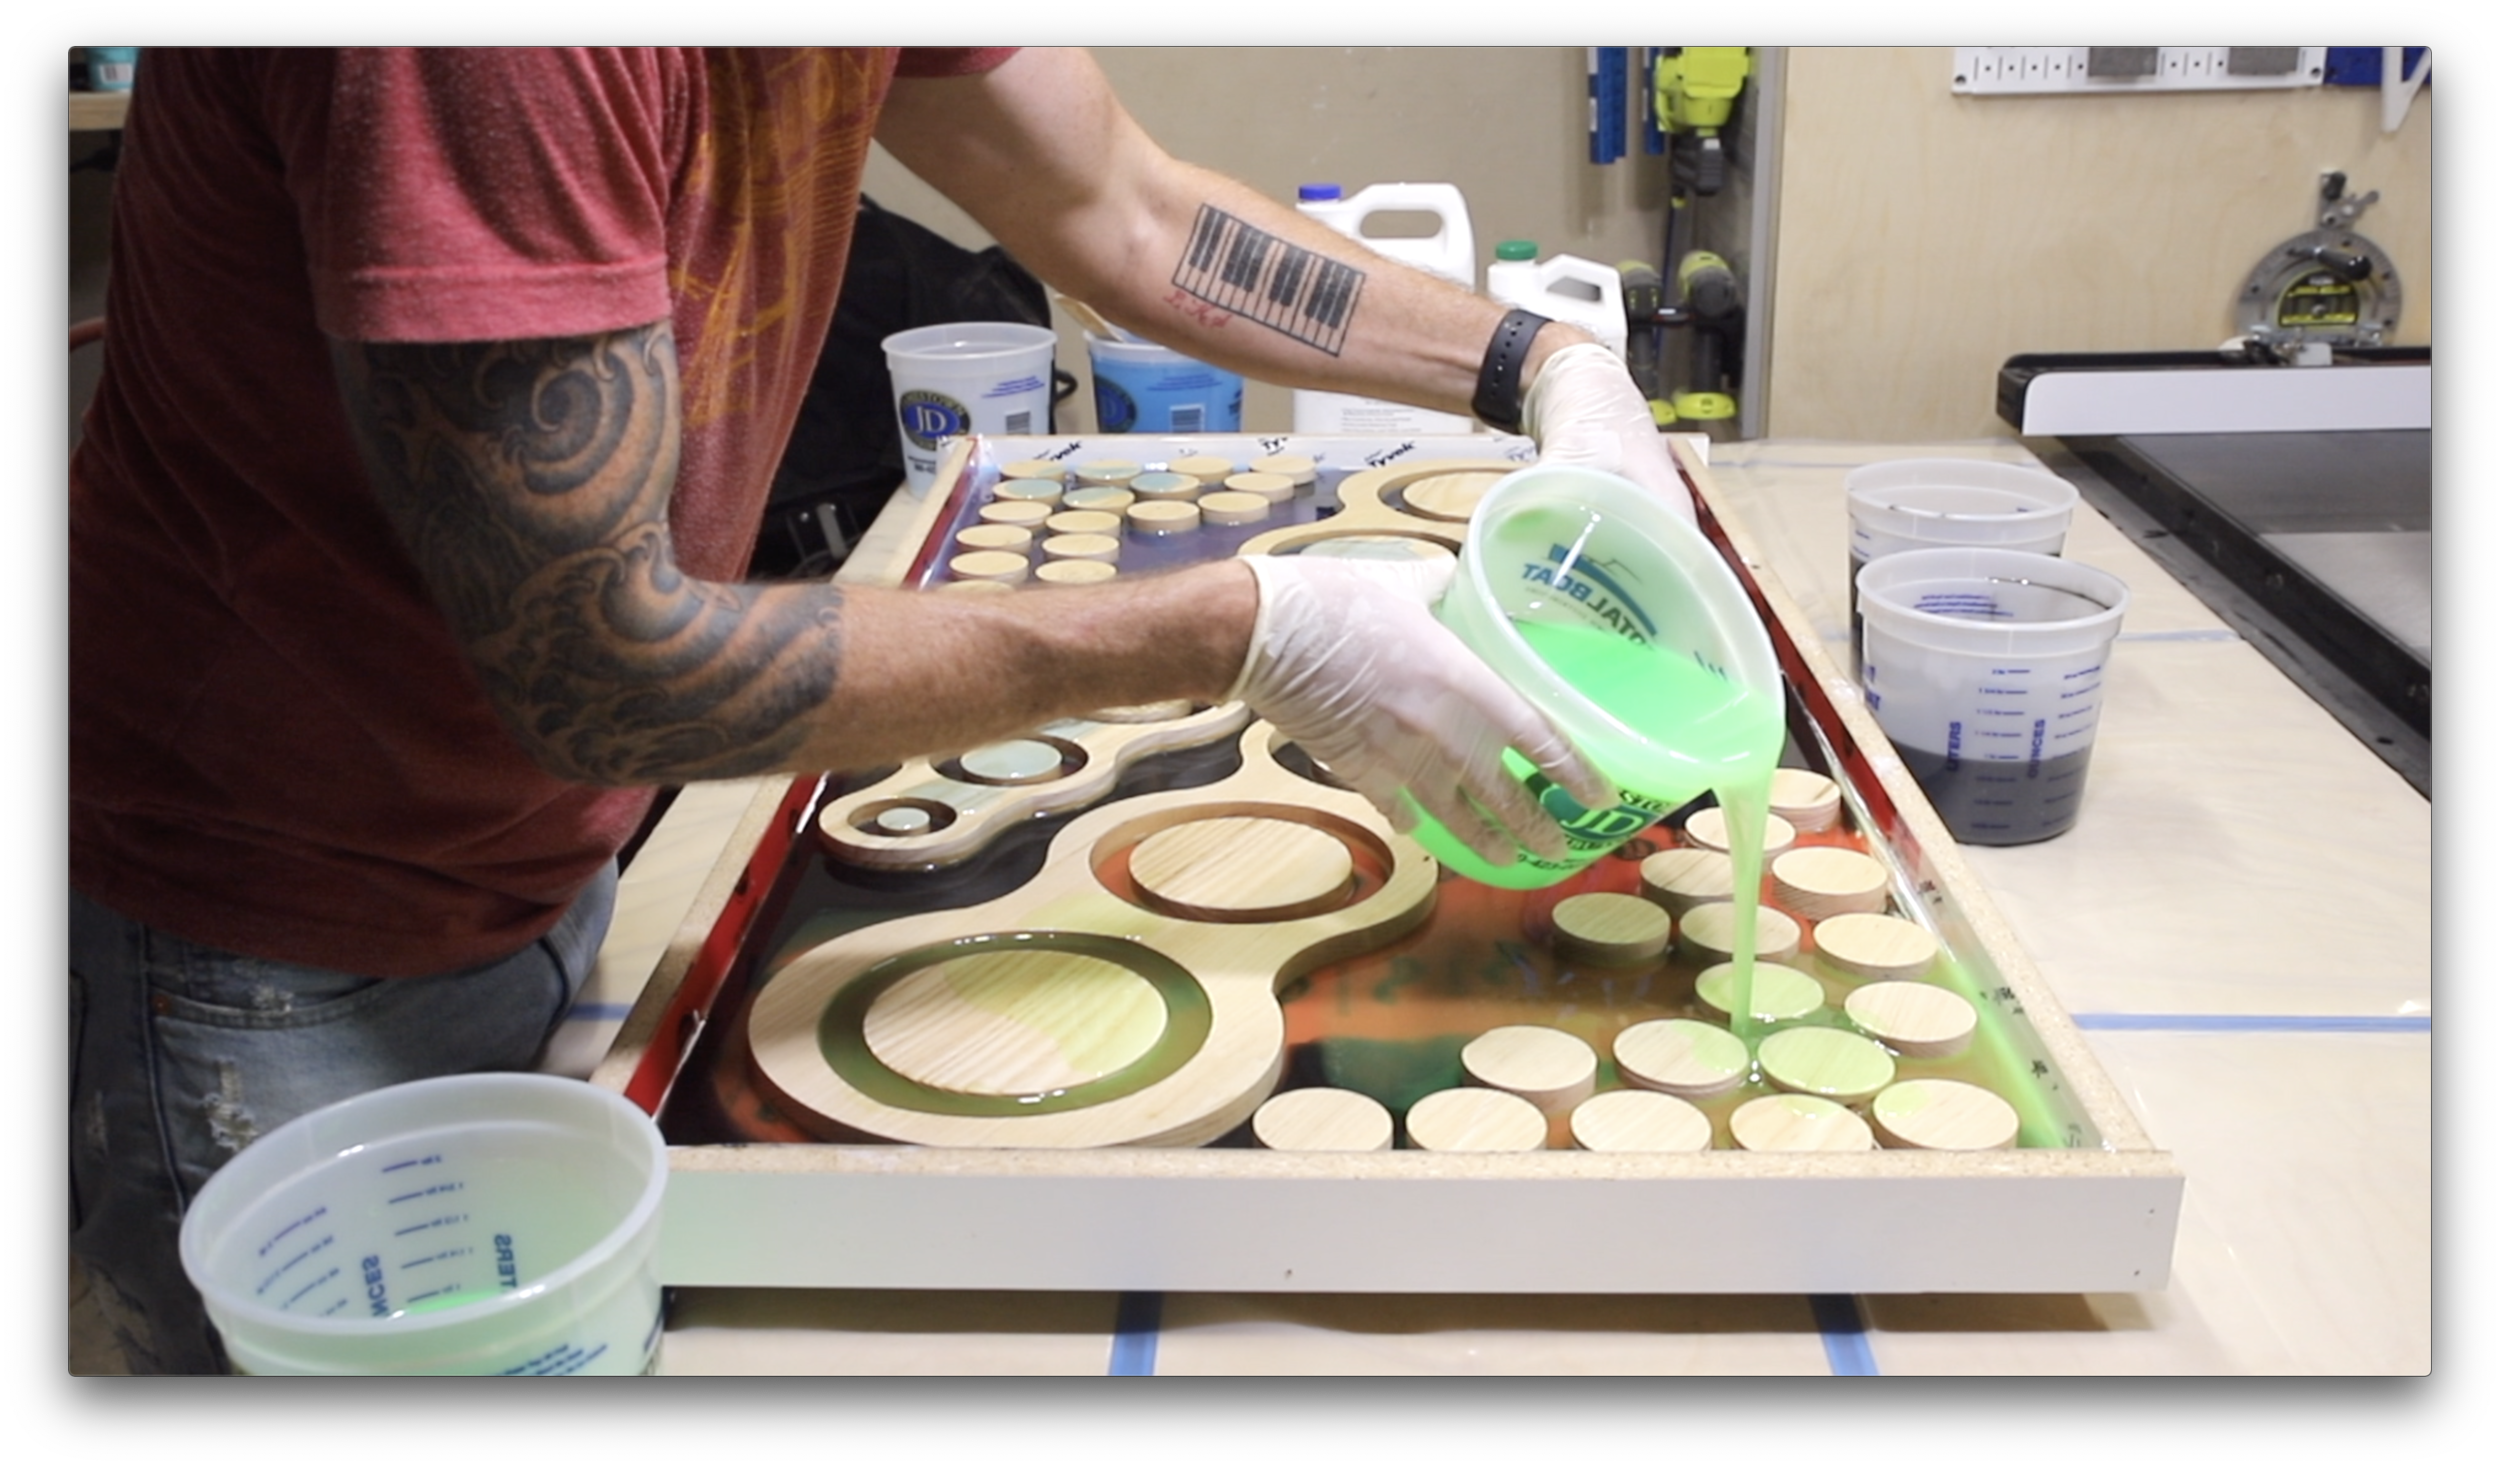
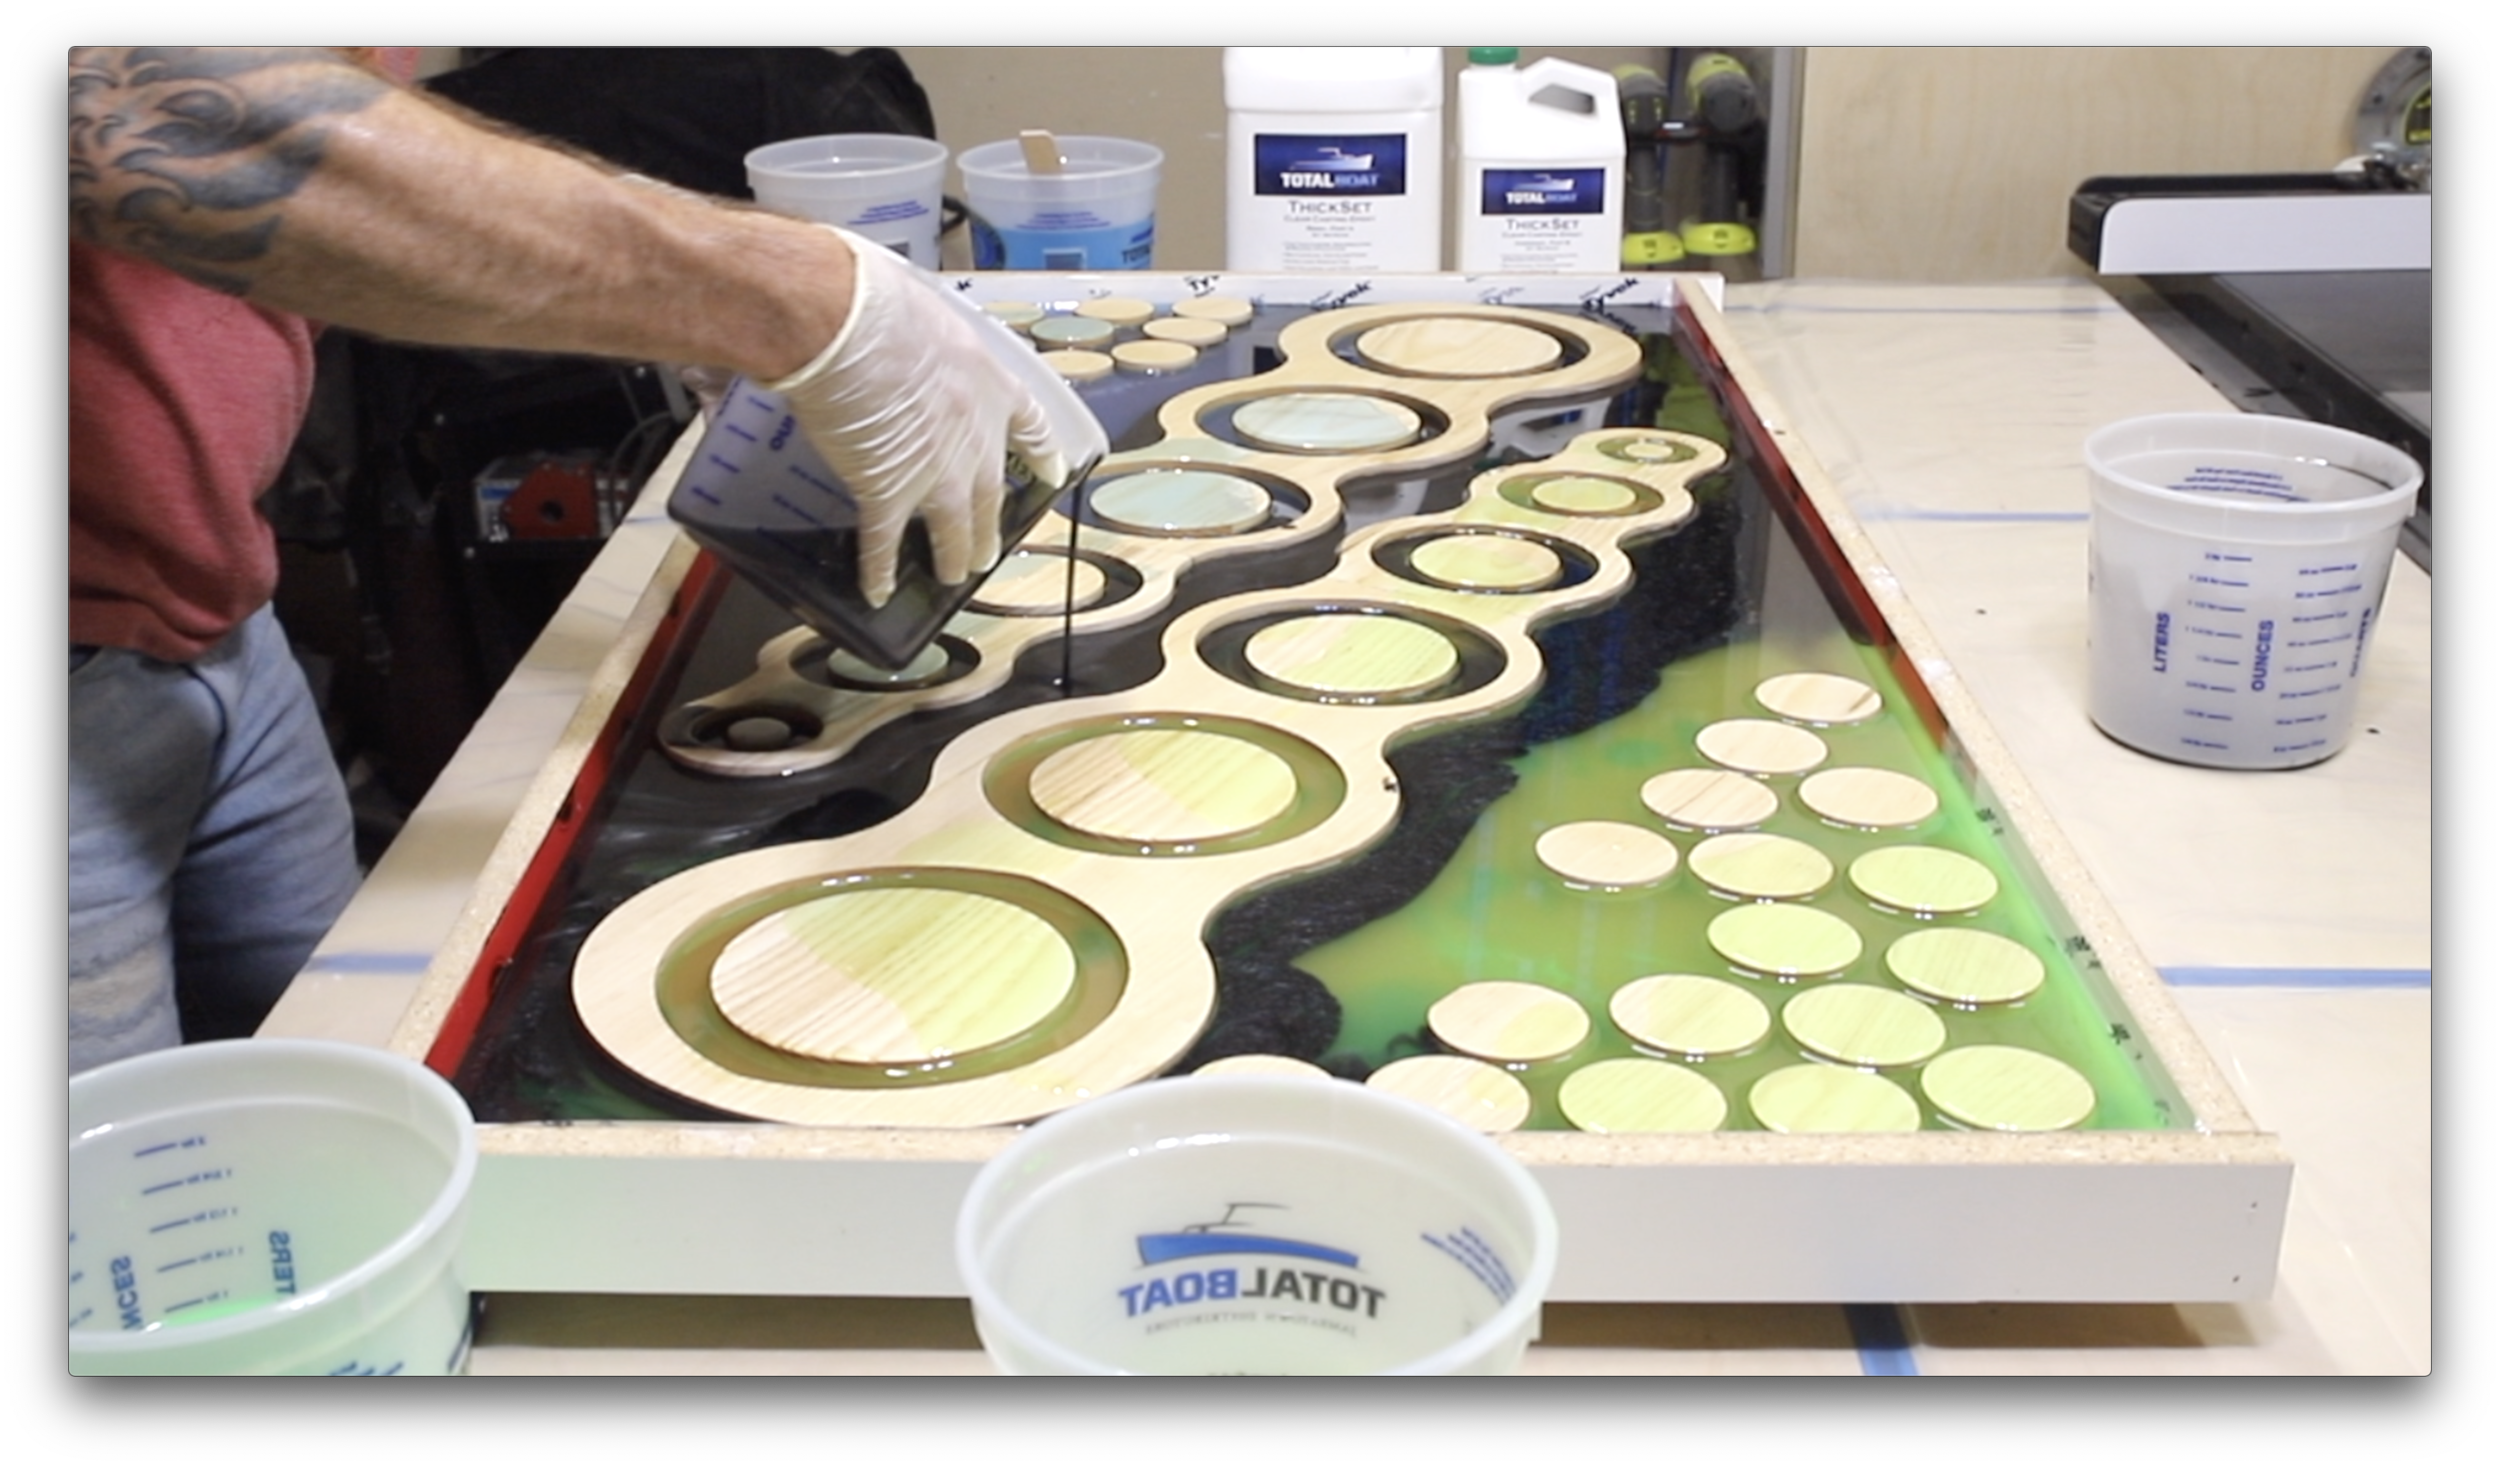
Next I could glue up the circle frame pieces that had to be cut separately due to the CNC size restraints and maximizing how much material I could cut out of each panel. I built up a form for the epoxy pours using melamine board I got at The Home Depot, which I had them rip the 4’x8’ sheet in half to make it easier to transport. The form for this coffee table is 2’x’4, and once I had the pieces cut I covered them in Tuck tape. To assemble the form I did not want to mess pre-drilling and driving in a bunch of screws, so I decided to use my 18 gauge pneumatic brad nailer. I have a 3 gallon pancake compressor I normally use, but its very loud and takes a long time to charge. I was sent the Ryobi ONE+ 1 Gallon Compressor, so I decided o give it a try instead. This. Is. A. Game. Changer. I just plugged in an 18V battery, switched it on, and it charged fully within about a minute. (I didn’t time it, but it was fast) I wouldn’t say it’s quiet, but it is nowhere near as loud as my 3 gallon pancake compressor. I was able to work comfortably in my shop with the garage door closed without wearing earplugs. I’m always concerned about the noise with my other compressor because I don’t want to disturb my neighbors while working in the shop. The Ryobi 1 gallon compressor will be my go to for any project that requires a lighter compressor load such as shooting in brad nails.


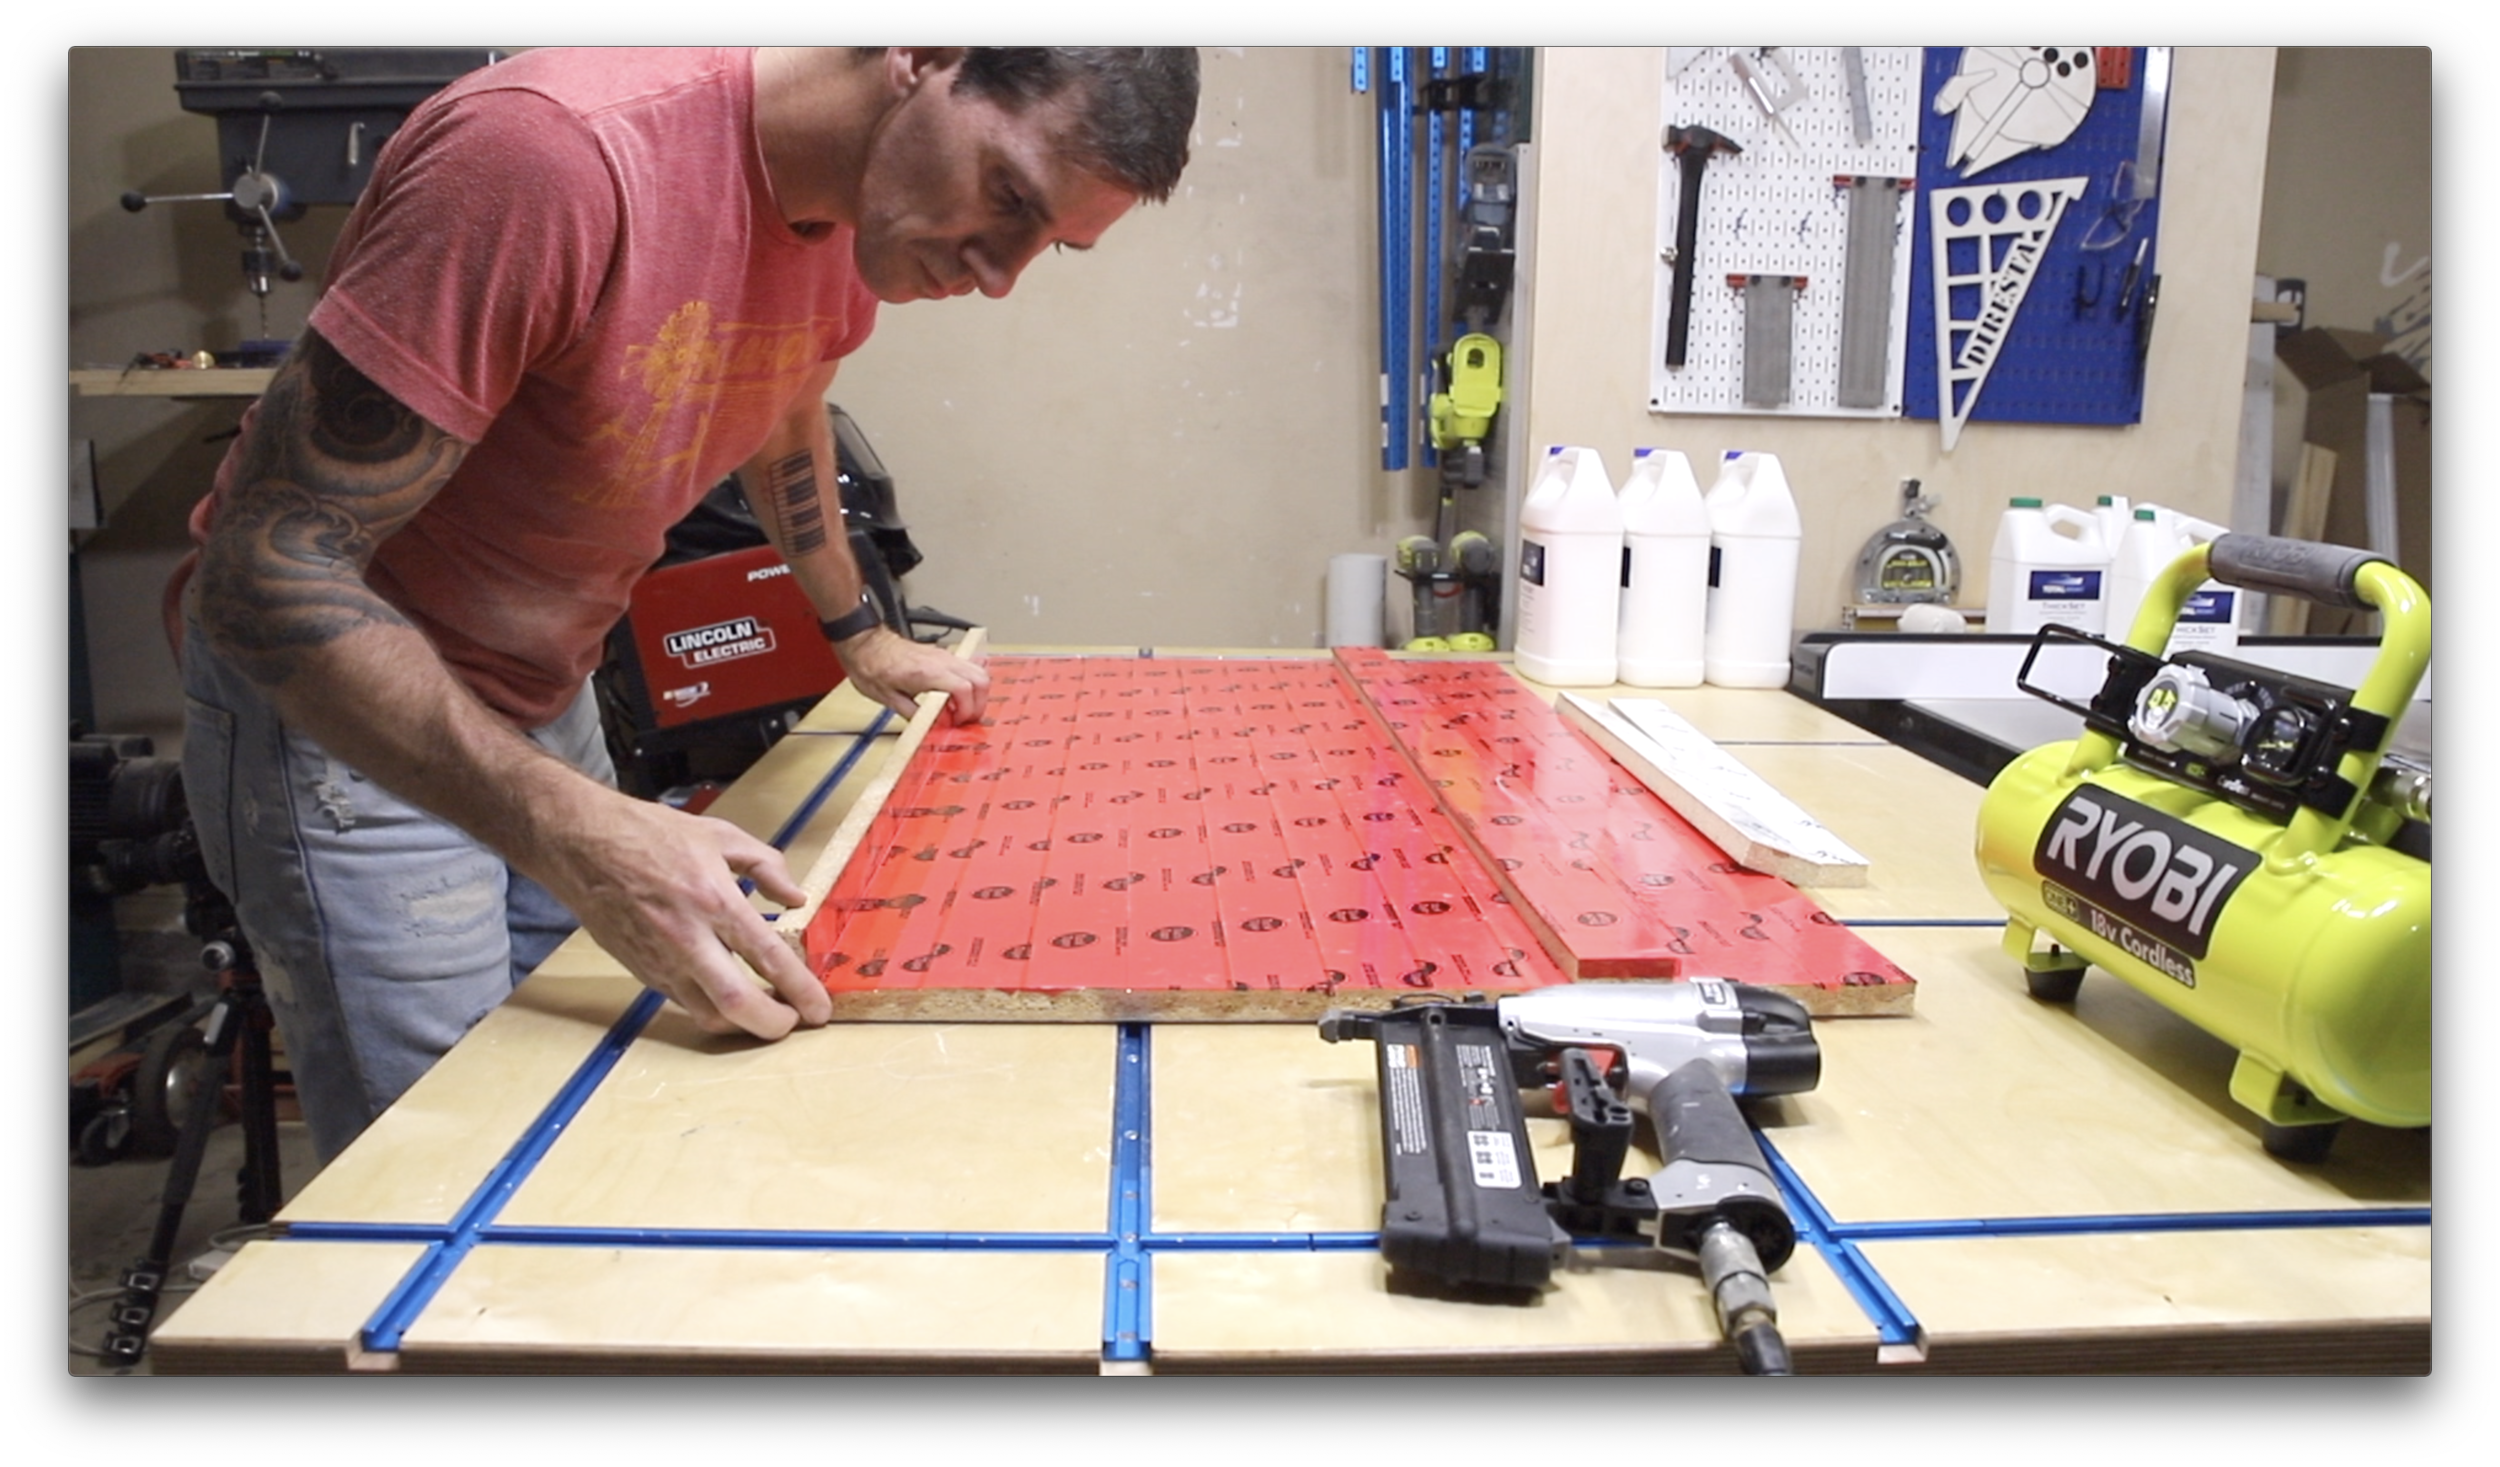
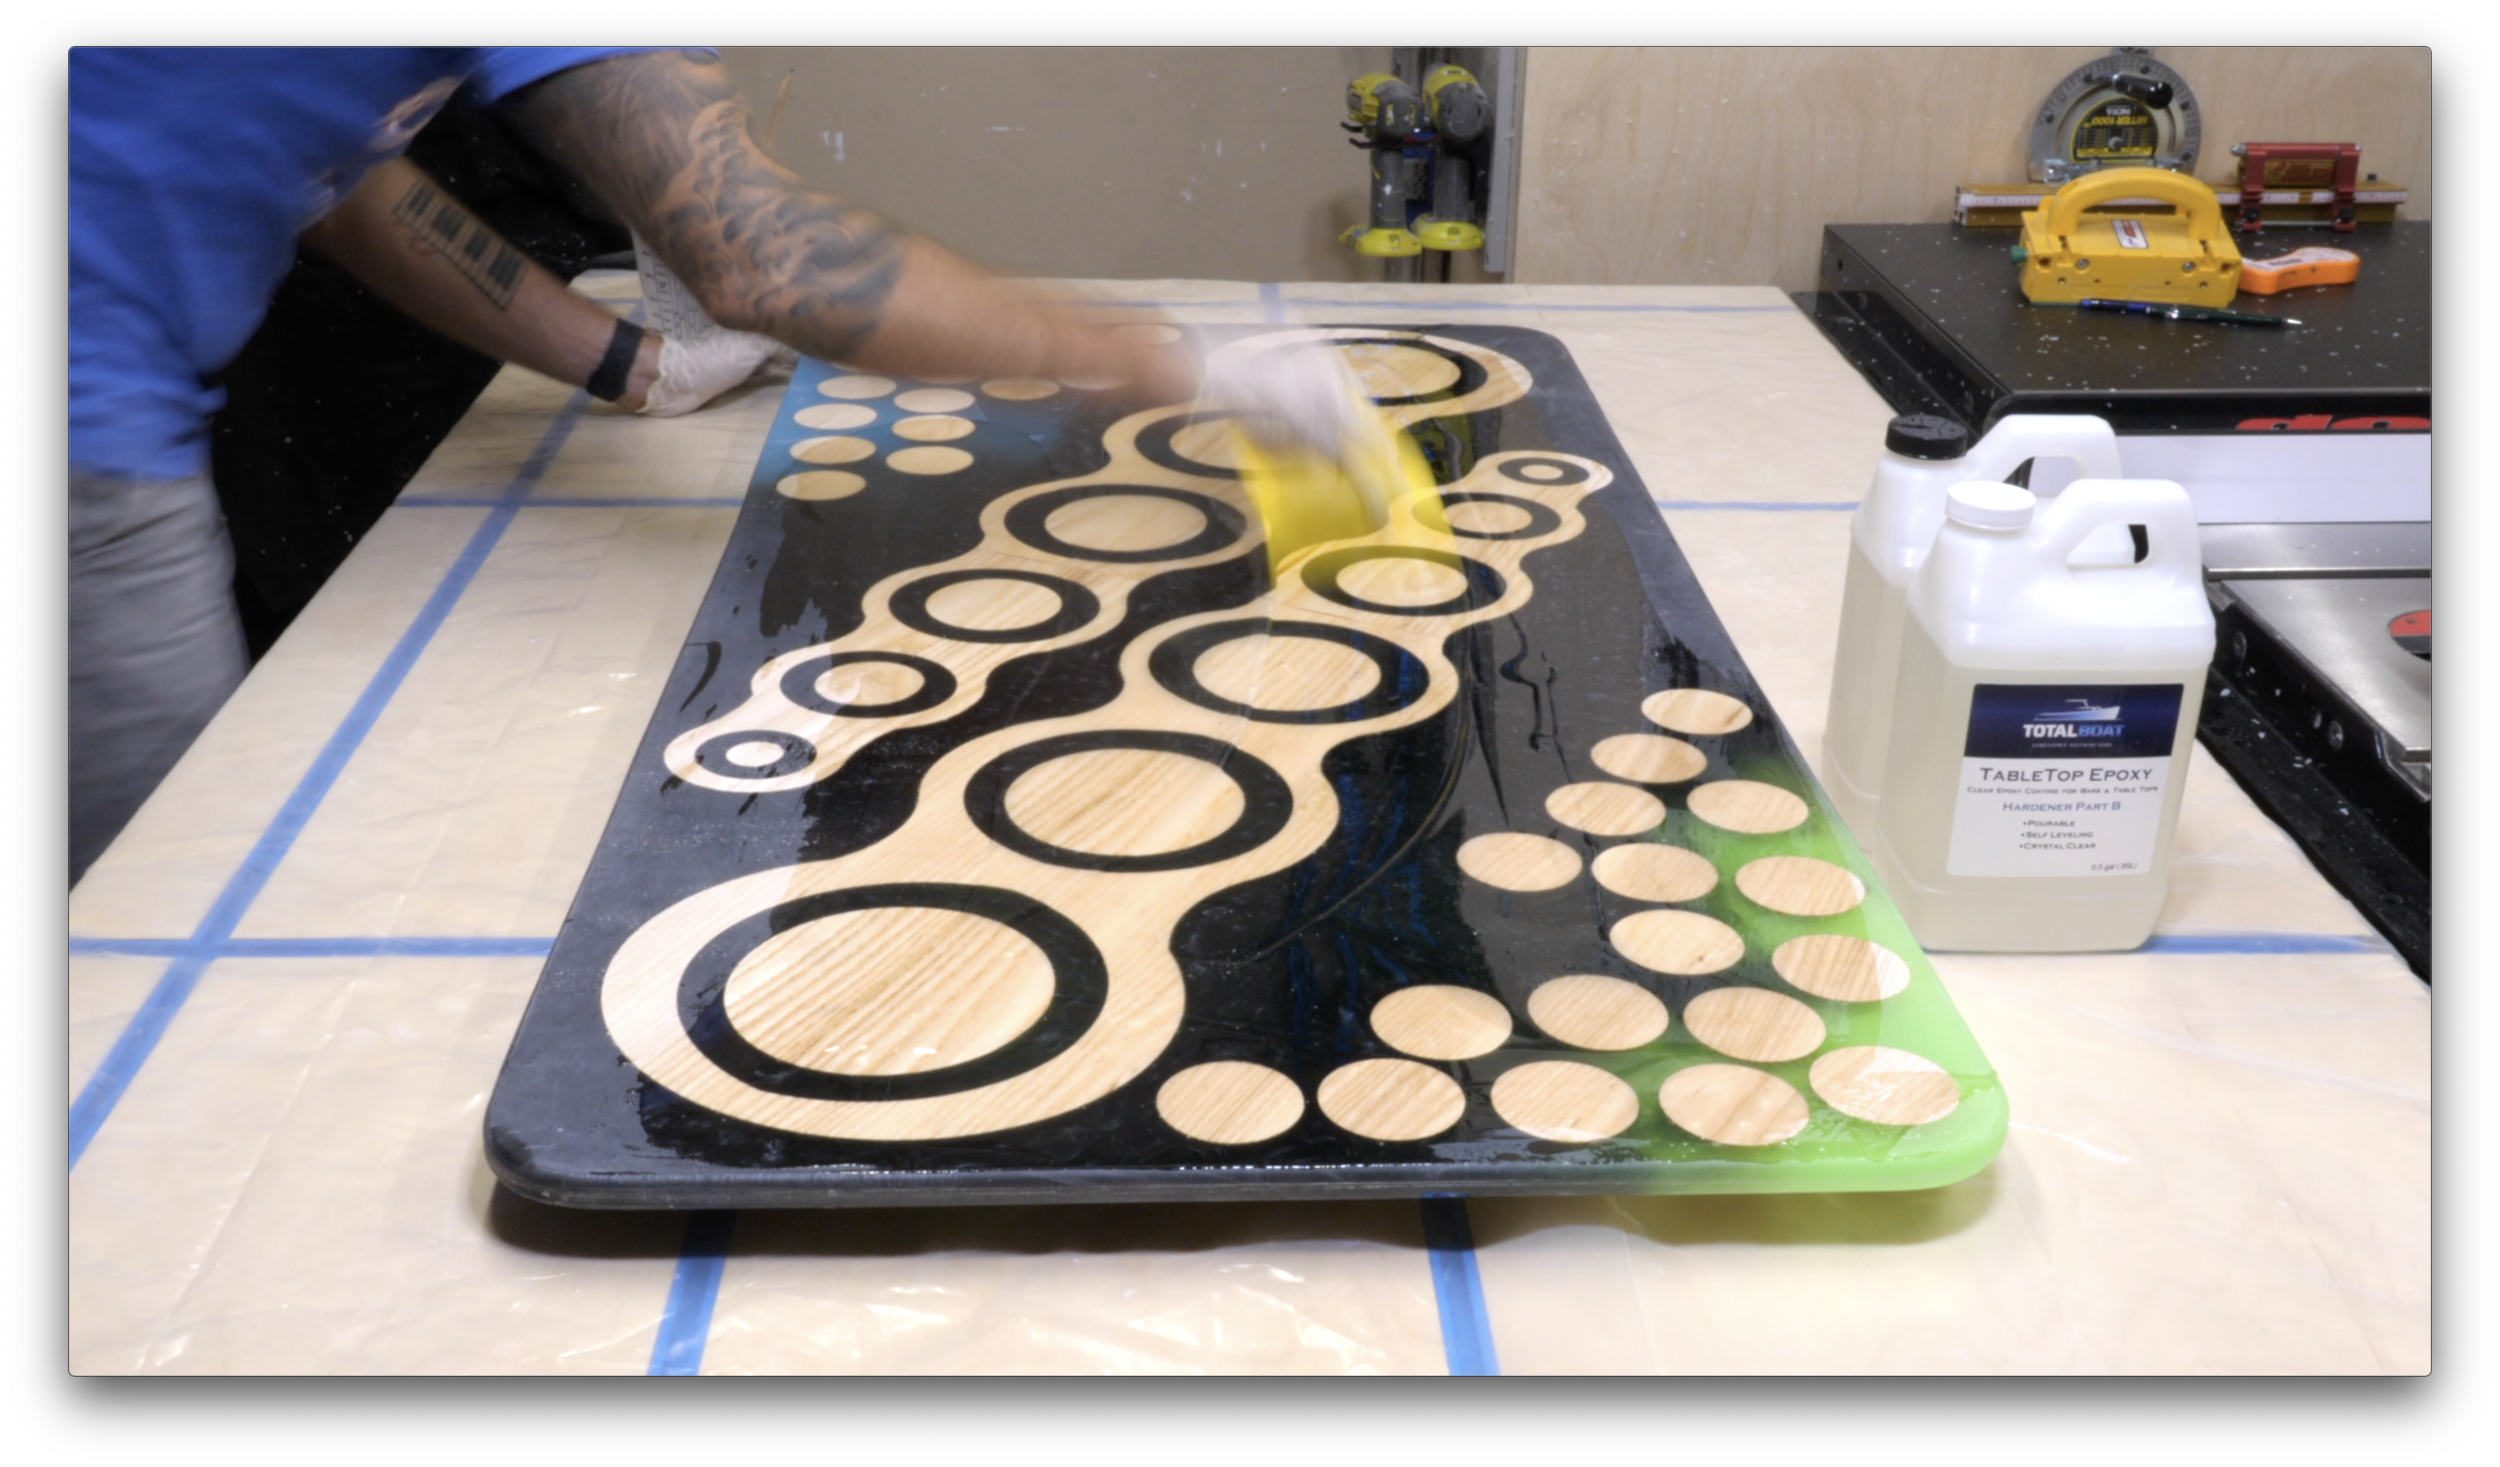
Once the form was tacked together with brad nails I added a bead of silicone around the edges to fully seal the form. I had zero leaks during this pour, so this method worked flawlessly. I adhered the wooden pieces into the form with hot glue, and mixed 3 gallons of Total Boat’s Thick Set epoxy. This epoxy clearly states to pour in an environment that’s 80 degrees or below. My shop gets a bit hotter than that in the heart of summer here in Oklahoma. This caused the exothermic reaction to kick early and bubble up.

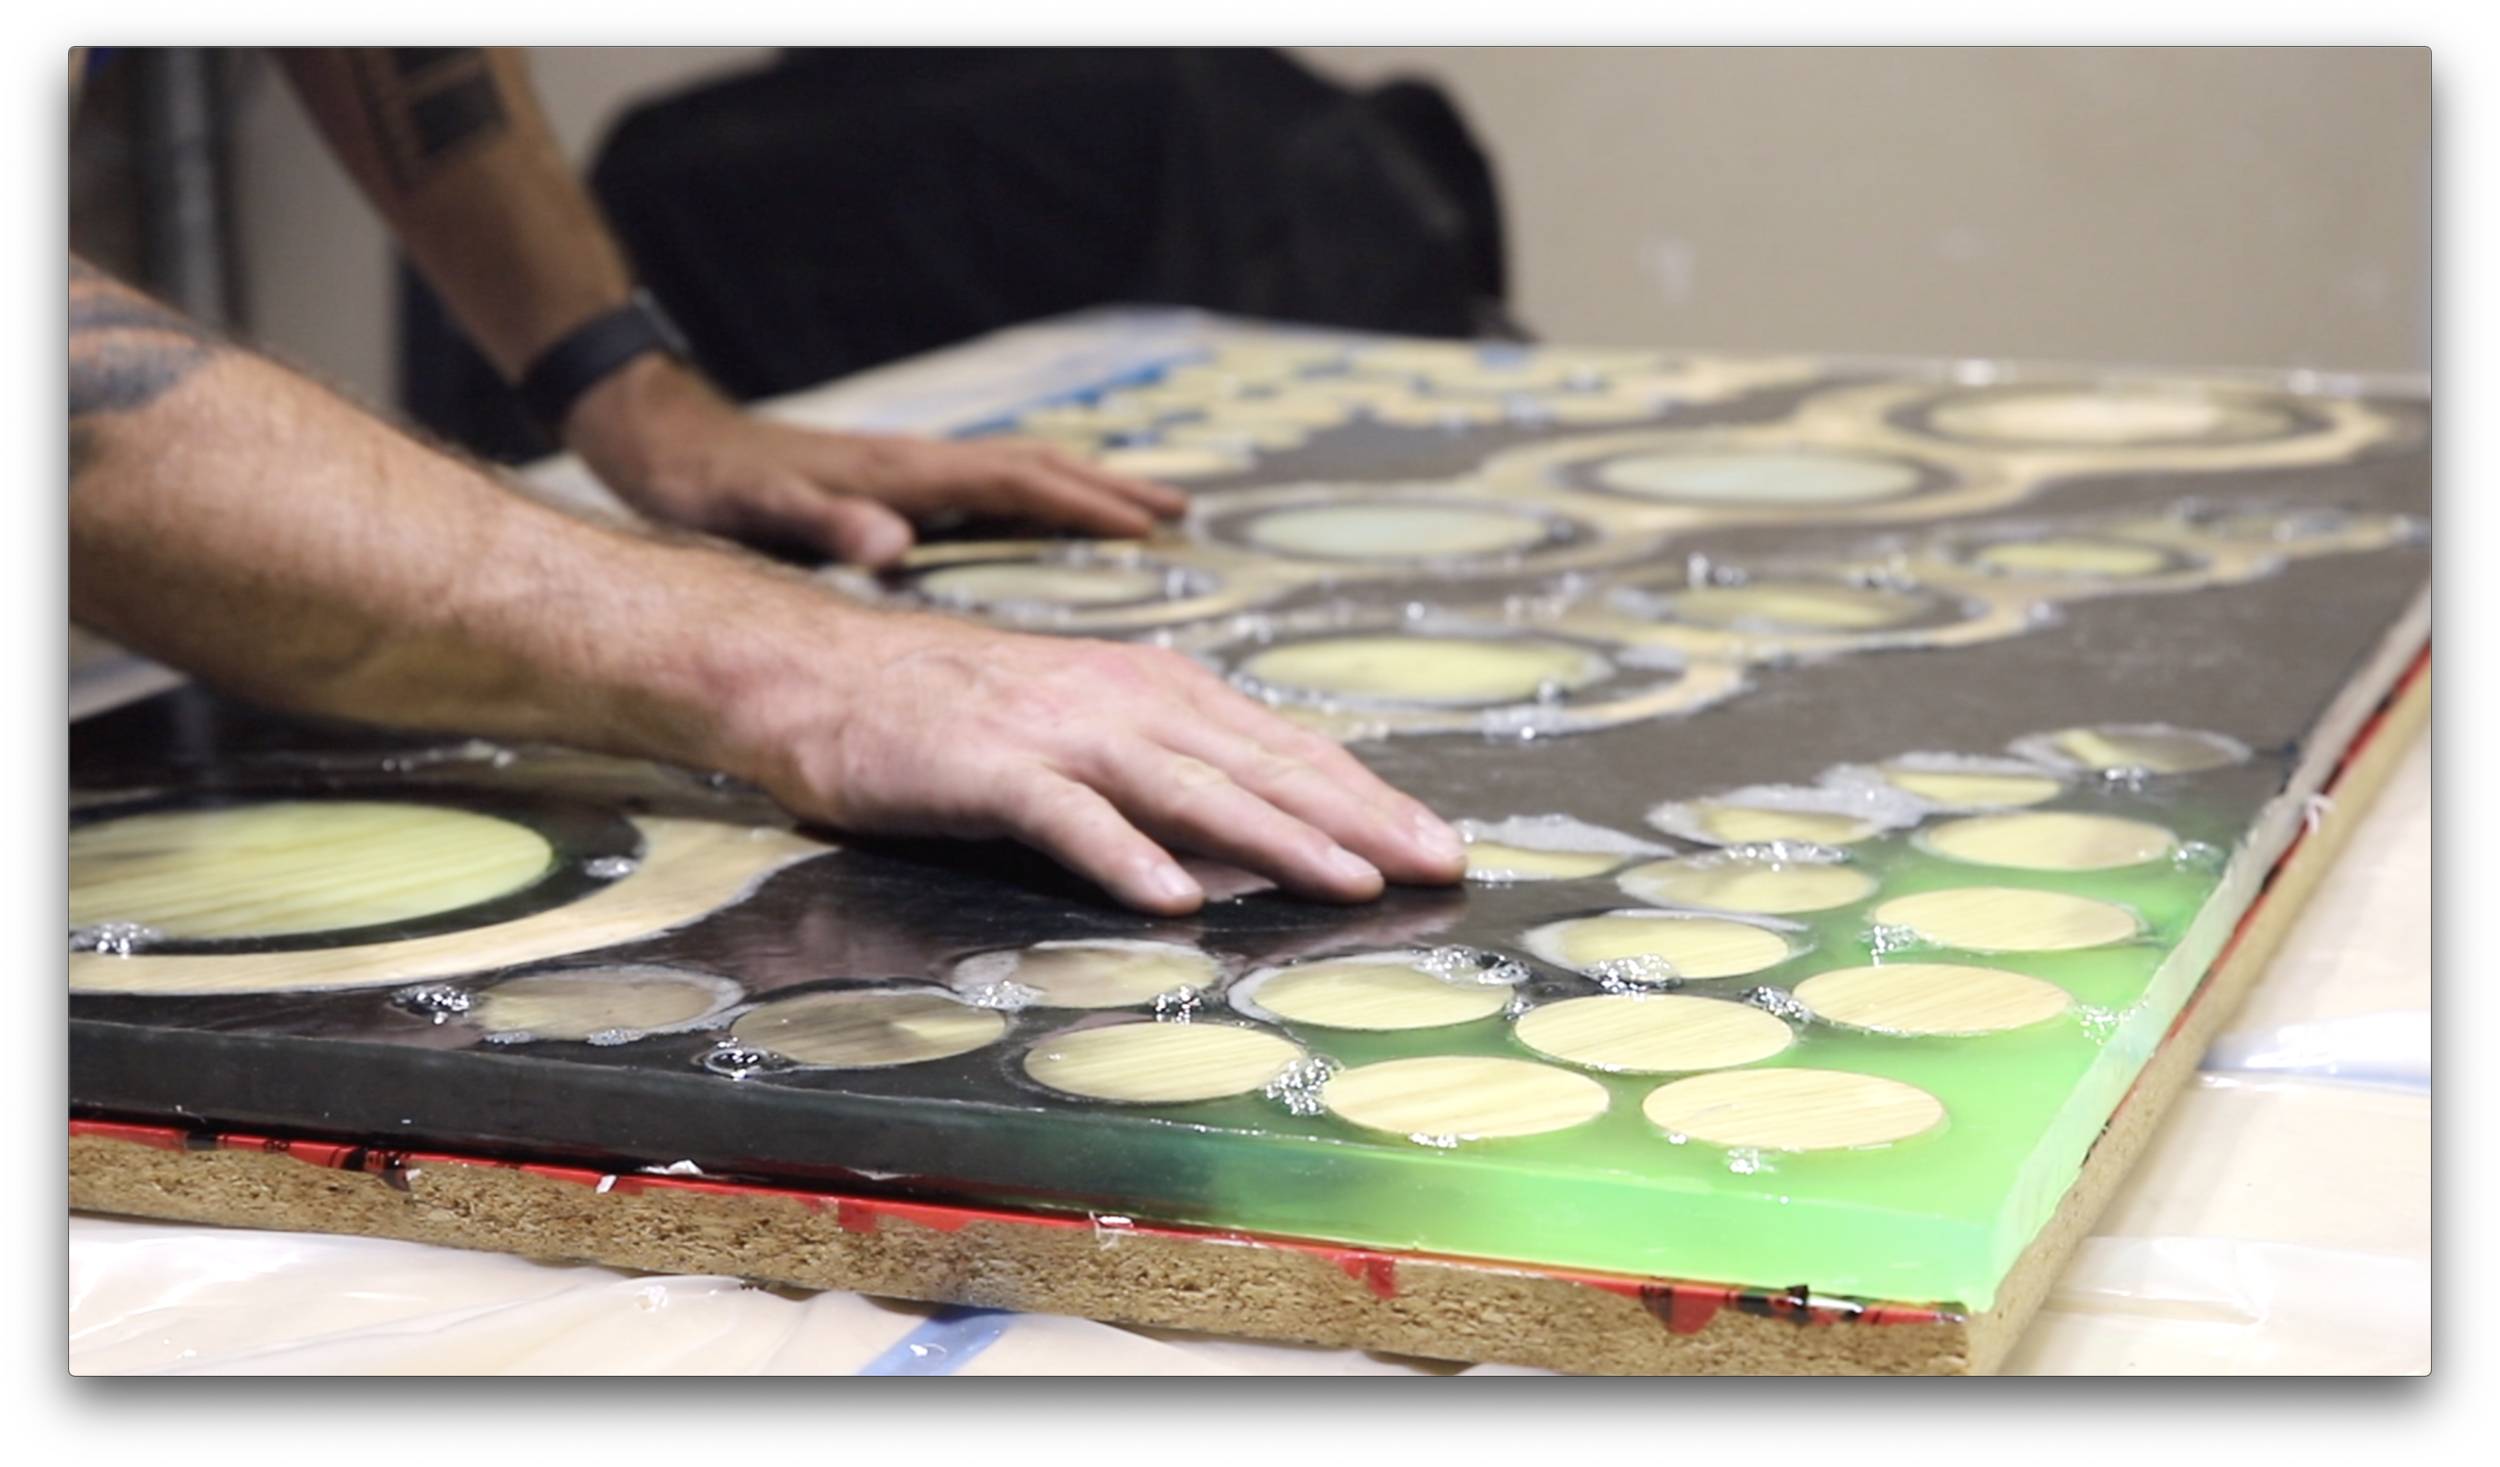
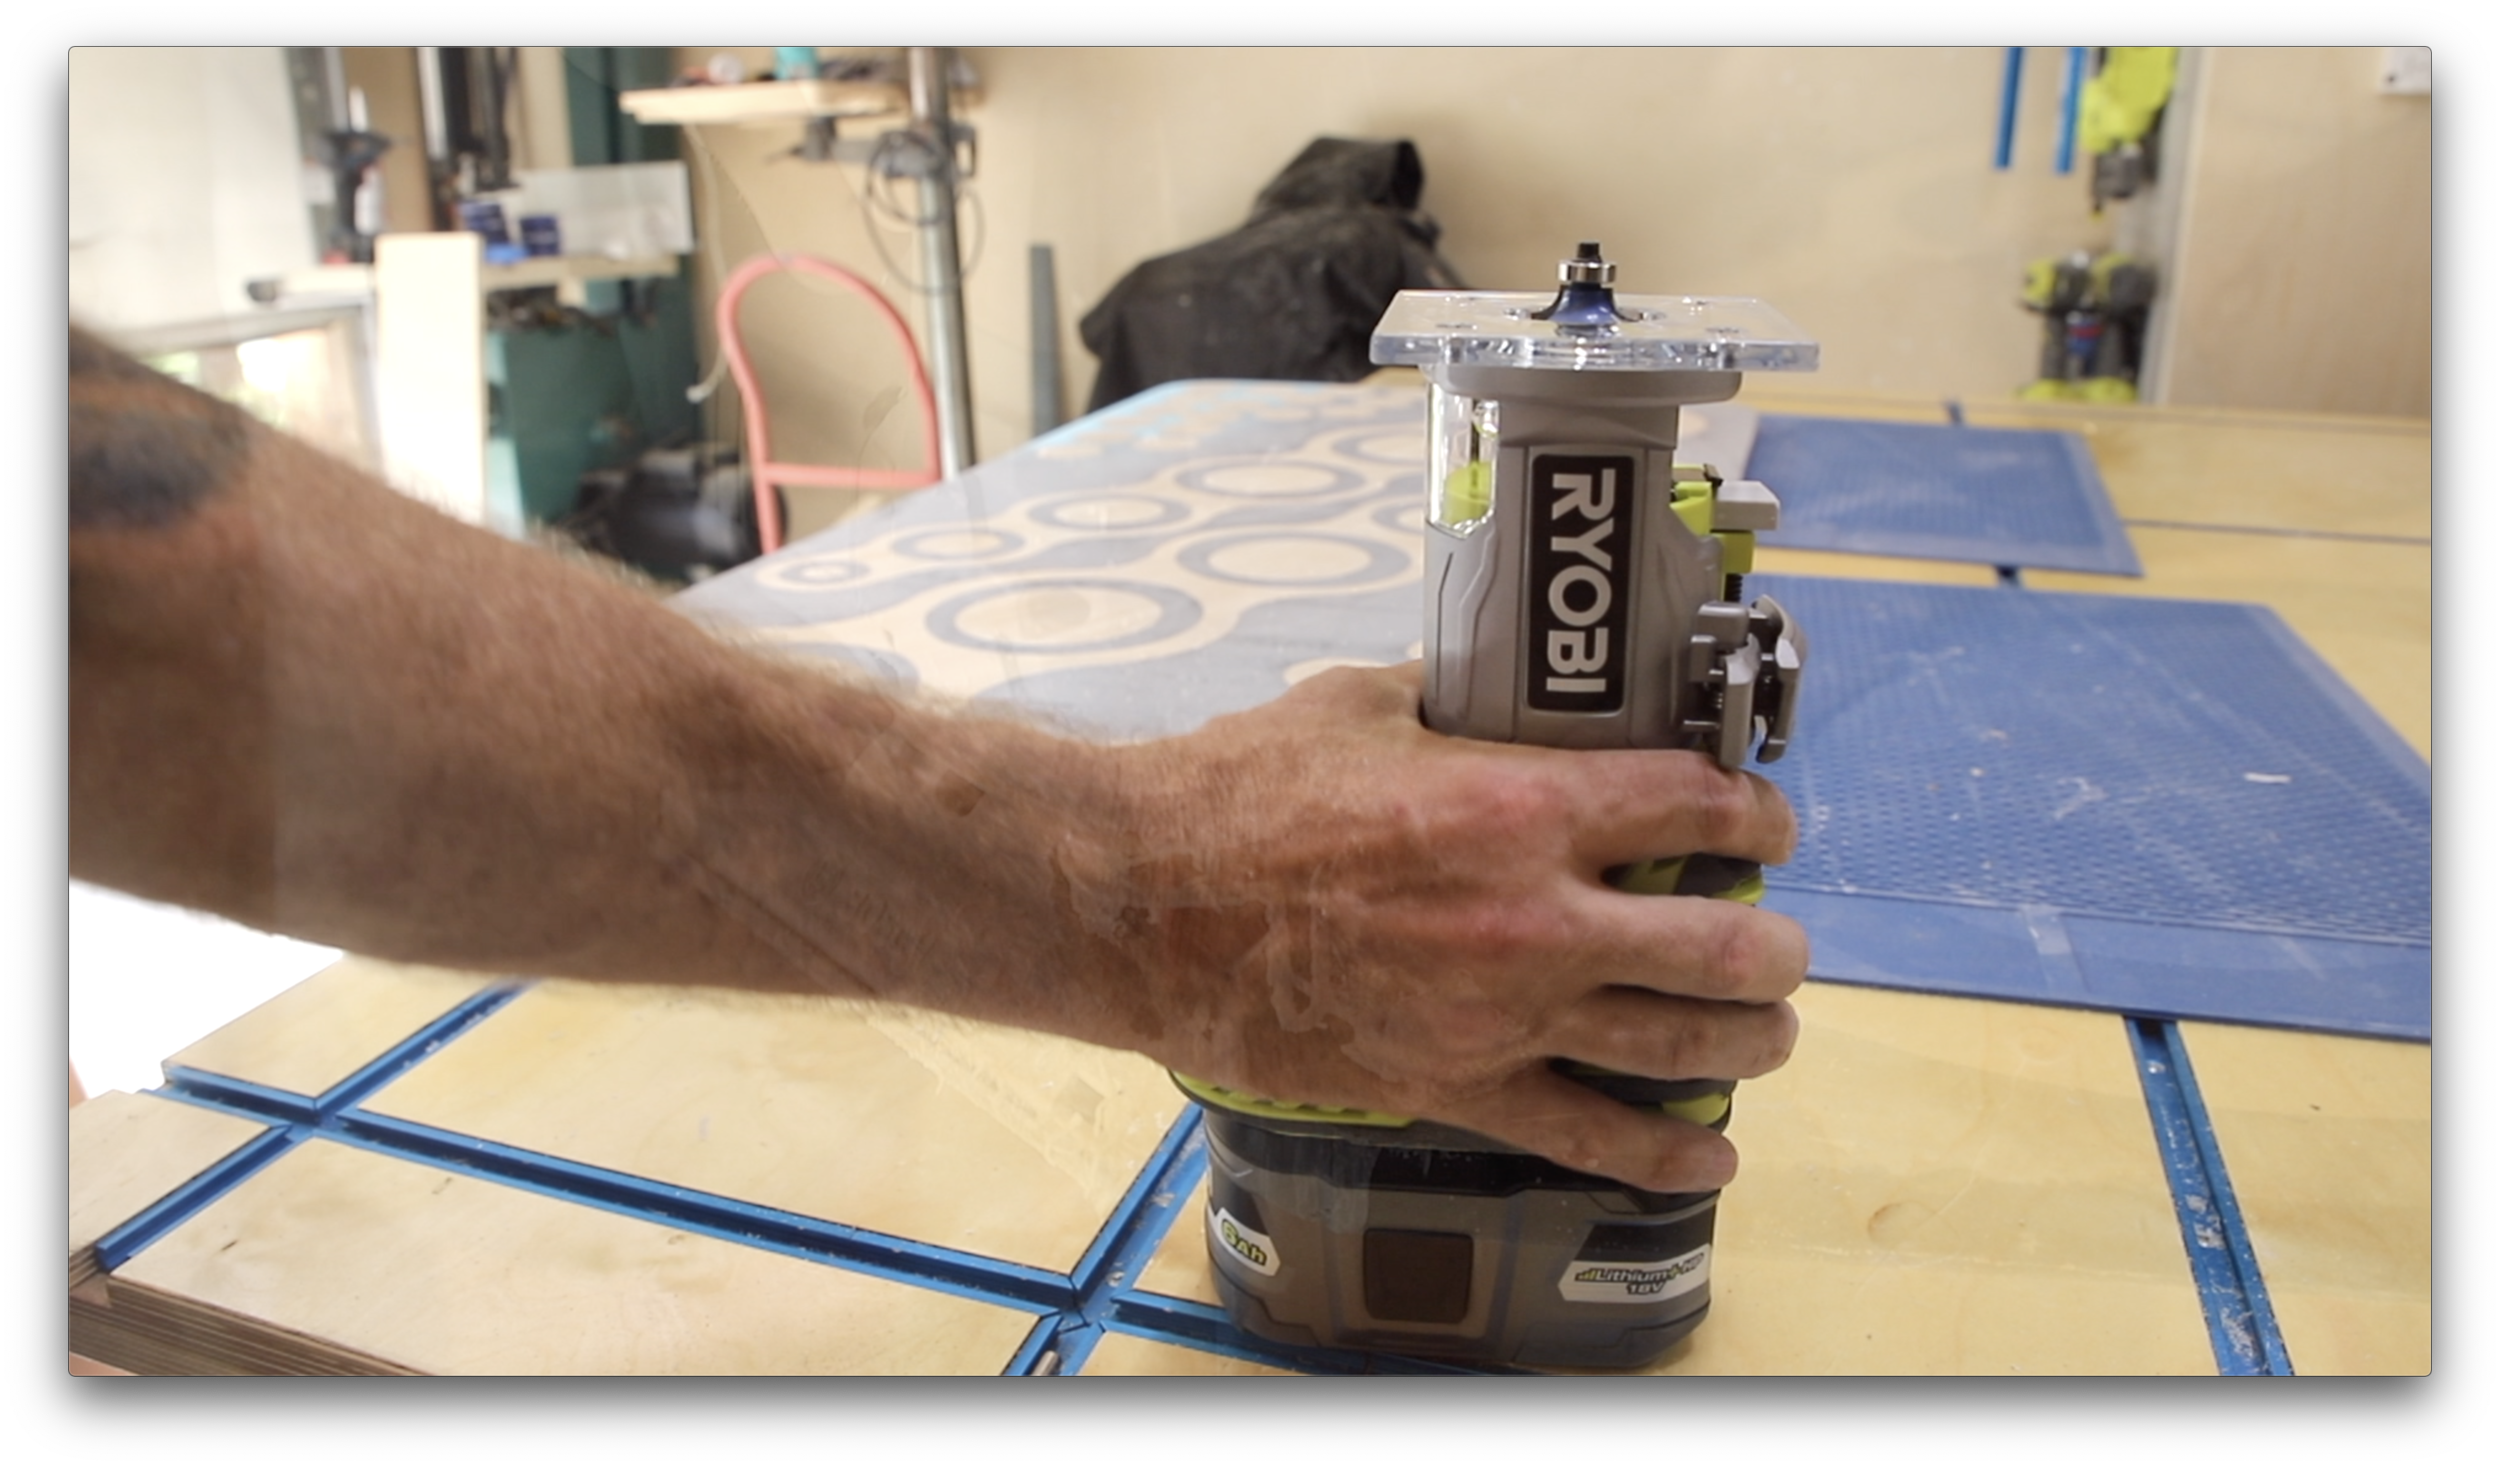
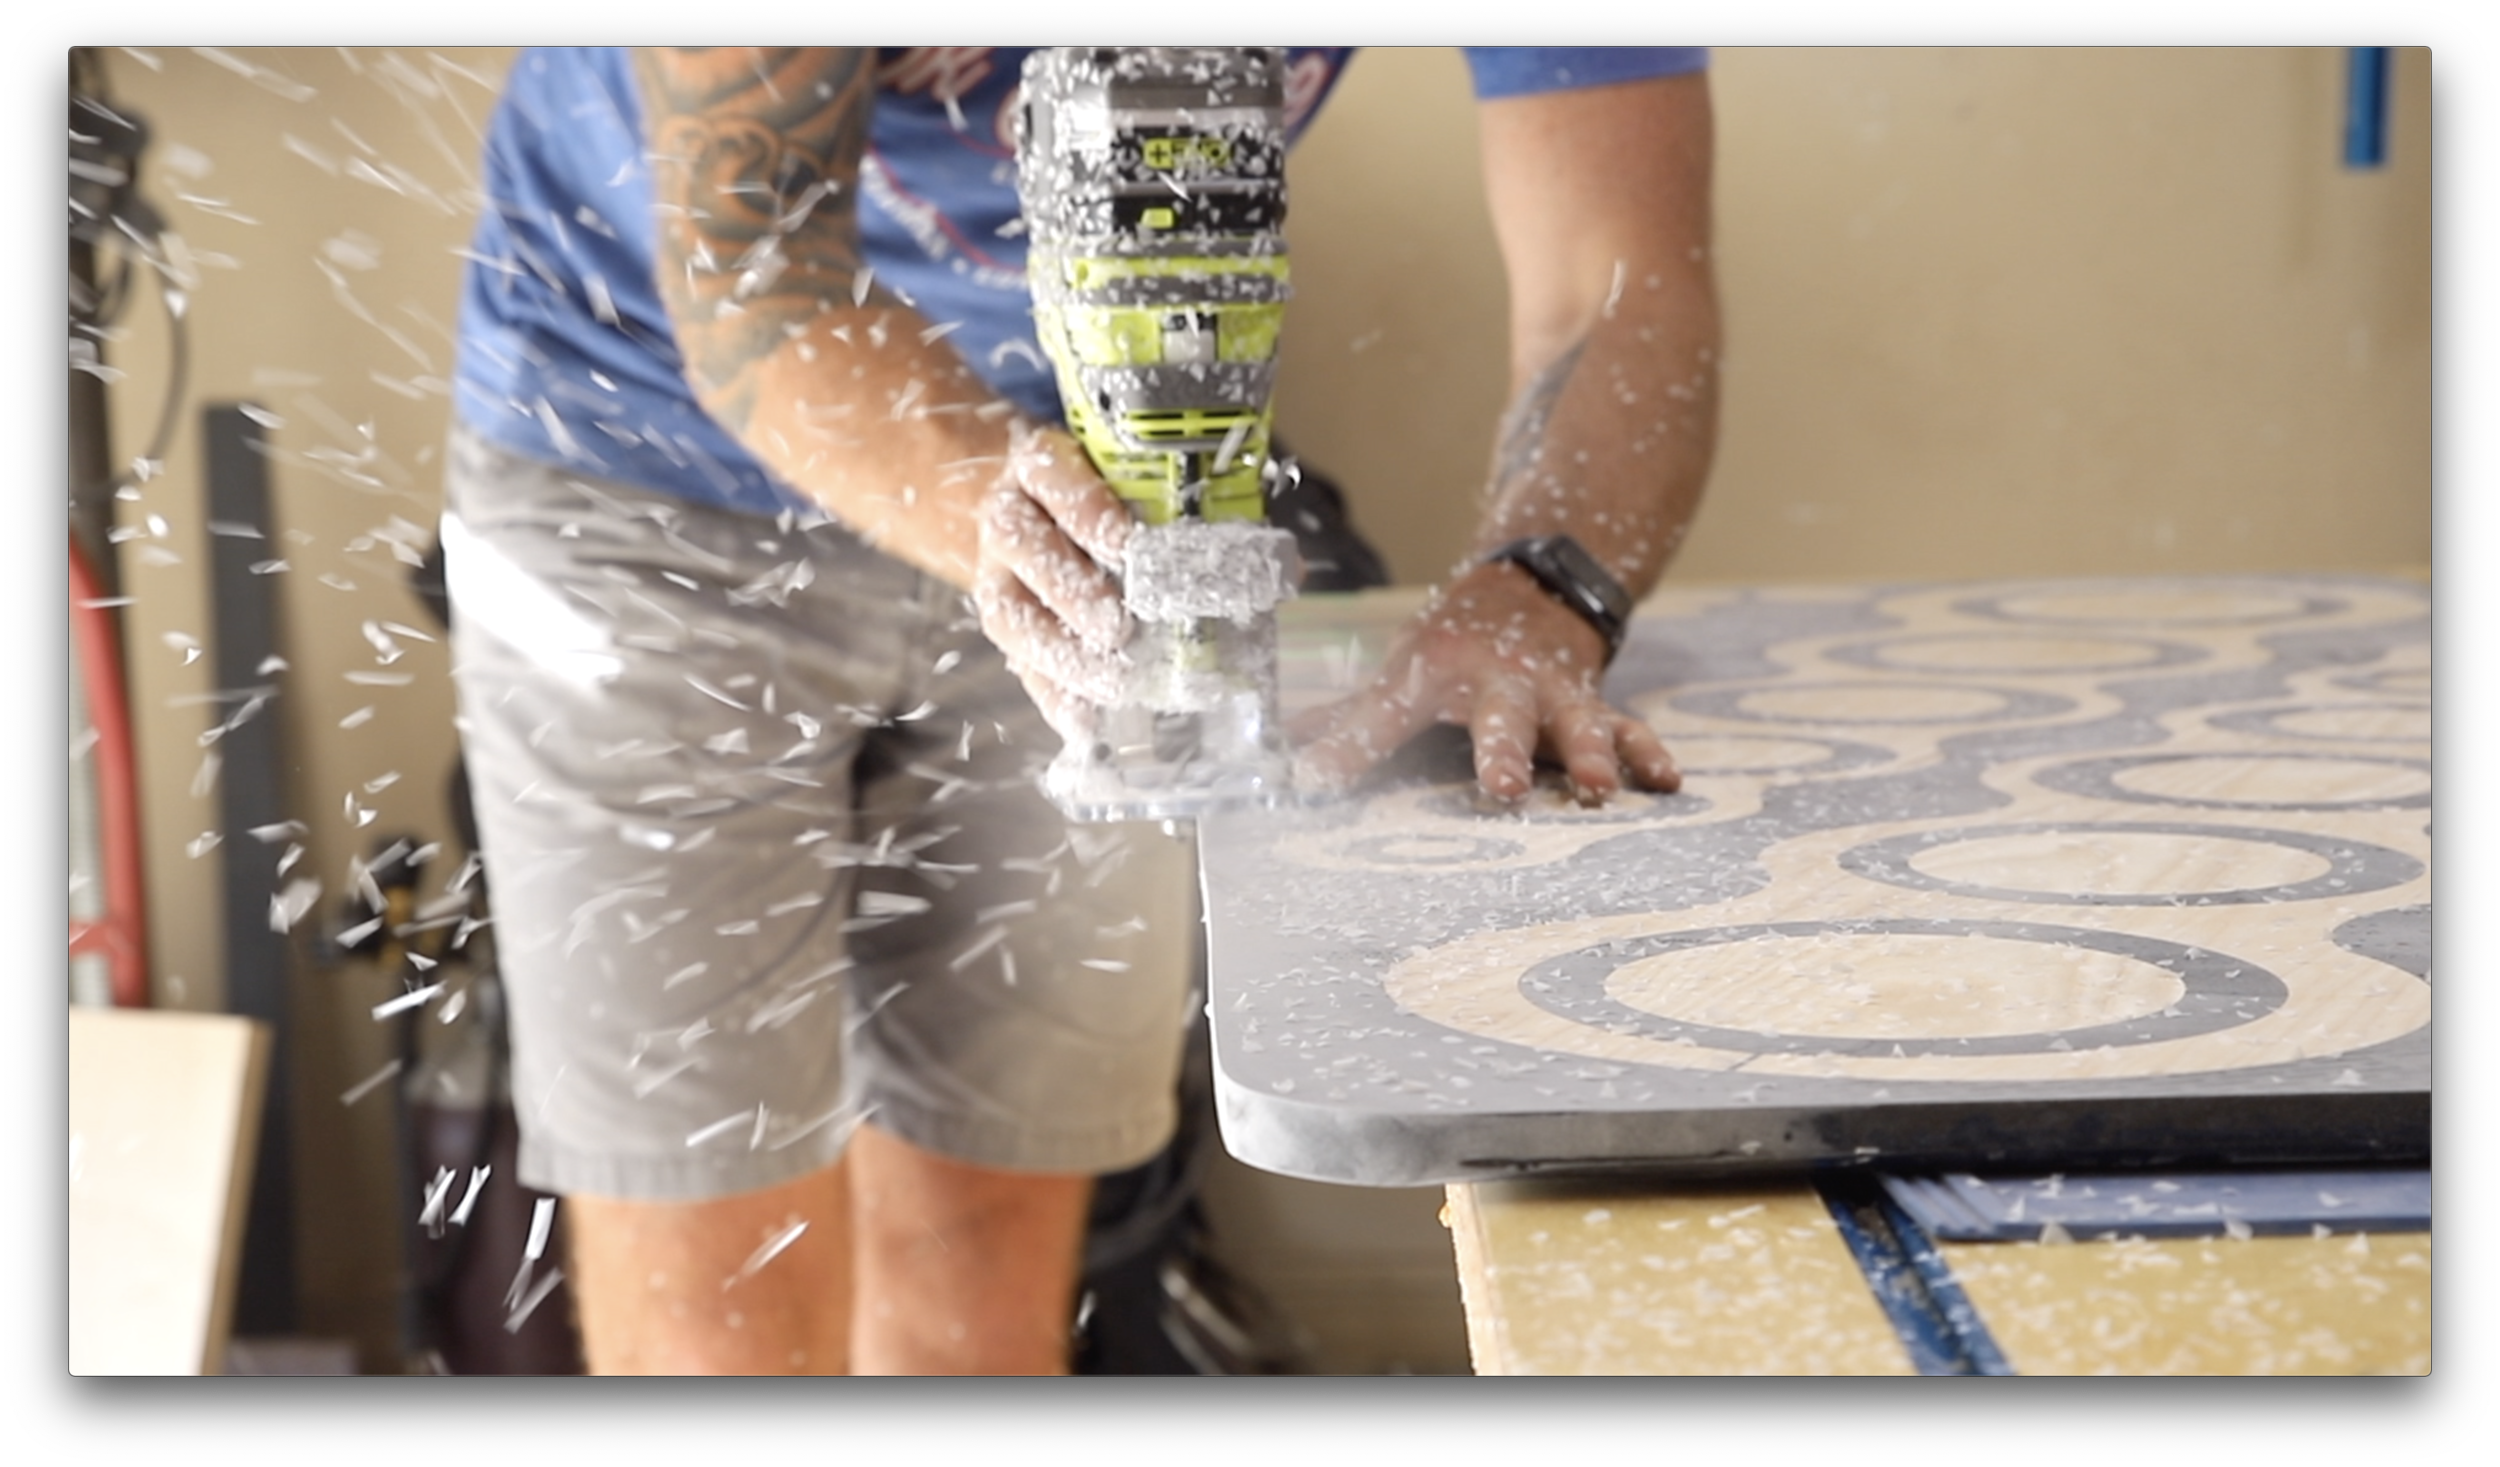
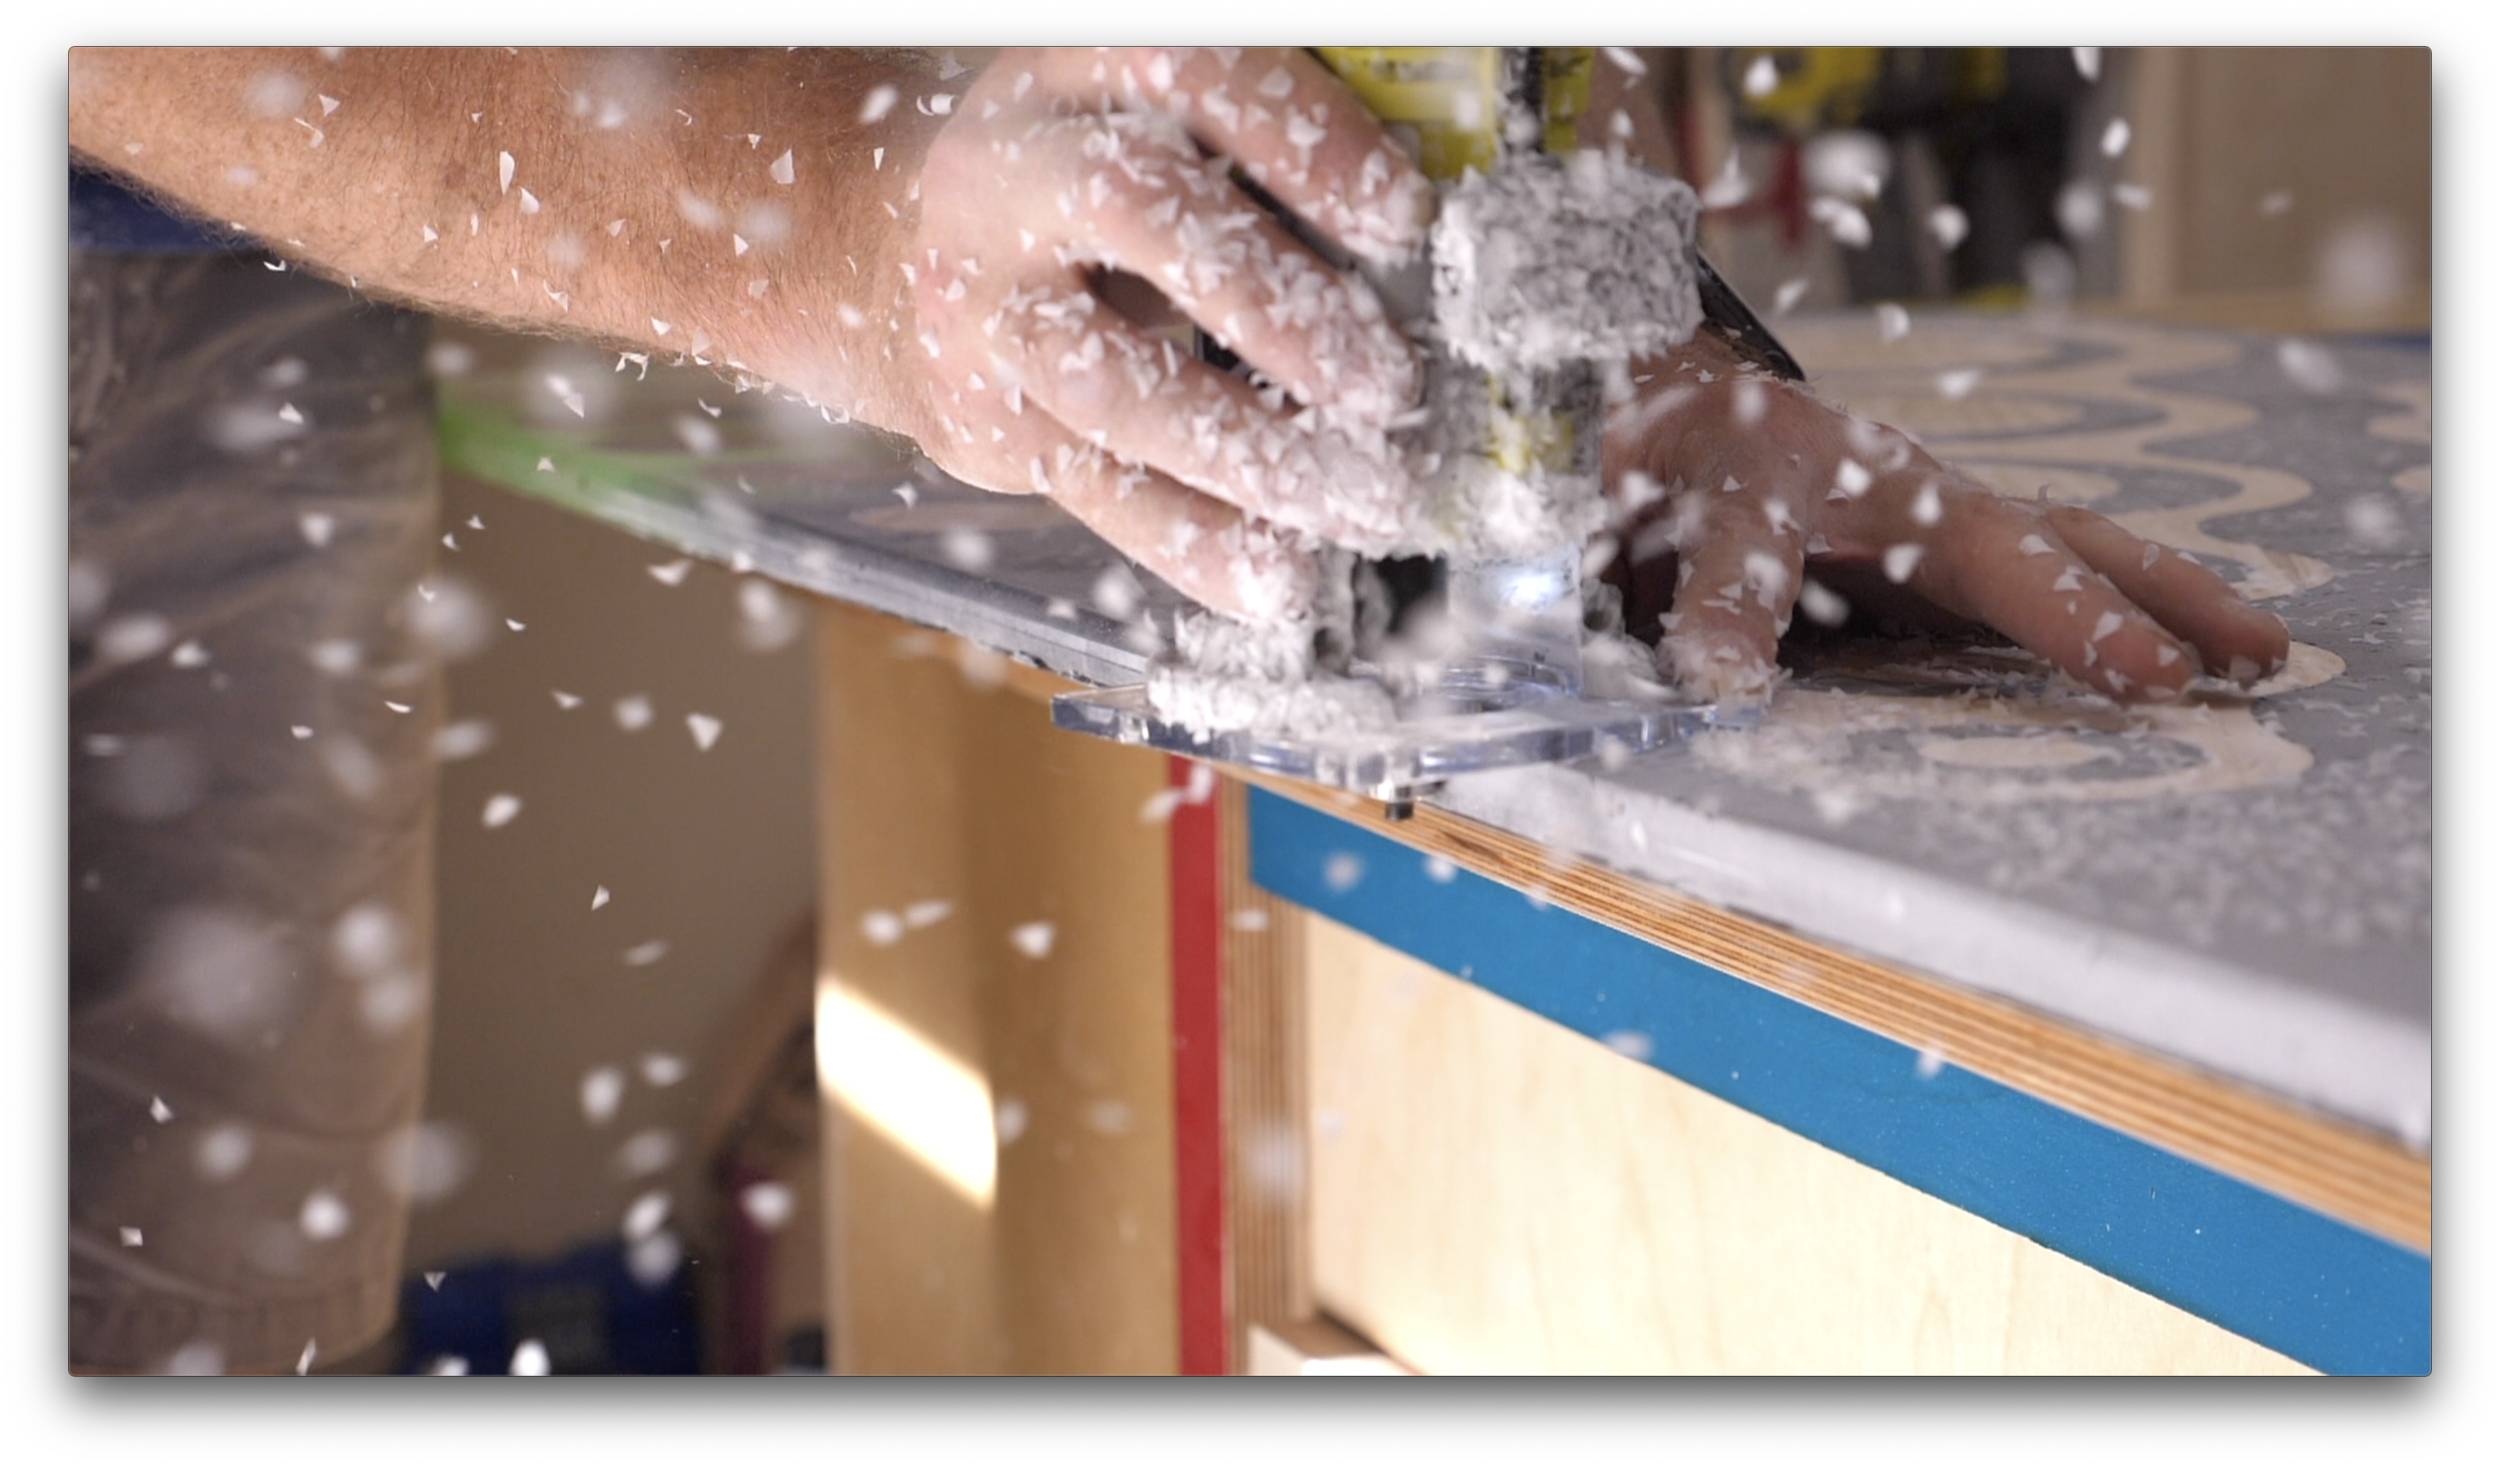
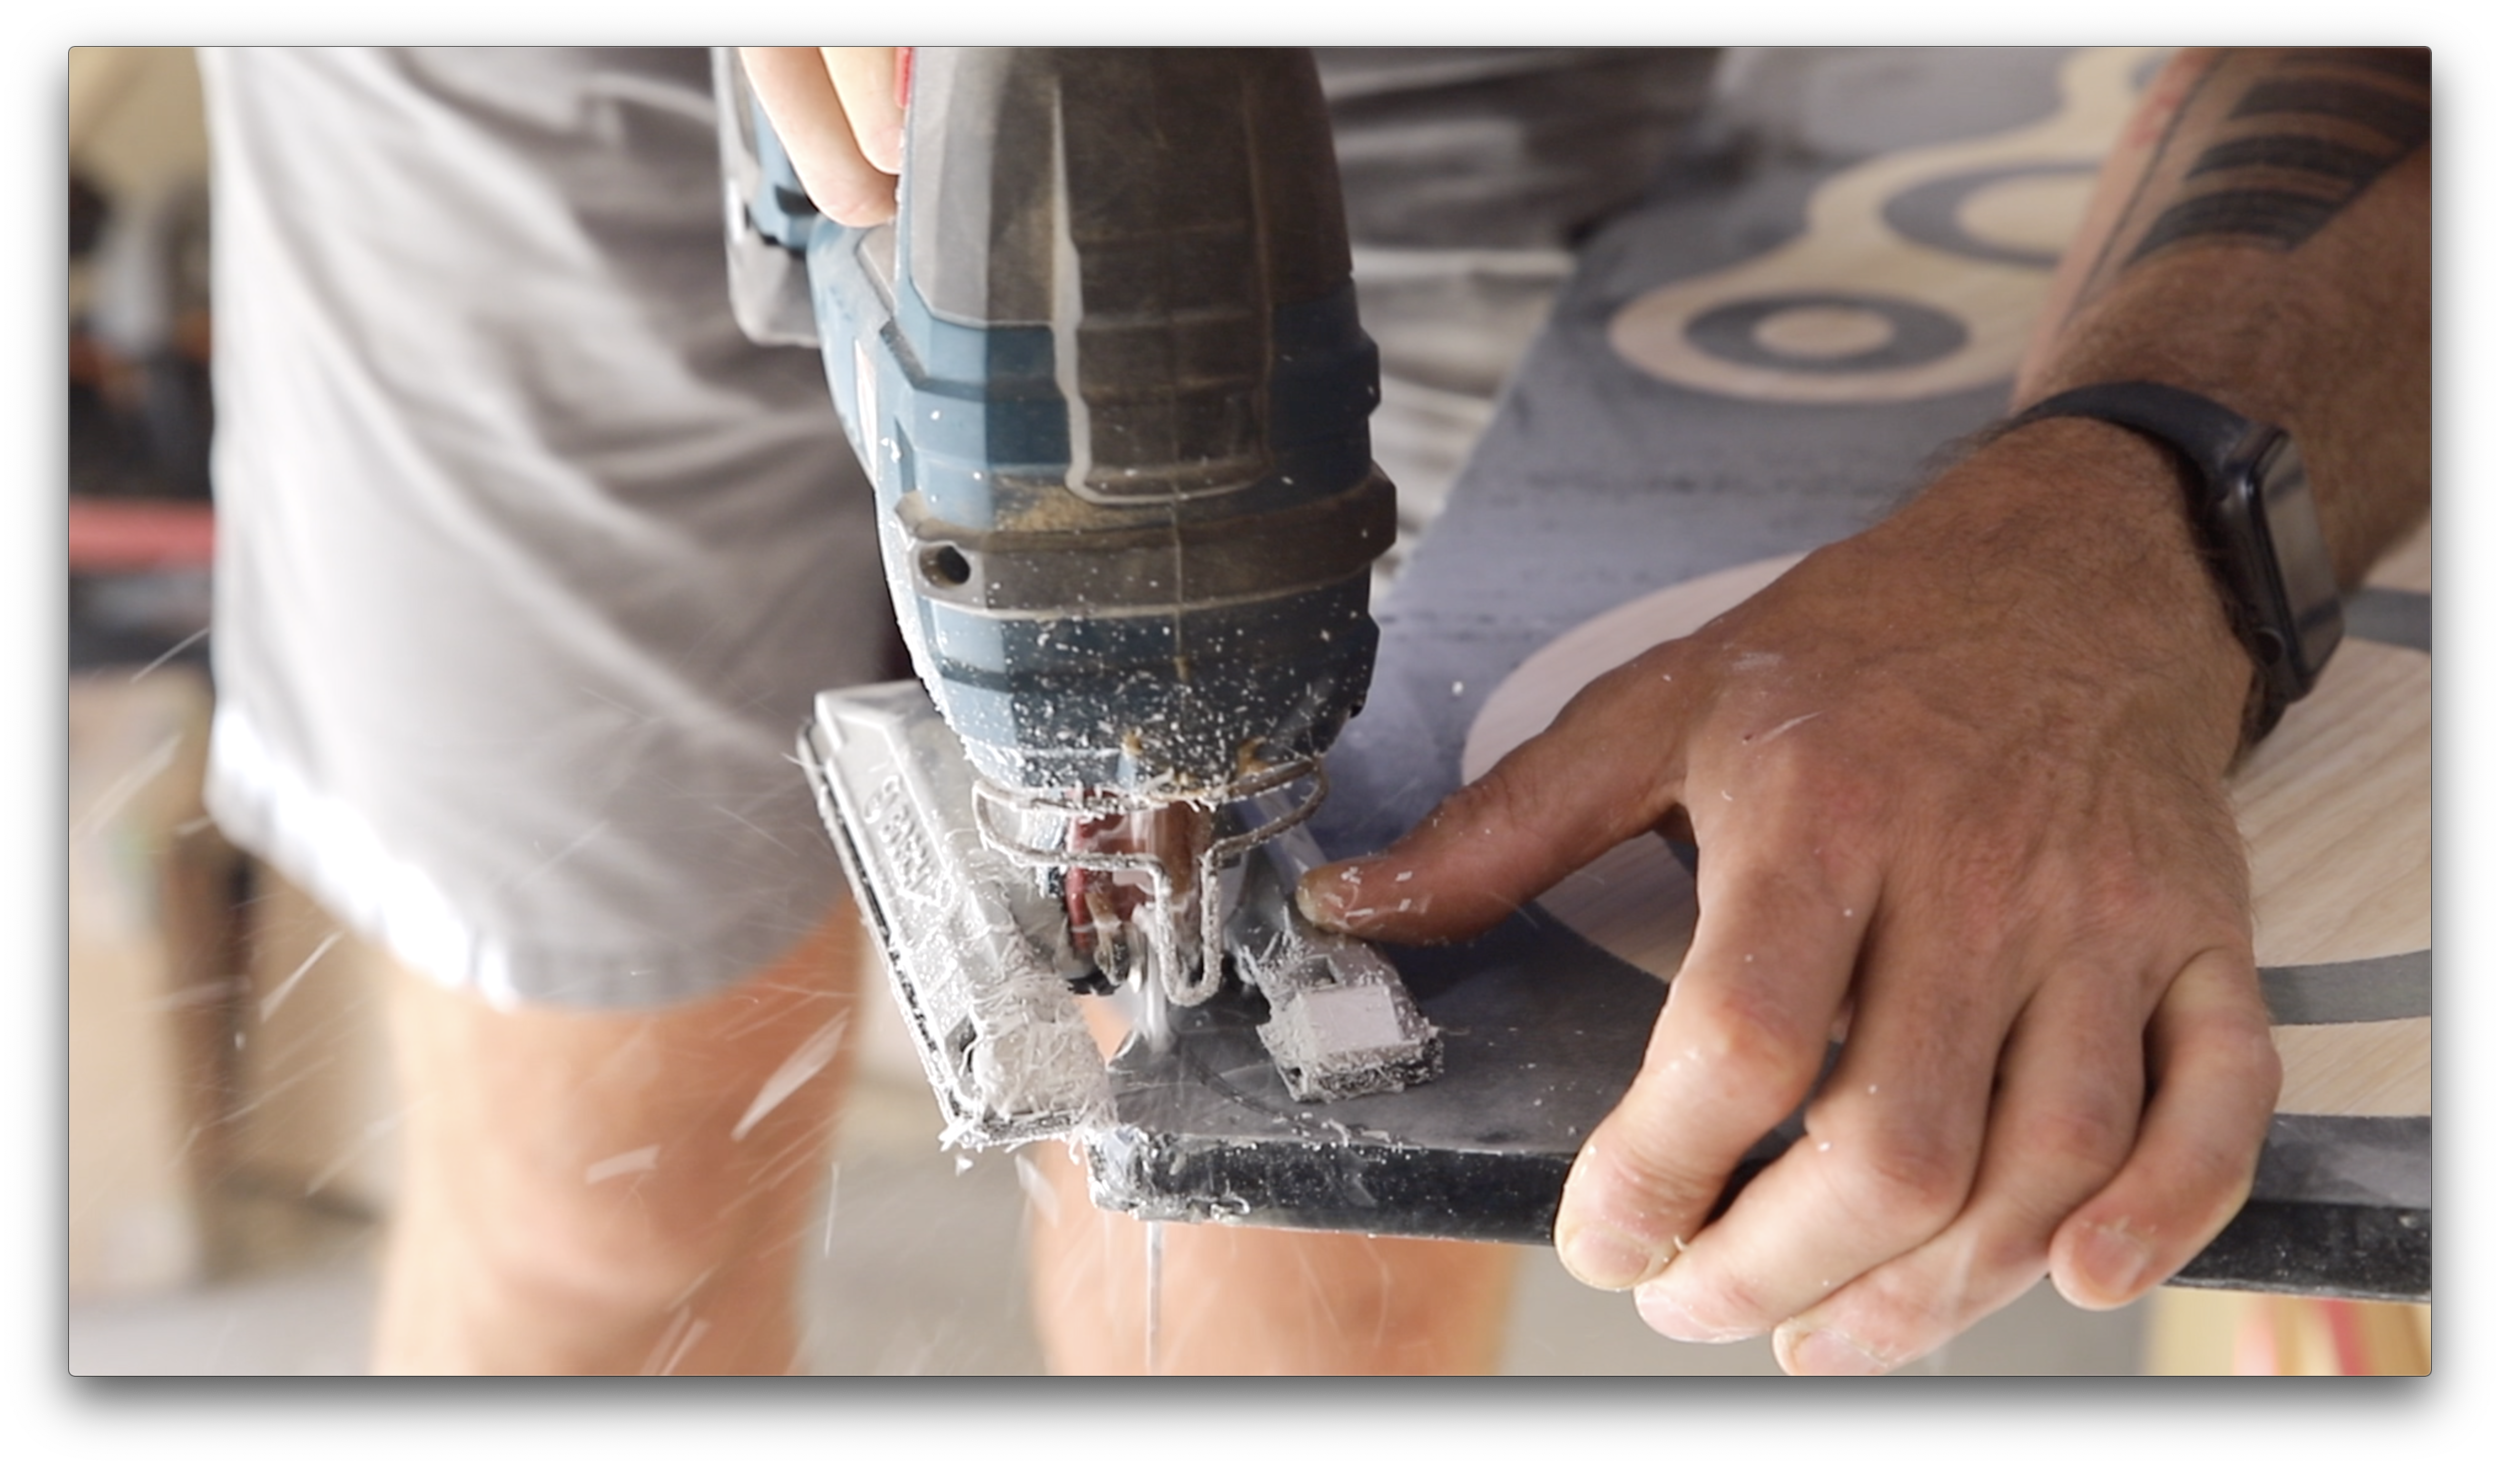
While the solution to fix the bubbles was pretty straightforward, it was extremely messy. I used a router sled, and a flattening bit to shave off about 3/16ths from the top of the coffee table. Next I routed the corners with a jig saw, and used my new Ryobi ONE+ Trim Router. Routers are one of those tools where its nice to have a few different options. I have my big, powerful Bosch plunge router that I used to flatten the table top, but for a round over a palm router is extremely handy. Add in the added bonus of it being battery powered, and this Ryobi Trim Router was the perfect tool to add the round over to the edges of this coffee table. I found the depth adjustment very easy to use, and I was able to dial it in precisely with the micro adjusting dial. The router is well balanced, and comfortable to use. Routing an edge profile on epoxy can be dicey because the epoxy can have a tendency to chip out. With the Ryobi ONE+ Trim Router I had zero chip out.
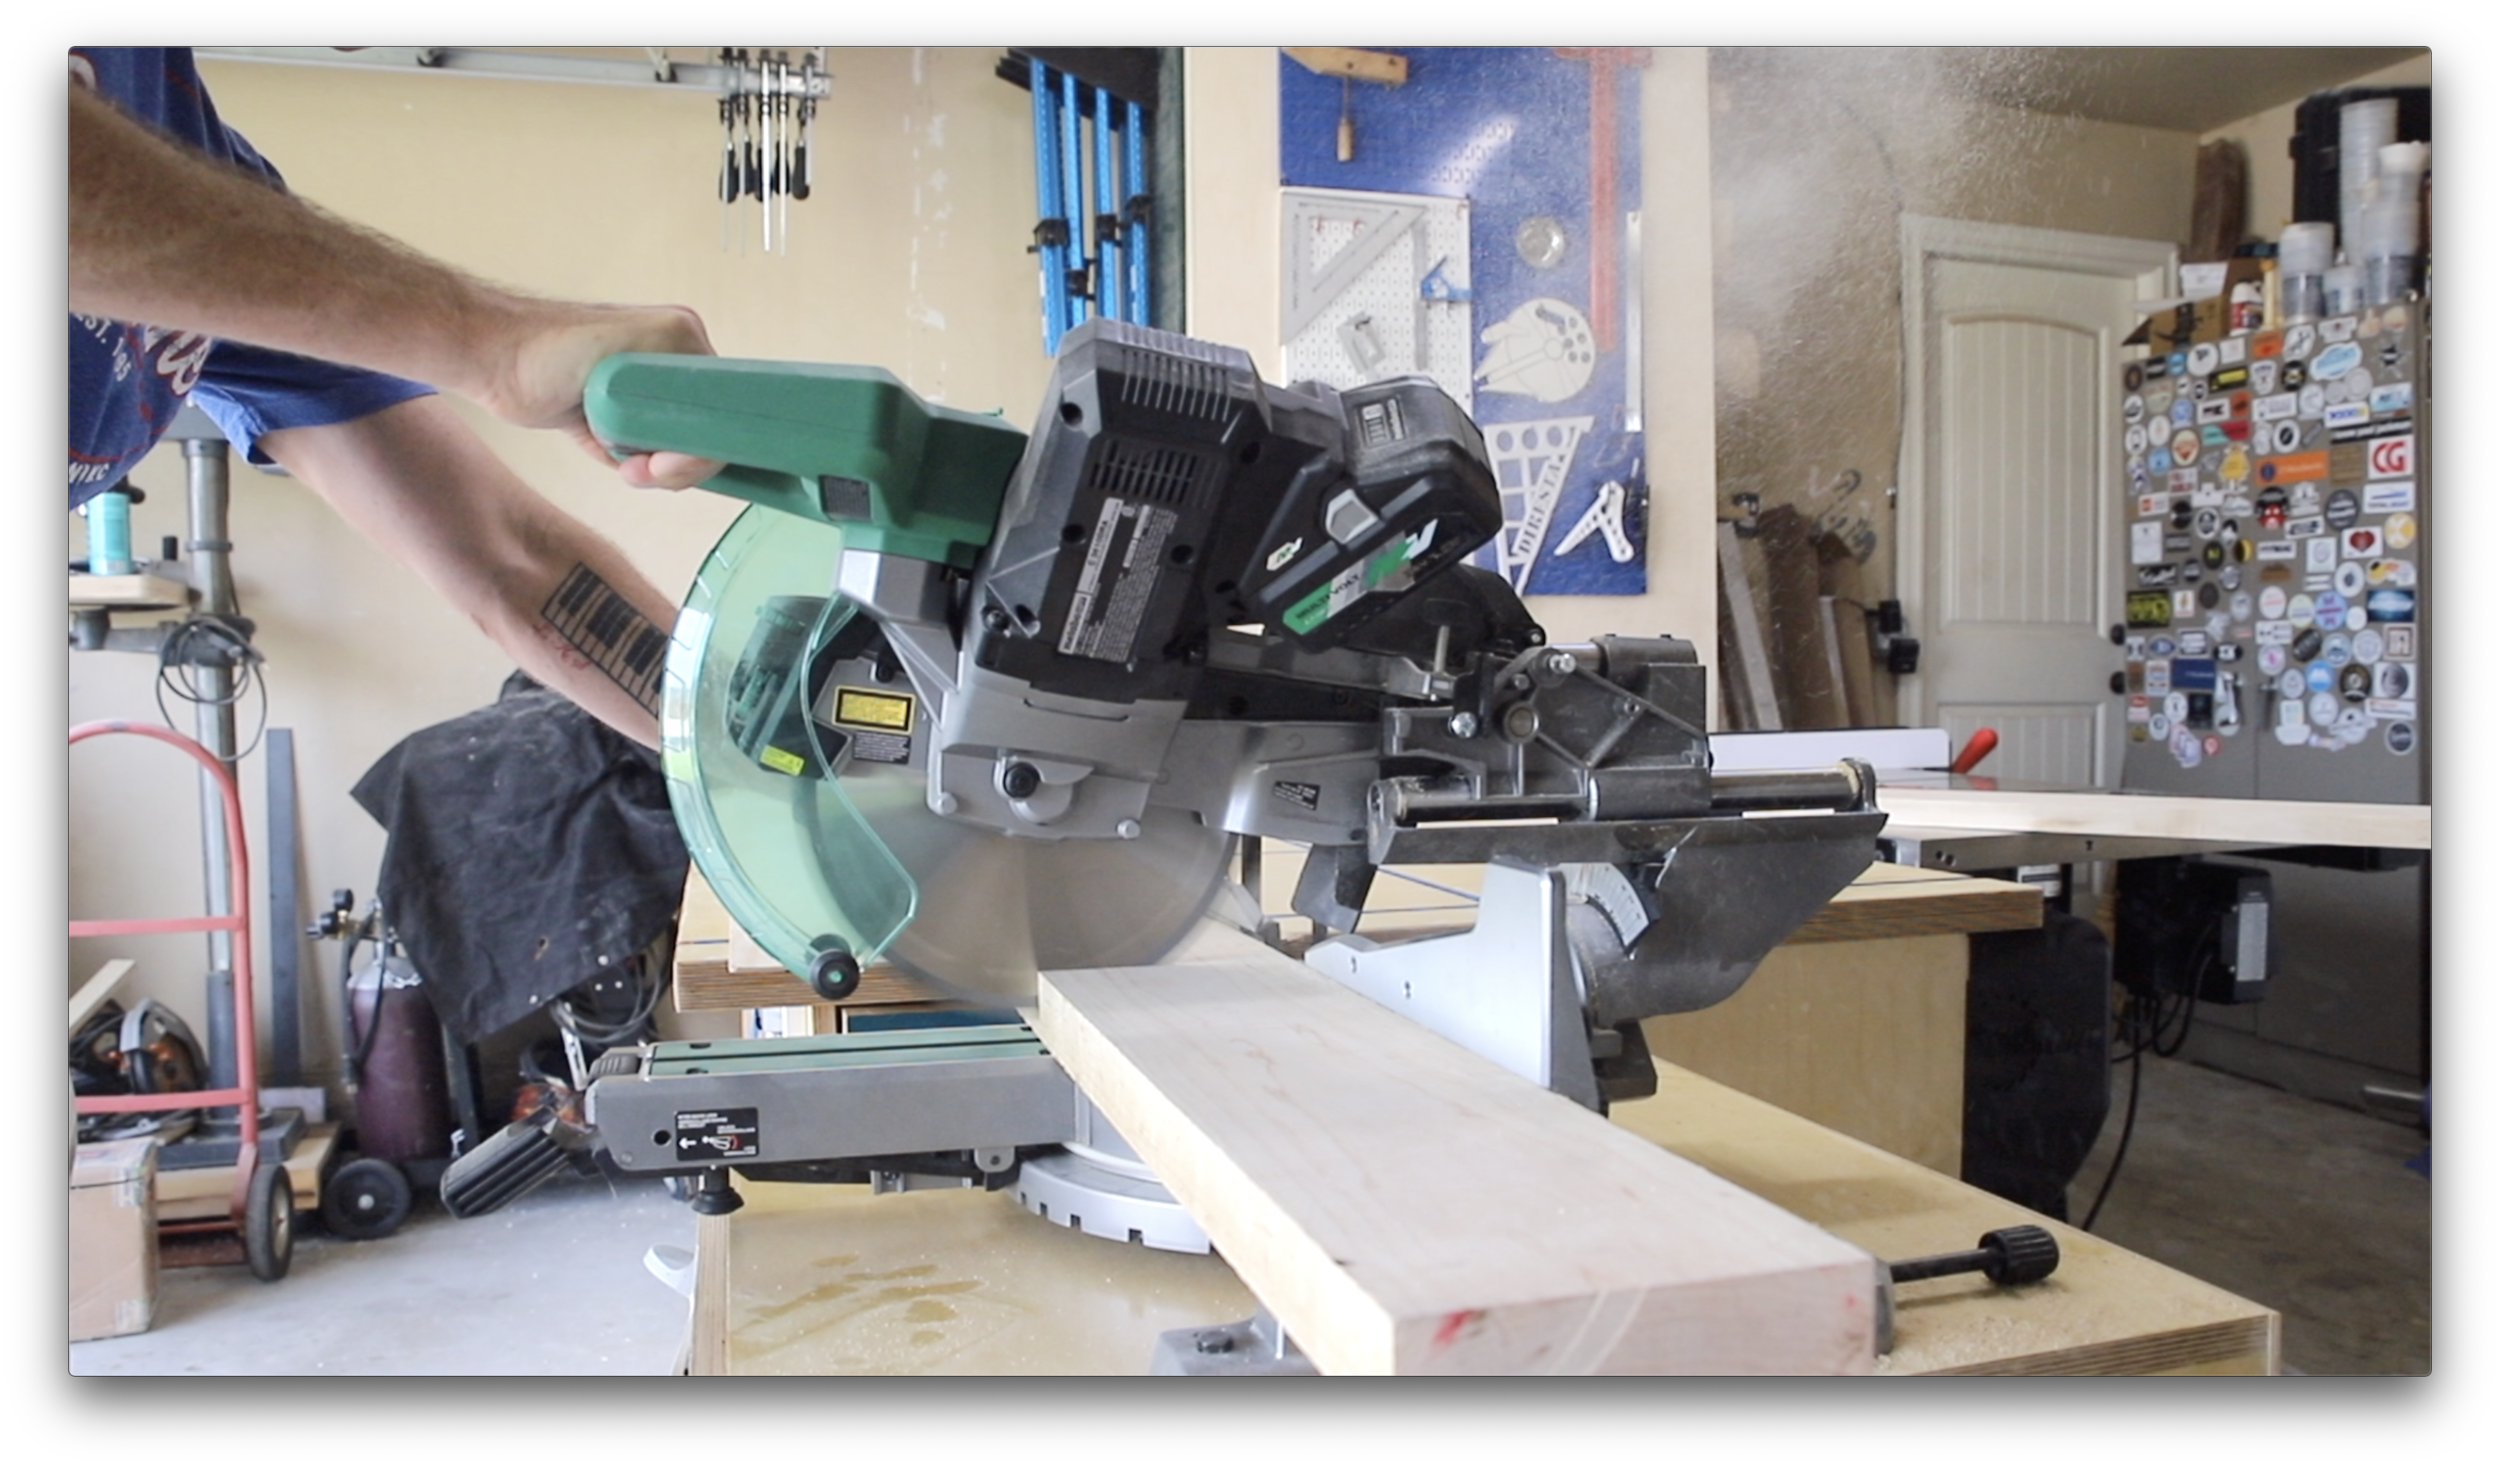
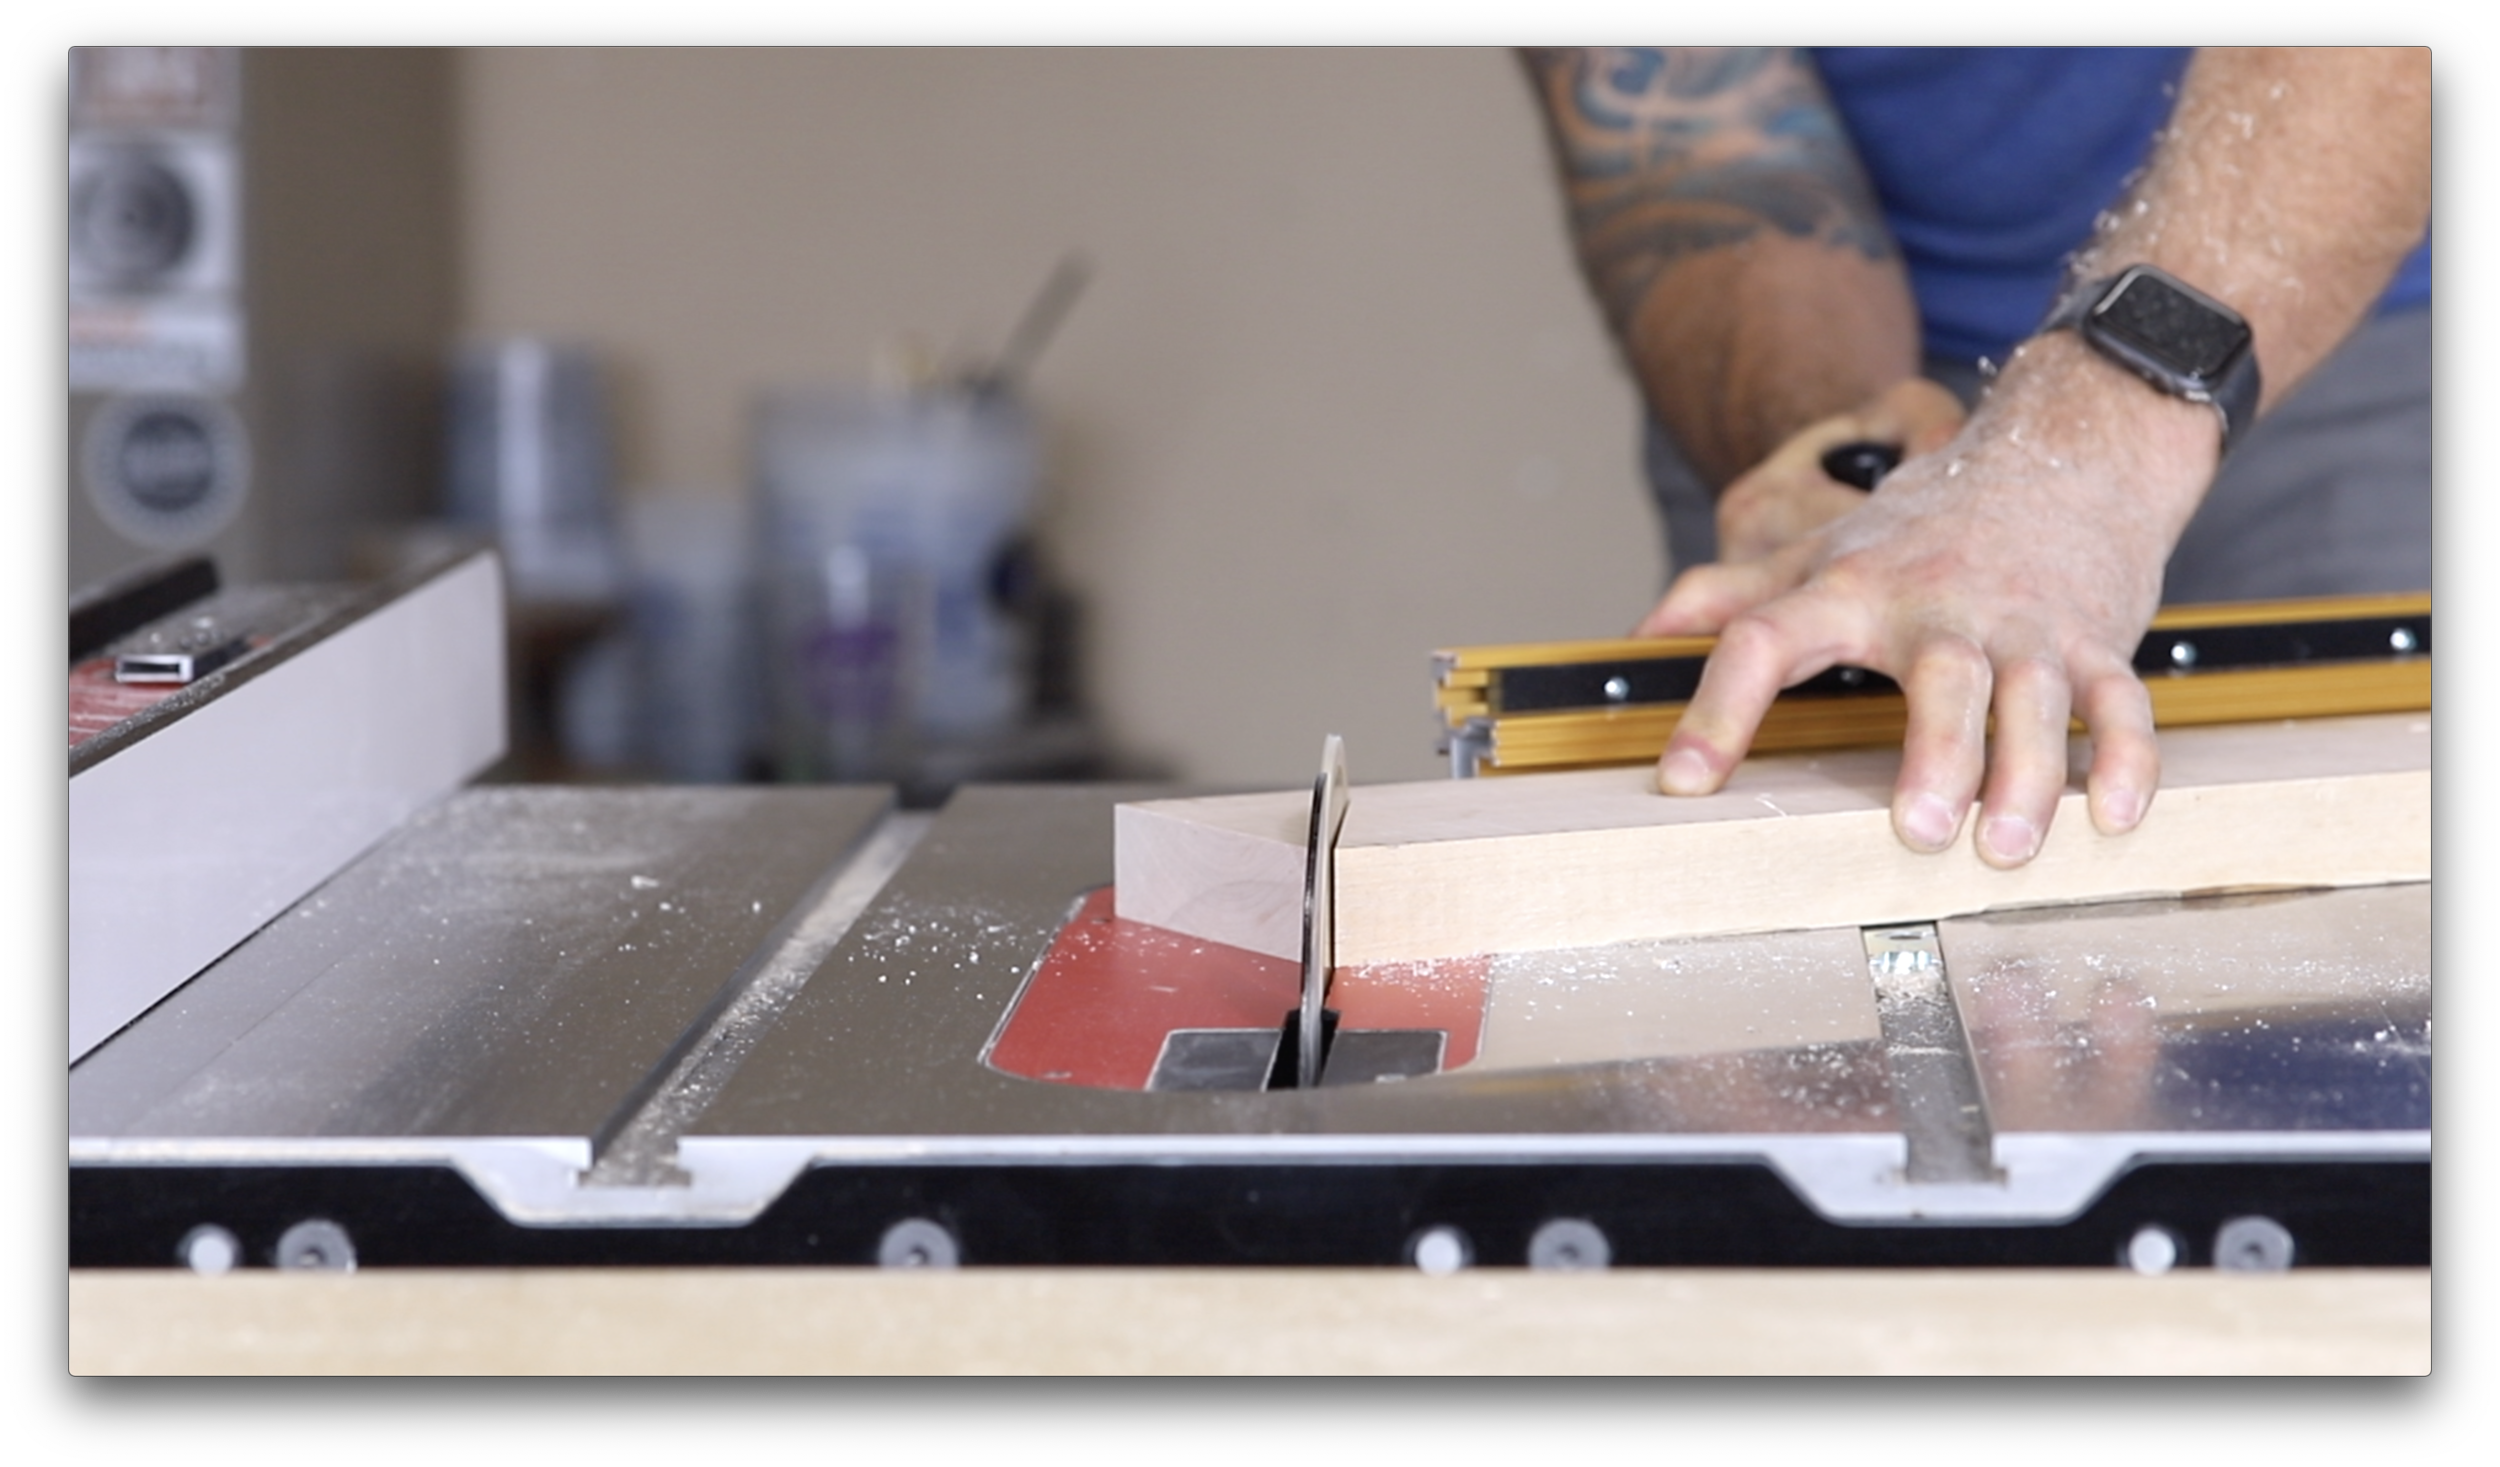
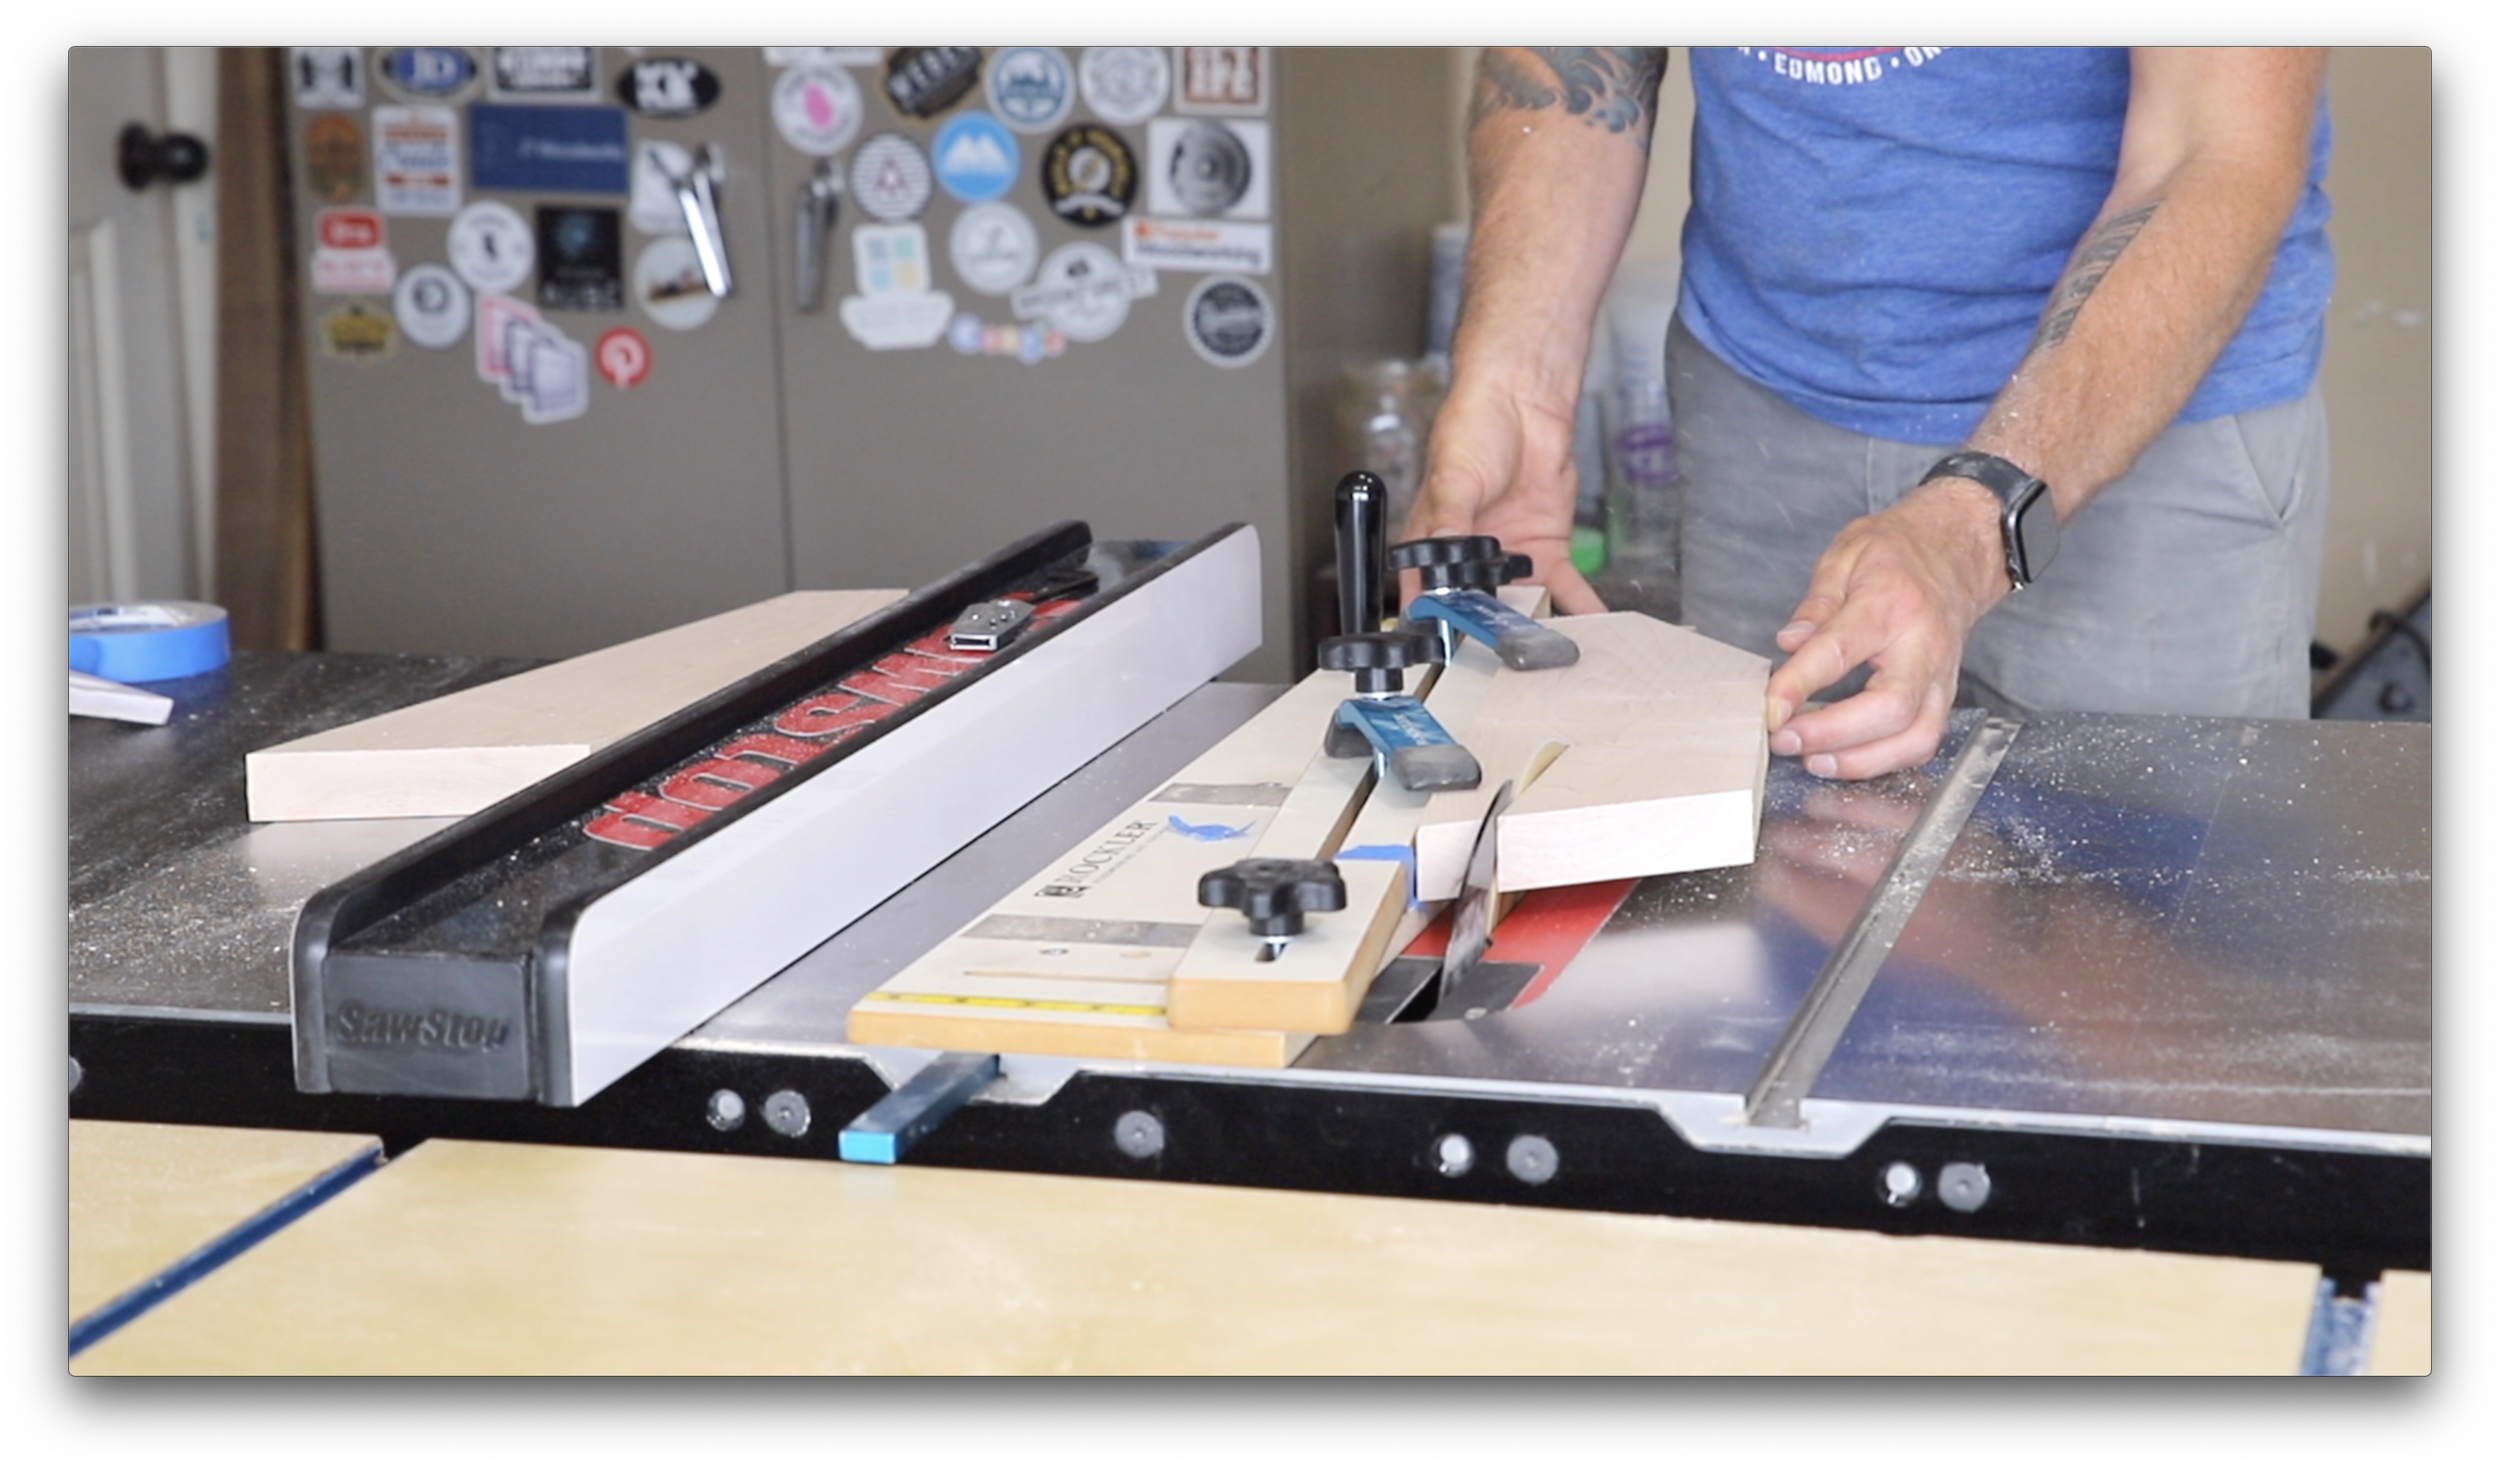
I finished the top with a layer of Total Boat’s Table Top epoxy to help even out the surface and fill in all the little pin holes left behind by the bubbles. Next I built the base out of some 6/4 soft maple. I went with maple because the original idea was to use India ink to stain it black. I ended up sticking with the natural wood color. For the base I went with a modern splayed leg design. I cut in 30 degree angles on the top and bottom of each leg, and then improvised a sled with the cut offs that allowed me to cut in a 90 degree face that would mate up with the stretches. Next I used a taper jig to taper the legs down to 1 1/4”. The whole base was assembled with glue and dominos.

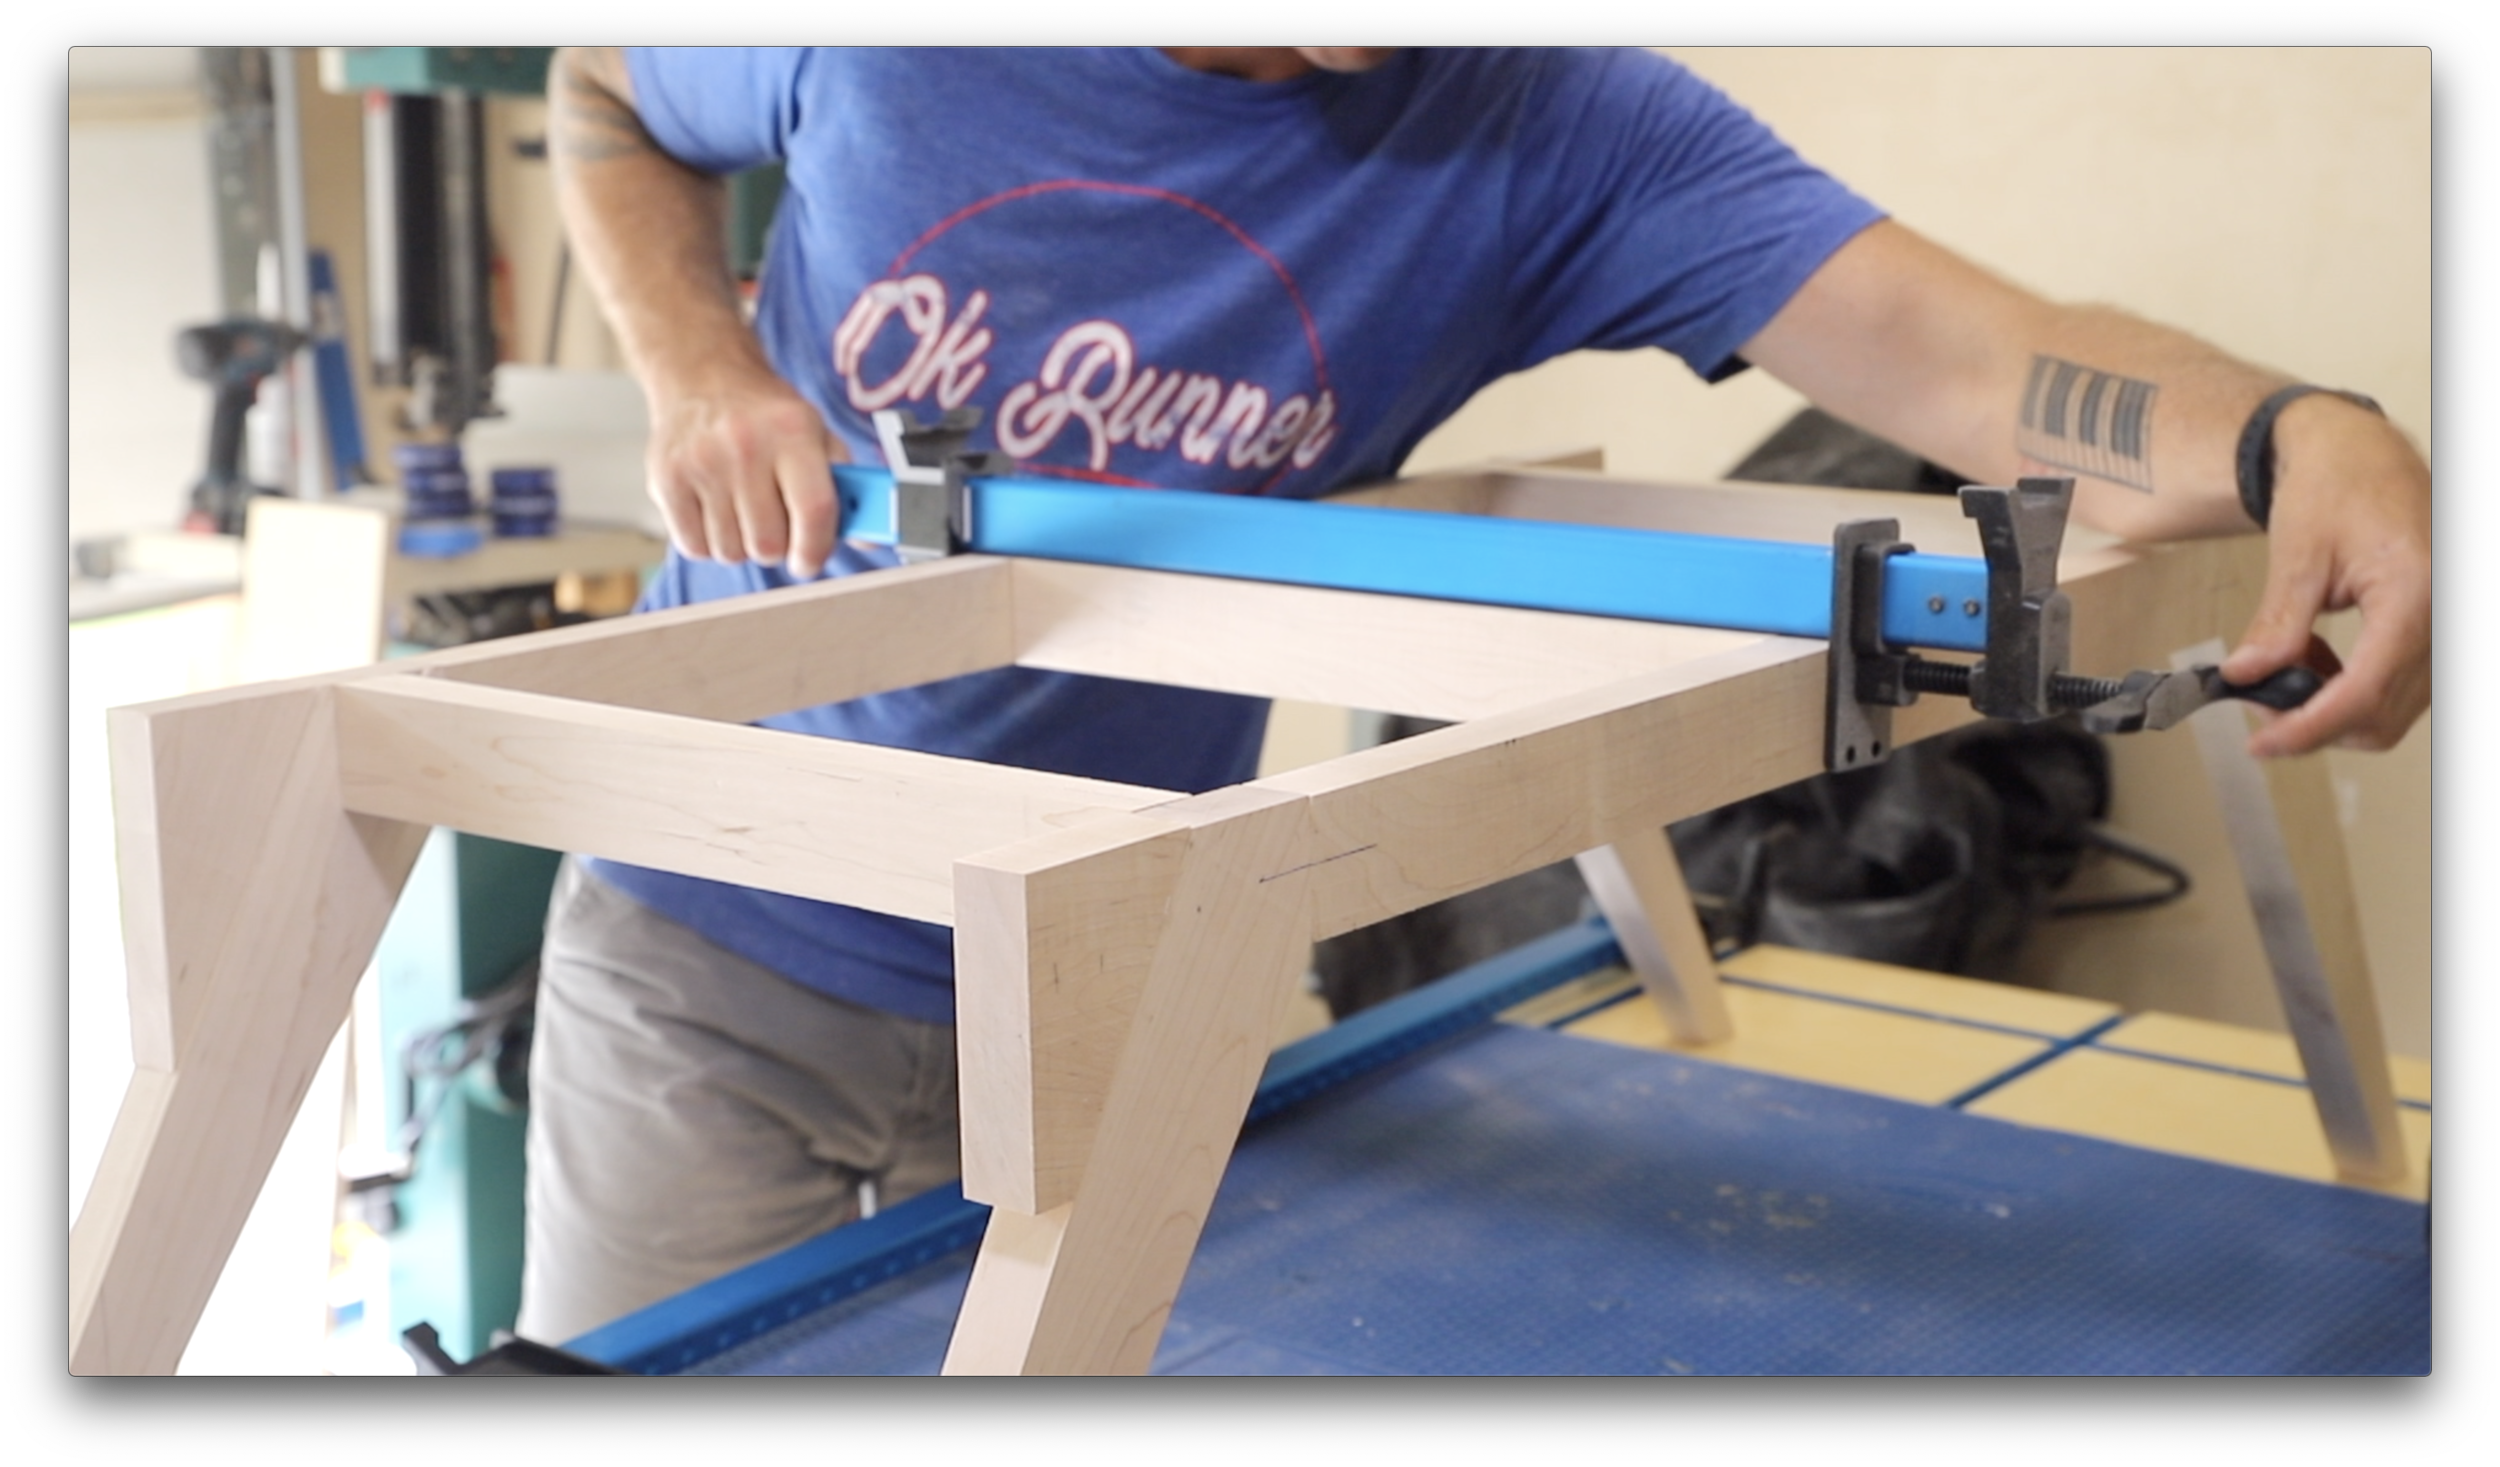
All that’s left is to attach the base to the table top. I used a forester bit to drill four holes into the underside of the coffee table base, and then attached with 1 1/2” screws. I’m caulking this project up to being an experiment since it didn’t quite turn out the way I hoped. On a good note friend of mine has a 15 year old son, and a 10 year old daughter who are big fans of my YouTube channel. They all dropped but the house to help me assemble my new jointer, and I asked the kids if they wanted the coffee table. They jumped on it, and were super excited. Thanks for dropping by, and make sure to check out the build video linked above!
